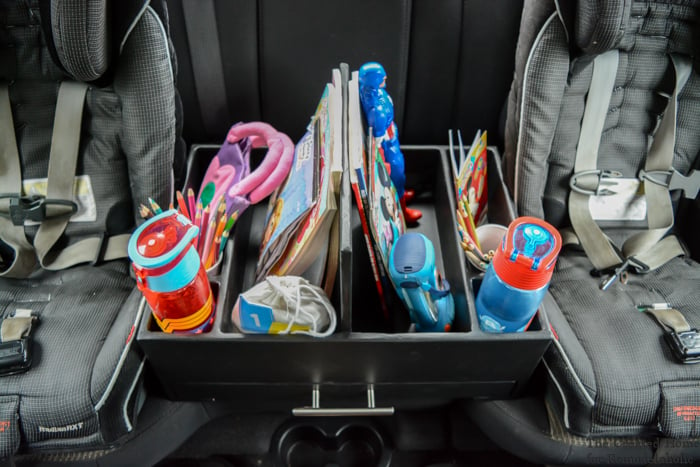
If your backseat currently looks like a small toy store collided with a snack aisle, you are not alone. Kids have an impressive ability to turn one short drive into an archaeological layer of crayons, books, water bottles, wrappers, tiny dinosaurs, and one mysterious sock that apparently belongs to nobody.
A DIY backseat car organizer for kids solves much of that chaos without requiring an expensive collection of plastic accessories. Better still, making your own lets you choose the size, pocket layout, colors, and materials that actually match your vehicle and your family’s habits.
The basic concept is simple: sew a durable fabric panel that hangs securely against the back of a front seat, then add pockets sized for the things your children regularly use. Done well, it becomes a compact command center for road trips, school runs, sports practice, and ordinary Tuesday-afternoon survival.
Why Make a DIY Backseat Car Organizer?
Commercial organizers can work well, but they are designed to fit thousands of different vehicles and families. That means the pocket intended for a water bottle may be enormous, while the tablet pocket somehow fits everything except your child’s tablet.
A homemade kids car organizer gives you control over every inch.
- You can customize it to your seat dimensions.
- You choose washable, durable fabric.
- Pockets can match the items your children actually carry.
- You can avoid unnecessary bulky compartments.
- Damaged elastic, straps, or pockets can be repaired instead of replacing the whole organizer.
- Fabric scraps can be turned into something genuinely useful.
Seat-back organizers are also widely recommended as a practical way to keep frequently used family items visible and contained instead of scattered around the rear footwell.
Before You Start: Measure the Car, Not Your Imagination
This is the step people are tempted to skip. Resist temptation. Your sewing machine cannot negotiate with an SUV seat that turns out to be four inches wider than expected.
Measure the Seat Back
Measure the usable width of the front seat from side to side. Then measure from just below the headrest to a few inches above the seat-bottom crease.
Your organizer should generally remain within the outline of the seat rather than dangling dramatically into the passenger’s legroom.
A common organizer panel may end up somewhere around 16 to 20 inches wide and 20 to 26 inches tall, but these numbers are examples, not rules. Compact cars, pickups, minivans, and SUVs can have dramatically different seats.
Create a Quick Paper Template
Before cutting your good fabric, tape together newspaper, kraft paper, or grocery bags until you have a rectangle matching your proposed organizer.
Hold it against the seat. Check:
- Can the headrest move normally?
- Does the organizer interfere with seat controls?
- Does it stay away from important vehicle hardware?
- Can children comfortably reach the lower pockets?
- Will taller passengers kick the bottom?
Making a five-minute template can prevent a two-hour sewing project from becoming a very attractive fabric rectangle living permanently in your closet.
Safety Comes Before Extra Pockets
A car organizer is storage, not part of your child’s restraint system. NHTSA emphasizes using the correct car seat, booster, harness, or seat belt according to the child’s size and the manufacturer’s instructions. An organizer should never interfere with those systems.
Check both your vehicle owner’s manual and any child-restraint instructions before installing accessories around seats, head restraints, tether points, or anchors. Do not improvise by attaching the organizer to hardware needed for a child restraint.
Also think carefully about what goes inside the pockets. Soft books, wipes, tissues, lightweight toys, and similar supplies make more sense than heavy tools, glass containers, large metal objects, or anything sharp.
The goal is organized storage, not creating a wall-mounted junk drawer capable of holding a bowling ball.
Materials for a DIY Car Seat Organizer
You do not need exotic supplies. A practical version can be made with materials available at most sewing or craft stores.
Basic Materials
- Approximately 1 yard of medium-to-heavy cotton canvas, duck cloth, denim, or upholstery-weight fabric
- Optional lining fabric
- Medium-weight fusible interfacing if your fabric needs extra structure
- Mesh fabric for see-through pockets
- 1-inch nylon or polyester webbing
- Adjustable buckles or side-release buckles
- Elastic, approximately 1/2 to 1 inch wide
- Bias binding or coordinating fabric for finished edges
- Heavy-duty polyester thread
- Sewing machine
- Fabric scissors or rotary cutter
- Measuring tape
- Pins or sewing clips
Durable, washable fabrics are especially useful because anything installed near children eventually meets crackers, mud, juice, sunscreen, or a substance nobody admits touching.
Planning the Perfect Pocket Layout
One of the biggest advantages of a DIY backseat organizer is designing pockets around actual objects rather than guessing.
Before cutting anything, place everything you expect the organizer to hold on a table.
You might include:
- Coloring books
- Small notebooks
- Tissues
- Wet wipes
- Sunglasses
- Soft toys
- Travel games
- Headphones
- Snack pouches
- A lightweight water bottle
- Pencils or washable markers
Family-travel guides frequently recommend bringing compact activities, games, and kid-friendly entertainment for longer drives, making dedicated organizer pockets particularly useful.
Top Row: Small Essentials
Use shallow pockets for tissues, sunglasses, headphones, or other lightweight items. Smaller pockets prevent tiny objects from disappearing into fabric caves where they will remain until approximately 2037.
Middle Row: Activity Zone
Create wider pockets for activity books, coloring supplies, or travel games. Mesh is helpful here because children can see what is available without excavating every pocket.
Bottom Row: Large Storage
The lower section can hold soft toys, books, spare clothing, or other larger but lightweight supplies.
Placing bulkier pockets toward the bottom also helps prevent the organizer from becoming excessively top-heavy.
Step-by-Step: How to Sew a Backseat Car Organizer
Step 1: Cut the Main Panels
Use your measurements to cut two identical rectangles: one for the organizer front and one for the back.
If your desired finished organizer is 18 by 24 inches and you are using a 1/2-inch seam allowance, cut approximately 19 by 25 inches.
Add interfacing to the wrong side of one panel if you want a firmer organizer.
Step 2: Prepare the Pockets
Cut each pocket slightly wider than its finished width if you want it to expand.
For example, a pocket occupying an 8-inch section of the organizer might start as a 10-inch-wide piece. Small pleats near the bottom create additional volume.
Fold the top edge down twice and stitch it for a clean finish.
Step 3: Add Elastic to Stretchy Pockets
For bottles, stuffed animals, or bulky objects, an elasticized pocket opening works better than a completely straight edge.
Create a narrow casing along the pocket top. Insert elastic slightly shorter than the pocket width and secure both ends.
The result should gather gently rather than resemble a fabric bear trap.
Step 4: Attach the First Pocket Row
Pin or clip your lowest pockets to the front panel first.
Sew the sides and bottom securely. Backstitch at the upper corners because those areas receive the most pulling.
If one long pocket needs several compartments, sew vertical dividing lines after attaching it.
Step 5: Add the Remaining Rows
Work upward, checking spacing as you go.
A good design usually leaves at least a little fabric visible between rows. If every pocket overlaps the one below it, children may struggle to reach smaller items.
Step 6: Create the Headrest Strap
Attach webbing near the upper corners of the main panel.
An adjustable strap with a side-release buckle makes installation and removal easier. Make the strap long enough to fit around the appropriate portion of your seat while allowing adjustment.
Do not permanently finalize the strap length until you test the organizer in the actual vehicle.
Step 7: Add a Lower Stabilizing Strap
A second adjustable strap around an appropriate lower portion of the seat can help keep the organizer from swinging when children pull objects from pockets.
Some sewing designs use straps, elastic, grommets, or similar systems to keep seat-back storage flat against the seat rather than dangling freely.
Again, the installation must be compatible with your particular vehicle. Never route straps where they interfere with safety equipment, seat movement, or child-restraint hardware.
Step 8: Join the Front and Back Panels
Place the organizer front and backing pieces with right sides together.
Sew around the perimeter while leaving several inches open for turning.
Clip the corners, turn everything right-side out, press carefully, and topstitch around the entire edge.
If you prefer a simpler construction, stack the layers wrong sides together and finish the perimeter using bias binding.
Step 9: Reinforce Stress Points
Stitch an X inside a square where each webbing strap connects to the organizer.
Double-check pocket corners as well. Children do not gently retrieve objects. They conduct surprise structural-engineering tests.
Smart Upgrades Worth Adding
Clear or Mesh Pockets
Visibility makes organization easier. Children can identify what belongs where, and parents can tell whether the wipes are missing without opening seven compartments.
Removable Activity Pouch
Add snaps or hook-and-loop fastener to attach a small pouch containing crayons, cards, or travel games.
When you reach a restaurant, hotel, or waiting room, detach the pouch and take it with you.
Washable Trash Pouch
A separate removable pouch can collect wrappers and tissues. Dedicated car trash containers are commonly recommended by family-organization sources because they prevent small pieces of garbage from migrating directly to the floor.
Name Labels
If two children sit in the back, make one organizer per seat and personalize each with fabric letters, embroidery, patches, or labels.
This introduces the valuable legal principle known as, “That is your pocket, not your sister’s.”
Color-Coded Storage
Different pocket colors can create easy categories:
- Blue for activities
- Green for snacks
- Yellow for cleaning supplies
- Red for items that return to the house
The exact colors do not matter. Consistency does.
What Not to Put in a Kids Backseat Organizer
The temptation is to use every available square inch, but more storage is not automatically better storage.
Avoid filling your car seat organizer DIY project with unnecessary objects just because a pocket exists.
Skip:
- Heavy metal items
- Glass bottles
- Sharp tools
- Large electronics that do not fit securely
- Objects that protrude significantly from pockets
- Food that can melt or spoil in a hot parked vehicle
- Anything that blocks seat controls or safety equipment
Instead, treat the organizer as a lightweight convenience station.
How to Keep the Organizer From Becoming Clutter
The fascinating thing about organizers is that, without maintenance, they eventually organize clutter instead of eliminating it.
Give each pocket a clear purpose and periodically empty everything.
A simple routine works:
- Remove trash after trips.
- Bring dirty cups and bottles inside.
- Return finished books or toys to the house.
- Restock wipes and tissues.
- Swap activities every few weeks.
- Wash the organizer whenever spills begin developing their own ZIP code.
General organization advice consistently favors designated storage locations and systems that are easy enough for children and adults to maintain.
DIY Backseat Organizer Ideas by Age
For Preschoolers
Prioritize large, easy-to-see pockets. Good choices include board books, soft toys, tissues, sticker activities, and simple mess-free entertainment.
Avoid designing lots of tiny compartments. Young children are much more likely to use an obvious open pocket than execute a sophisticated filing system at highway speed.
For Elementary-Age Kids
Add separate sections for activity books, pencils, travel games, headphones, and personal items.
This age is ideal for teaching children to return each item to its designated pocket after using it.
For Older Kids
Simplify the organizer. Larger pockets for notebooks, headphones, charging cables, books, and travel essentials may be more useful than many small toy compartments.
The beauty of DIY construction is that you can remake or modify the layout as your children’s needs change.
Real-World Experience: What You Learn After Actually Using a Backseat Organizer
The most useful lessons about a DIY backseat car organizer for kids tend to appear after ordinary family use rather than while the fabric is sitting neatly on a sewing table.
First, bigger is rarely better. An organizer covered with twelve deep pockets looks impressive when empty, but children quickly discover that every pocket can be filled. Before long, the seat back is carrying three books, six toy cars, two water bottles, fourteen markers, a stuffed penguin, and enough snacks to survive a minor apocalypse.
A better experience comes from limiting storage deliberately. Give the organizer enough capacity for one trip or one day’s routine rather than turning it into permanent household storage.
Second, pocket visibility matters more than expected. A beautiful solid-fabric pocket hides its contents beautifullywhich is precisely the problem when a child asks where the headphones are five minutes after putting them away. Mesh sections make frequently used items easier to locate and reduce unnecessary digging.
Third, the lower attachment matters. An organizer secured only near the headrest may look perfectly respectable until somebody grabs a book from the bottom pocket. Suddenly the entire thing swings forward like a fabric drawbridge. A properly designed lower stabilizing system can make everyday use feel dramatically more polished, provided it is installed in a way permitted by the vehicle manufacturer.
Fourth, snack storage deserves special thought. Dry, sealed snacks can be convenient for appropriate children during travel, but permanent snack storage eventually produces crumbs, forgotten packaging, and fascinating discoveries involving crackers that have achieved geological status. A removable snack pouch is easier to carry inside, clean, and refill.
Fifth, washable fabric is not an optional luxury. Even families that begin with strict rules about food and drinks eventually experience spills, muddy shoes, sticky fingers, or a leaking package of wipes. Canvas, denim, and similar durable fabrics generally make cleanup easier than delicate decorative materials.
Another useful lesson is that children are more likely to participate in organizing when the system is obvious. A book pocket should look like a book pocket. The stuffed-animal compartment should be large enough to accept a stuffed animal without a wrestling match. When storage requires three hands and an engineering degree, everything eventually returns to the floor.
It also helps to rotate what stays in the car. Instead of keeping twenty activities available indefinitely, choose a handful. Every few weeks, swap them for different books, games, or drawing materials. The organizer remains lighter, and forgotten activities suddenly feel interesting again.
Finally, perfection is unnecessary. Your first handmade organizer may have a slightly crooked pocket or a topstitching line that would cause a professional upholsterer to raise an eyebrow. The children will not care. If their favorite book is reachable, their headphones are not underneath somebody’s shoe, and the car floor is visible again, the project has succeeded magnificently.
Final Thoughts
A good DIY backseat car organizer for kids does not need complicated hardware, twenty-seven pockets, or Pinterest-level sewing skills. It needs thoughtful measurements, sturdy washable fabric, secure construction, and compartments designed around the things your family genuinely carries.
Measure the seat first. Keep the organizer soft and reasonably lightweight. Build shallow pockets for everyday essentials, larger lower pockets for activities, and adjustable straps that keep the panel sitting neatly against the seat without interfering with vehicle or child-passenger safety systems.
Most importantly, involve your kids. Let them choose fabric, assign pocket purposes, or help decide which travel activities deserve permanent backseat status. When children understand the systemand feel that part of it belongs to themthey have a much better chance of using it.
Will your car remain perfectly spotless forever? Absolutely not. Children are children, crackers possess supernatural mobility, and somehow a toy dinosaur will still end up under the driver’s seat.
But with a custom kids backseat storage organizer, at least the dinosaur has an official place to live.