If your books are constantly doing the slow dramatic fall-over like they just heard Darth Vader breathing behind them, it may be time for a stronger force: DIY 2×4 Star Wars R2D2 book ends. This project is simple, affordable, nerdy in the best possible way, and perfect for adding a handmade touch to bedroom decor, a kids’ reading corner, a dorm shelf, or a Star Wars-themed office.
The best part? You do not need a full workshop, a professional paint booth, or a tiny astromech droid beeping encouragingly in the background. A basic 2×4 board, a few tools, paint, wood glue, screws, and patience can turn ordinary lumber into a pair of sturdy bookends inspired by everyone’s favorite brave little droid. R2-D2 is instantly recognizable because of his rounded dome, white-and-blue body panels, silver details, and compact mechanical shape. Translating that look into a chunky wooden bookend gives you something playful without making your shelf look like a toy explosion.
This guide walks through the design, materials, measurements, building steps, painting ideas, safety notes, styling tips, and personal experience notes that make the project easier and more fun. Whether you are making these for a child’s bedroom, a Star Wars fan cave, or your own “I swear this is organized” bookshelf, this project brings personality and function together faster than you can say, “Help me, Obi-Wan Kenobi.”
Why Make R2D2 Book Ends from a 2×4?
A 2×4 is one of the most beginner-friendly materials in DIY woodworking. Although the name says “2×4,” most standard boards sold in home improvement stores actually measure about 1.5 inches by 3.5 inches after milling. That size is ideal for chunky, stable decor pieces. It has enough weight to hold up books, enough surface area to paint character details, and enough thickness to survive the occasional bump from a backpack, laundry basket, or rogue action figure.
Using a 2×4 also keeps this project budget-friendly. One board can make multiple bookend sets, especially if you use short offcuts. This is exactly the kind of weekend project that makes you feel wildly productive while secretly costing less than a fancy coffee run. Plus, DIY bookends are easy to customize. You can make them subtle and modern, bright and cartoon-like, weathered and battle-worn, or clean enough for a minimalist bedroom shelf.
Project Overview
Skill Level
Beginner to intermediate. If you can measure, cut, sand, paint, and avoid gluing your hand to the workbench, you are in good shape.
Estimated Time
Plan for one afternoon of cutting, sanding, and assembly, plus drying time for glue and paint. If you add detailed R2-D2 panels, give yourself a second session. Tiny painted rectangles have a funny way of turning “quick project” into “I now respect prop makers deeply.”
Finished Size
A practical size for each bookend is about 6 inches tall, 4 to 5 inches wide, and 4 to 5 inches deep. You can adjust the measurements depending on your shelf depth and the size of the books you want to hold.
Materials and Tools You Will Need
Materials
- One untreated 2×4 board or clean 2×4 scraps
- Wood glue
- 1.25-inch wood screws
- Sandpaper in 120-grit and 220-grit
- White primer or white acrylic paint
- Blue, gray, black, and silver acrylic craft paint
- Clear protective topcoat, such as water-based polyurethane or clear acrylic sealer
- Painter’s tape
- Felt pads or rubber bumpers for the bottom
- Optional: thin plywood, craft wood, or cardstock for raised droid details
Tools
- Miter saw, circular saw, or hand saw
- Drill and drill bits
- Clamps
- Paintbrushes and small detail brushes
- Pencil and ruler
- Safety glasses
- Dust mask or respirator when sanding
- Hearing protection when using power saws
Safety First: The Boring Part That Keeps the Fun Parts Fun
Before cutting or sanding, put on safety glasses. Wood chips are rude little missiles, and they do not care that you are making charming bedroom decor. If you are using a power saw, wear hearing protection and keep loose sleeves, hair, and dangling cords away from the blade. When sanding, use a dust mask or respirator, especially indoors or in a garage.
Clamp your workpiece before cutting or drilling. A clamped board behaves like a responsible citizen; an unclamped board behaves like it has joined the dark side. Also, always pre-drill screw holes near the ends of 2×4 pieces to reduce splitting. This matters because softwood can crack when a screw is driven too close to the edge.
Step 1: Plan the R2D2 Shape
The easiest way to make R2D2-inspired bookends is to build each one as an L-shaped support. The vertical piece becomes the droid body, while the bottom piece slides under the books and helps anchor everything. For each bookend, cut one vertical block about 6 inches tall and one base block about 4 inches long. The actual 3.5-inch width of the 2×4 gives you a sturdy face for painting the droid design.
To create the R2-D2 silhouette, round the top corners of the vertical block. You can do this with a jigsaw, sanding block, rasp, or simply by sanding the edges until they look softer. You do not need a perfect dome. The goal is recognizable charm, not building a screen-accurate droid replica that starts arguing with C-3PO.
Step 2: Cut the 2×4 Pieces
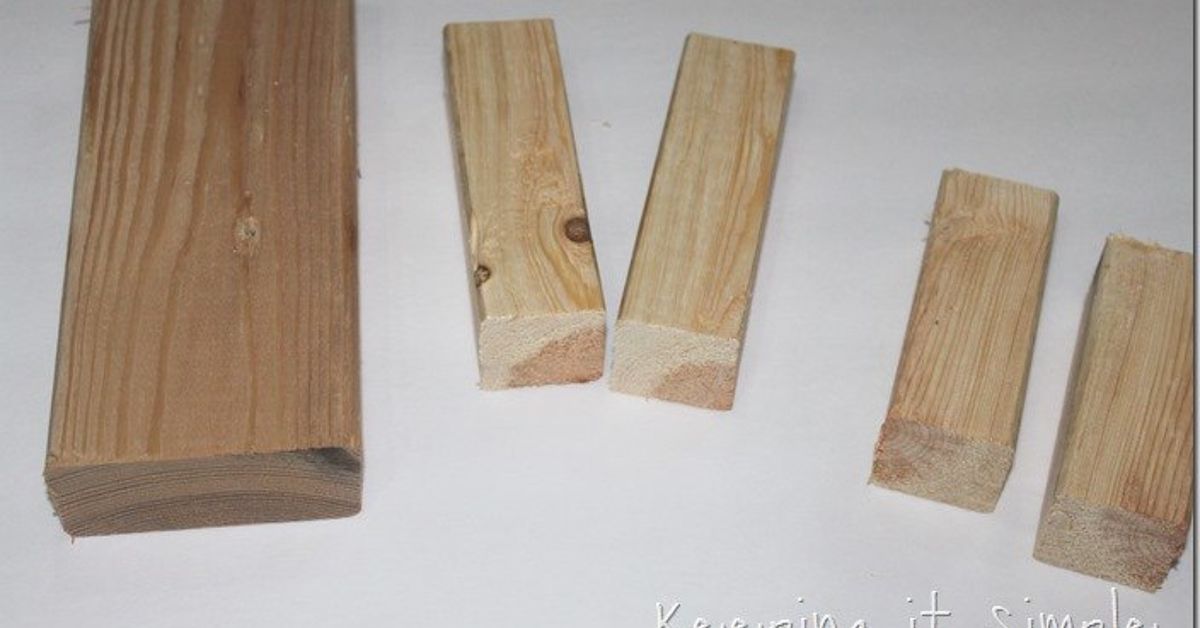
Measure carefully and mark your cuts with a pencil. For one pair of bookends, cut:
- Two vertical pieces: 6 inches long
- Two base pieces: 4 inches long
After cutting, check that each piece sits flat. If a cut is slightly uneven, sand it until the pieces meet cleanly. Bookends need stable contact with the shelf, so do not ignore wobbles. A wobbly bookend holding up novels is like a stormtrooper aiming at anything important: technically trying, but not confidence-inspiring.
Step 3: Sand Everything Smooth
Start with 120-grit sandpaper to remove roughness, saw marks, and sharp edges. Then switch to 220-grit for a smoother finish before painting. Pay extra attention to the corners and the top edge where the “dome” shape will appear.
After sanding, remove dust with a vacuum brush attachment or a slightly damp cloth. This step is more important than it sounds. Paint does not like dusty wood. If sanding dust stays on the surface, your crisp R2-D2 details can turn into a lumpy space disaster.
Step 4: Assemble the L-Shaped Bookends
Place one vertical piece upright at the back of one base piece, forming an L shape. Apply wood glue where the two pieces meet. Clamp them together, then pre-drill two pilot holes through the base into the vertical piece. Drive in wood screws to strengthen the joint.
Repeat for the second bookend, but mirror the layout so the two bookends face inward when placed on a shelf. Let the glue cure according to the manufacturer’s instructions. Even if the screws make the bookends feel sturdy right away, the glue adds long-term strength.
Step 5: Prime and Paint the Base Color
Paint the entire bookend white first. White primer works well because it seals the wood and gives the blue, gray, and silver details a clean surface. Apply two thin coats instead of one heavy coat. Thick paint can pool in corners and make the finish look clumsy.
Let the paint dry fully between coats. This is the perfect time to organize your books, make a snack, or stare at the pieces and proudly say, “Yes, I am basically a maker now.”
Step 6: Add R2D2-Inspired Details
Once the white base is dry, lightly sketch the droid details with a pencil. R2-D2’s design is known for blue panels, silver-gray mechanical sections, black sensor areas, and a compact body. For a bookend version, keep the design simple so it reads clearly from across the room.
Easy Front Design
- Paint a silver or gray dome area across the rounded top.
- Add two or three blue rectangles on the dome.
- Paint one black circle or oval for the main “eye” sensor.
- Add blue vertical panels on the body.
- Use gray lines to suggest mechanical doors and compartments.
- Add tiny black dots or silver accents for bolts and vents.
Painter’s tape helps create crisp panels. For curved areas, use a small detail brush and go slowly. The charm of this project comes from handmade personality, so do not panic if your panels are not perfectly symmetrical. R2-D2 has survived desert planets, swamp planets, starships, and several family movie nights. He can survive one slightly crooked blue rectangle.
Step 7: Seal the Paint
After the painted design is completely dry, apply a clear protective topcoat. A water-based finish is usually a good choice because it dries clear and does not yellow as much as some oil-based finishes. Apply thin coats and let each coat dry fully.
If the bookends are for a child’s bedroom, a playroom, or a busy desk, sealing is especially helpful. Books sliding in and out can scuff painted surfaces over time. A topcoat gives your little droids a better chance of surviving daily shelf duty.
Step 8: Add Felt Pads or Rubber Bumpers
Stick felt pads or rubber bumpers to the bottom of each bookend. This protects shelves from scratches and adds grip. If your bookends will sit on a smooth painted shelf, rubber bumpers may help prevent sliding. If they will sit on a delicate wood surface, felt is a gentle option.
Bedroom Decor Styling Ideas
Create a Star Wars Reading Corner
Place the R2D2 bookends on a small floating shelf, nightstand, or cube organizer. Add a reading lamp, a cozy throw blanket, and a few favorite books. The bookends become functional decor instead of just themed decoration. This is especially useful in kids’ bedrooms, where storage has to work hard while still looking fun.
Pair with Neutral Bedding
If you want the bookends to feel stylish rather than overly themed, pair them with neutral bedding, simple shelves, and a few blue accents. The R2-D2 colors already include white, blue, gray, and black, which fit surprisingly well with modern bedroom decor.
Use Them as Desk Decor
These bookends are also great for holding notebooks, sketchbooks, journals, or school folders. On a desk, they add a bit of personality without taking up much room. They are ideal for anyone who likes Star Wars but does not necessarily want a giant spaceship hanging above the bed.
Customization Ideas
Make Them Battle-Worn
For a weathered look, lightly dry-brush gray paint around the edges after the main design dries. Add a few tiny scuffs with silver or dark gray. This makes the bookends look like they have rolled through a few adventures.
Add Raised Panels
Cut small rectangles from thin craft wood or sturdy cardstock, paint them blue or gray, and glue them onto the front. Raised panels add dimension and make the bookends look more like a handcrafted prop.
Personalize the Back
Add a name, initials, favorite quote, or date on the back of each bookend. This turns the project into a thoughtful handmade gift for birthdays, holidays, dorm move-ins, or a bedroom makeover.
Common Mistakes to Avoid
One common mistake is making the base too short. If your books are tall or heavy, a tiny base will not provide enough support. A 4-inch base is a good starting point, but you can extend it to 5 or 6 inches for larger books.
Another mistake is skipping the sanding. Paint magnifies rough spots, especially on construction lumber. Sanding turns a basic 2×4 into something that looks intentional instead of rescued from a garage corner five minutes ago.
Finally, avoid overloading the design with too many tiny details. R2-D2 has a complex look, but a bookend works best when the main shapes are clear: white body, silver dome, blue panels, black sensor, gray mechanical lines. Simple reads better on a shelf.
Experience Notes: What This Project Feels Like in Real Life
Building DIY 2×4 Star Wars R2D2 book ends is one of those projects that starts small and somehow makes you ridiculously proud. At first, it seems almost too simple: cut a few pieces, glue them together, paint some panels, done. But once the white base coat dries and the first blue rectangle goes on, the whole thing suddenly has personality. It stops looking like leftover lumber and starts looking like a tiny wooden droid reporting for bookshelf duty.
The biggest lesson from making a project like this is that simple shapes are your friend. Trying to recreate every tiny panel on R2-D2 can become stressful fast. The better approach is to capture the impression of the character. A silver dome, bright blue blocks, one black sensor, and a few gray lines are enough for almost everyone to recognize the inspiration. People do not walk into a bedroom and inspect whether the lower utility panel is placed with galactic engineering accuracy. They usually say, “Oh, that’s cute!” which is the entire mission.
Another practical experience is that 2×4 wood is wonderfully forgiving but rarely perfect. Some boards have dents, knots, rounded edges, or grain that soaks up paint unevenly. Instead of fighting every imperfection, you can use them as part of the handmade charm. A small knot can disappear under primer, or it can become a “battle scar” if you are going for a weathered droid look. The project does not need showroom perfection. In fact, too-perfect bookends can lose the warm DIY character that makes them special.
Painting is where patience pays off most. Thin coats look better than thick coats, especially with white paint. If you rush, the surface can feel sticky or uneven. Painter’s tape also works best when the base coat is fully dry. Pulling tape too early or applying it over soft paint can make edges peel. A good habit is to paint the white base one day and add the details the next day. That sounds slower, but it saves the frustration of fixing smudges.
For bedroom decor, these bookends work best when they are part of a small scene. Put them beside a stack of adventure books, graphic novels, journals, or bedtime reads. Add a small plant, a lamp, or a framed print nearby so the shelf feels decorated rather than crowded. In a child’s bedroom, they can help make books feel more exciting. In an adult room, they add nostalgic fun without turning the space into a full collectibles display.
This is also a great project to do with kids, as long as an adult handles the cutting, drilling, and any tool-heavy steps. Kids can help sketch panels, choose shades of blue, add dots, or paint the little sensor. The result becomes more meaningful because it has their decisions in it. Maybe one bookend looks neat and the other looks like R2-D2 had too much space coffee. That is not a failure. That is a memory.
The finished bookends also make excellent gifts because they are useful. Many themed DIY gifts are cute but have nowhere to go. Bookends solve a real problem: books, notebooks, comics, and folders need support. Add a handwritten note saying they were made from a 2×4 and painted by hand, and suddenly the gift feels personal instead of store-bought.
One final experience tip: take a photo before giving them away or placing them on the shelf. DIY projects have a way of disappearing into everyday life once they start being used. A quick picture reminds you that you made something from plain wood, a little paint, and a fun idea. That is the quiet magic of small woodworking projects. They make a room more personal, and they make you look at leftover lumber like it might secretly be decor waiting for its hero moment.
Conclusion
DIY 2×4 Star Wars R2D2 book ends are a practical, playful, and beginner-friendly bedroom decor project. They use affordable materials, basic tools, and simple painting techniques to create something that feels custom and full of personality. The sturdy 2×4 construction helps hold books in place, while the R2-D2-inspired design adds charm to shelves, desks, reading nooks, and kids’ rooms.
The key is to keep the structure strong, the sanding smooth, the paint layers thin, and the design recognizable rather than overly complicated. With a white base, silver dome, blue panels, and a few black and gray details, you can create bookends that feel instantly connected to the Star Wars universe without needing advanced woodworking skills. For anyone looking to add handmade #bedroomdecor with a little sci-fi humor, this project is a small but mighty win.
Note: This article is written as an original DIY guide inspired by Star Wars-style bedroom decor. Star Wars and R2-D2 are trademarks of their respective owners; this project is intended for personal, decorative crafting and fan-inspired home use.