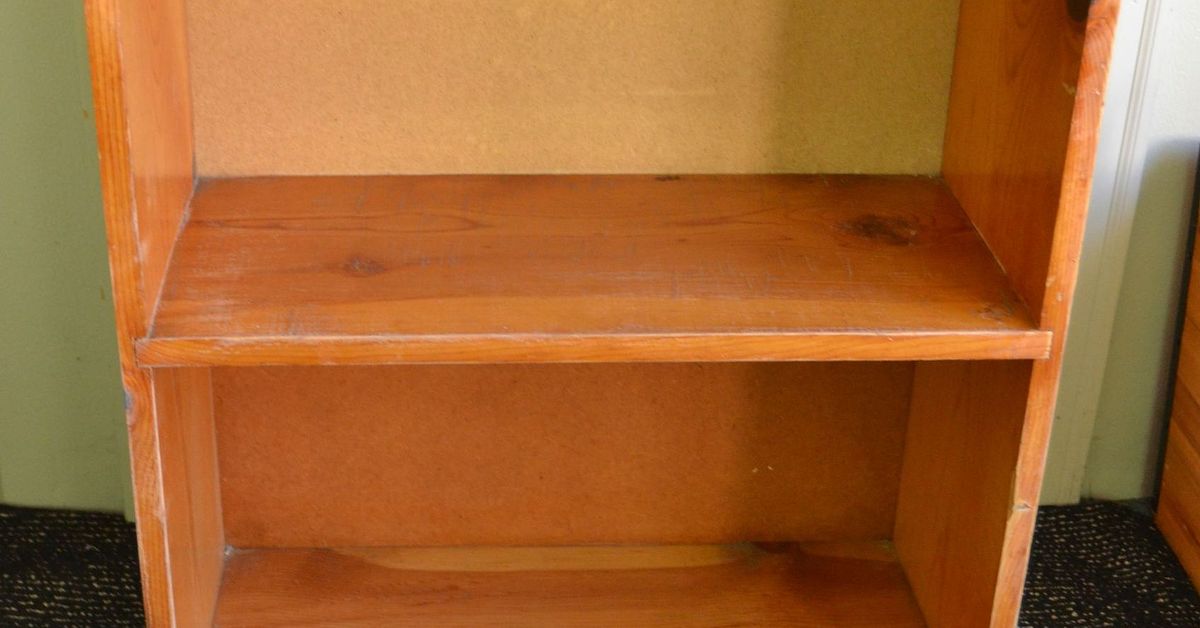
There is a special kind of optimism required to stop the car, back up half a block, and inspect a lonely bookshelf sitting at the curb. To everyone else, it may look like a scratched, dusty piece of furniture with one shelf leaning at a suspicious angle. To a DIY-minded person, however, it looks like potential. Possibly beautiful potential. Possibly free potential. And “free” is a very persuasive design style.
A curbside bookshelf makeover can turn an unwanted bookcase into useful storage, a colorful statement piece, a home library centerpiece, or something that looks surprisingly custom. The secret is not simply slapping on paint and hoping the transformation fairy handles the details. A successful furniture makeover begins with inspection, cleaning, repairs, surface preparation, and a realistic understanding of what the bookshelf is actually made from.
Whether your roadside rescue is solid wood, veneer, laminate, MDF, or particleboard, this guide walks through the process from curb to curated shelves.
Before You Bring a Curbside Bookshelf Home
The most important step happens before the bookshelf crosses your front door. Not every free piece of furniture deserves a second life in your house. Some deserve a respectful nod before you continue driving.
Check the Structure First
Give the bookcase a gentle shake. A little movement may be repairable, especially if loose screws, nails, or a weak backing panel are responsible. Major twisting, extensive rot, severely swollen particleboard, or badly broken joints may turn a fun weekend project into an unpaid apprenticeship in furniture engineering.
Inspect the shelves for sagging. Check whether adjustable shelf pins are missing. Look at the bottom edges for water damage and examine the back panel to see whether it is still securely attached. A damaged backing panel matters more than many beginners realize because it often helps keep an inexpensive bookcase square and stable.
Look for Moisture, Mold, Odors, and Pests
A bookshelf that has spent several rainy days beside the road may have absorbed enough moisture to swell engineered wood or loosen veneer. Musty odors can also be difficult to eliminate. Examine joints, corners, cracks, and the underside carefully before loading the piece into your vehicle.
Solid wood can often survive cosmetic abuse remarkably well. Particleboard is less forgiving once water has caused extensive swelling and crumbling. Know when to rescue and when to retreat.
Be Cautious With Unknown Old Paint
If a curbside bookshelf appears genuinely old and has an unknown painted finish, do not aggressively sand first and ask questions later. Disturbing old lead-based paint can create hazardous dust. The U.S. Environmental Protection Agency recommends lead-safe precautions when older painted surfaces may contain lead, including controlling dust and keeping the work area contained.
Identify What Your Bookshelf Is Made Of
Your makeover strategy should follow the material. Treating thin laminate like a thick slab of oak is an excellent way to turn “vintage-inspired bookshelf” into “why is the surface disappearing?”
Solid Wood
Solid wood is generally the most flexible candidate for refinishing. It can often be sanded, painted, stained, repaired, and refinished multiple times. Look for visible grain continuing around edges and end grain where boards terminate.
Wood Veneer
Veneer is a thin layer of real wood applied over another material. It can be beautiful and worth preserving, but aggressive sanding may cut through the thin surface. Sand gently and only as much as necessary.
Laminate or Melamine
Laminate has a slick manufactured surface that usually needs thorough cleaning, gentle deglossing, and a suitable bonding primer before painting. The goal is to dull the surface, not sand through it.
MDF and Particleboard
These materials are common in affordable bookcases. They can be painted successfully, but damaged edges and swollen areas need special attention. Wood filler can help smooth minor chips, while badly deteriorated sections may not be worth repairing. Guidance from furniture and paint specialists consistently emphasizes matching sanding and priming methods to the surface rather than using one aggressive technique on everything.
Gather Your Bookshelf Makeover Supplies
Your exact supply list will depend on the condition and material of the bookshelf, but a typical curbside furniture makeover may require:
- Protective gloves and appropriate eye and respiratory protection
- Drop cloths or protective sheeting
- Vacuum and clean rags
- Mild cleaner or degreasing cleaner suitable for the surface
- Screwdriver and basic repair tools
- Wood glue and clamps
- Wood filler or another compatible repair product
- Sandpaper or sanding sponges in appropriate grits
- Primer matched to wood, laminate, or the existing finish
- Furniture-appropriate paint or wood stain
- Quality brush and small smooth-finish roller
- Optional clear protective finish
- New shelf pins, feet, trim, wallpaper, or decorative backing
You do not necessarily need every item. The goal is not to purchase enough supplies to make your free bookshelf cost more than a custom built-in library. Start with the condition of the piece and buy accordingly.
Step-by-Step Curbside Bookshelf Makeover
Step 1: Photograph and Disassemble the Bookcase
Before removing anything, take a few photos. This is especially useful when hardware, shelves, brackets, or backing pieces have a mysterious arrangement that suddenly becomes impossible to remember 45 minutes later.
Remove adjustable shelves and any hardware that can be taken off safely. Label parts if necessary. Disassembly makes cleaning, repairing, and painting easier and helps prevent missed corners.
Step 2: Clean Before You Sand
Old furniture collects dust, grease, fingerprints, polish residue, and substances best described as “curb mystery.” Painting over grime can interfere with adhesion and trap dirt beneath the finish.
Vacuum loose debris first. Then clean the surface with a product appropriate for the material and let everything dry completely. Do not soak MDF or particleboard. Water and compressed wood fibers are not close friends.
Step 3: Make Structural Repairs
Tighten loose fasteners and reglue joints when appropriate. Replace missing shelf supports. Secure a loose backing panel. Fill dents, chips, or unwanted hardware holes with a compatible filler and allow repairs to dry fully before sanding them smooth.
Check the bookcase for square before committing to decorative work. A flawless paint finish on a bookshelf that leans like it has had a very long evening is not the victory you were aiming for.
Step 4: Sand for the Finish You Actually Need
Sanding does not always mean removing every molecule of the original finish. When painting a sound existing surface, the goal is often to clean up imperfections and create enough “tooth” for the next coating to adhere. When restoring bare wood for stain, more complete finish removal may be necessary.
Work gently around veneer and laminate. On solid wood, progressive sanding may be appropriate when removing a damaged finish. After sanding, vacuum thoroughly and remove remaining dust before priming or finishing. Major U.S. DIY and coatings guides repeatedly stress cleaning, scuff sanding where appropriate, dust removal, and proper primer selection as the foundation of a durable painted finish.
Step 5: Prime the Bookshelf
Primer is one of the least glamorous parts of a furniture makeover and one of the easiest to regret skipping.
Use a primer compatible with the bookshelf material and the paint system you selected. Slick laminate often benefits from a bonding primer. Bare wood may require a wood primer, while stains or discoloration may call for a stain-blocking product.
Apply a thin, even coat. A brush is useful for corners and edges, while a small fine-finish roller can cover larger flat areas efficiently. Let the primer dry according to the manufacturer’s directions. A light sanding between primer and paint can improve smoothness when the product instructions allow it.
Step 6: Paint in Thin, Controlled Coats
Two thin coats generally produce a better-looking result than one heroic coat applied with the enthusiasm of someone frosting a birthday cake.
Start with inside corners and detailed areas, then move to broad surfaces. Watch for drips along shelf edges and underneath horizontal surfaces. Allow each coat to dry as directed before recoating.
For a contemporary look, consider satin or semi-gloss furniture-appropriate enamel. For a softer vintage appearance, a matte or chalk-style finish may suit the piece. The best choice depends on the desired look, the amount of handling the bookshelf will receive, and the coating system recommended for your surface.
Creative Design Ideas for a Curbside Bookshelf Makeover
Once the repair work is finished, the project becomes much more entertaining. A bookcase is basically a rectangular invitation to experiment.
Try a Two-Tone Color Scheme
Paint the exterior one color and the interior another. A deep green exterior with a warm cream interior can feel classic, while charcoal with a muted terracotta backing creates a more dramatic look.
A two-tone design is also useful when you want a bold color without letting it dominate the entire room.
Transform the Back Panel
The back of a bookcase is prime decorating territory. Paint it in a contrasting color, apply removable wallpaper, add beadboard, use decorative fabric, or replace a damaged thin backing with a better panel when the structure allows.
Design resources from Better Homes & Gardens and HGTV frequently use contrasting paint, wallpaper, pattern, and upgraded back panels to give basic bookcases more depth and personality.
Add Trim for a More Custom Look
Simple molding can make a plain bookshelf appear more architectural. Add trim around the top, face frame, or base, provided the bookshelf is sturdy enough for the modification.
For a built-in effect, multiple bookcases can sometimes be positioned together and finished with coordinated trim. This is a larger project because units must be leveled, securely joined where appropriate, and anchored safely.
Add Legs or a New Base
A low, boxy bookshelf can gain an entirely different personality with appropriately installed furniture legs or a new plinth-style base. This works best when the structure can safely support the modification.
Do not choose tiny decorative legs for a bookcase destined to hold an encyclopedia collection, three cast-iron bookends, and your emotional attachment to every hardcover you have owned since college.
Preserve Some Natural Wood
Not every curbside bookshelf needs to be completely painted. If the top or shelves have attractive real-wood grain, consider refinishing those areas while painting the frame.
For wood that will be stained or clear-coated, careful sanding and dust removal are essential. Protective clear finishes are commonly applied in multiple coats, with drying and light sanding between coats when specified by the manufacturer.
How to Style the Finished Bookshelf
A freshly refinished bookshelf can still look chaotic if every shelf is packed from edge to edge. Styling does not require turning your home into a furniture catalog, but a little visual breathing room helps.
Start With the Books
Arrange books according to how you actually use them. Alphabetical order may work for serious collections. Grouping by topic is practical. Arranging by color is visually playful. There is no bookshelf police department coming to inspect your system.
Mix Vertical and Horizontal Stacks
Alternating upright books with short horizontal stacks creates variation in height and shape. A horizontal stack can also support a small object, framed photograph, or decorative bowl.
Use Larger Objects Instead of Dozens of Tiny Ones
A few substantial pieces often look calmer than a collection of miniature objects scattered across every shelf. Try a plant, basket, ceramic piece, framed artwork, or meaningful travel object.
Leave Some Empty Space
Empty space is not a decorating emergency. It allows books and objects to stand out and keeps the finished bookshelf from looking like a storage unit that recently lost an argument with gravity.
Do Not Forget Bookshelf Safety
A furniture makeover is not finished when the paint dries. Tall or potentially unstable bookcases should be secured appropriately. The U.S. Consumer Product Safety Commission recommends anchoring furniture such as bookcases to help reduce tip-over hazards, particularly in homes with children. Heavier objects are also better kept lower rather than creating a top-heavy arrangement.
Follow the bookshelf manufacturer’s instructions when available and use anchoring hardware appropriate for the furniture and wall construction. A beautiful bookcase should hold novels, not grudges against the laws of physics.
Common Curbside Bookshelf Makeover Mistakes
Skipping the Inspection
Paint does not repair rotten wood, severe water damage, or major structural failure. Evaluate first.
Painting a Dirty Surface
Dust and grease interfere with the finish. Clean first, then prepare the surface.
Oversanding Veneer or Laminate
Thin decorative surfaces can be damaged quickly. Sand only enough to achieve the required preparation.
Using the Wrong Primer
A general-purpose approach may fail on slick laminate or problematic stains. Match the primer to the surface and coating system.
Rushing Drying and Curing
Paint that feels dry may not yet be ready for heavy books, scraping objects, or aggressive handling. Follow the product’s drying and curing guidance before fully loading the shelves.
Ignoring Stability
Repair loose joints, restore structural backing, level the piece, and anchor it when appropriate. Decorative improvements should never replace basic safety.
Experiences and Lessons From a Curbside Bookshelf Makeover
The experience of transforming a curbside bookshelf rarely follows the neat sequence shown in a 30-second makeover video. In real life, there is usually a moment when the project looks worse than when it began. The shelves are scattered across the garage, the backing panel is leaning against a wall, primer has revealed three dents you somehow missed, and you briefly wonder whether buying a new bookshelf would have been emotionally healthier.
That awkward middle stage is normal.
One of the biggest lessons in any secondhand furniture makeover is that the original plan should remain flexible. You may bring home a bookshelf expecting to strip and stain it, only to discover that the “wood grain” is actually a printed laminate. You may plan to paint everything white and then uncover a beautiful solid-wood top worth preserving. Good furniture flipping is partly craftsmanship and partly detective work.
Another common experience is underestimating preparation. The exciting part is choosing the color. The important part is the hour spent cleaning grime from corners no human hand has apparently touched since the early 1990s. It is tempting to rush into painting because that is when the dramatic before-and-after transformation begins. Unfortunately, the finished surface remembers every shortcut.
A practical makeover often improves when you stop chasing perfection. A curbside bookshelf may have a small dent that remains visible after filling, a shelf with a slight history written into its surface, or an old screw hole that refuses to disappear completely. Unless you are restoring a valuable antique, a little evidence of age can add character. The goal is usually to create a sturdy, attractive, useful piece of furniturenot convince a museum conservator that the bookshelf has never experienced Tuesday.
Color choice can also be surprising. A shade that looks dramatic on a tiny paint sample may become much more intense when spread across five shelves, two sides, a top, and every interior corner. Testing the color on a concealed area or sample board can prevent a full-scale relationship crisis with a gallon of extremely enthusiastic blue paint.
Then there is the lesson of patience. Thin coats take longer than one thick coat. Proper drying takes longer than touching the surface every twelve minutes and asking, “How about now?” Reassembly is easier when paint is sufficiently hardened. Heavy books should not be loaded onto a freshly finished shelf simply because the room looks empty and you are excited.
The most satisfying stage usually comes after the tools are put away. The same object that looked abandoned beside a trash bin now holds favorite novels, family photos, records, baskets, or plants. Small details suddenly matter: the contrast of a dark back panel behind pale book spines, the way new trim gives a basic case more presence, or the fact that a repaired shelf no longer sags under the weight of a dictionary nobody has opened since smartphones became useful.
There is also something unusually rewarding about the economics of the project. A curbside bookshelf may cost nothing to acquire, although paint and repair supplies certainly are not free. The real value comes from working with what already exists. You learn to recognize which damage is cosmetic, which materials can be refinished, and which pieces are better left alone. Those skills carry into future thrift-store finds, hand-me-down furniture, and household repairs.
Perhaps the best experience is the moment someone asks where you bought the bookshelf. That question is the unofficial trophy of furniture upcycling. You can simply say, “I found it,” which sounds elegantly mysterious and avoids explaining that its previous showroom was technically the side of the road.
A successful curbside bookshelf makeover is ultimately less about rescuing one piece of furniture and more about learning to see possibilities. Scratches can be sanded. Loose joints can sometimes be repaired. Basic shapes can be changed with color, trim, pattern, or thoughtful styling. Not every discarded bookcase is worth saving, but the right one can become a practical piece with more personality than something pulled straight from a box.
Conclusion: From Roadside Reject to Room Favorite
A curbside bookshelf makeover proves that good design does not always begin in a showroom. Sometimes it begins with a sudden U-turn and the sentence, “Hold on, was that a bookcase?”
The best transformations start with careful inspection. Make sure the piece is structurally worth saving, identify its material, clean it thoroughly, repair damage, and prepare the surface correctly. From there, paint, stain, decorative backing, trim, new feet, and thoughtful styling can transform a forgotten bookshelf into useful storage with a genuinely custom look.
Take your time with preparation, respect unknown old finishes, let coatings dry properly, and secure tall furniture when appropriate. Do those things well, and your free curbside find may become the piece in the room that receives the most complimentswhich is a very satisfying outcome for something that began the day waiting for a garbage truck.
Note: This article synthesizes practical guidance from established U.S. home-improvement, coatings, woodworking, design, environmental-safety, and consumer-safety resources, including This Old House, Lowe’s, Better Homes & Gardens, Bob Vila, the EPA, the CPSC, Sherwin-Williams, Benjamin Moore, Rust-Oleum, Minwax, HGTV, The Spruce, Family Handyman, and Popular Mechanics.