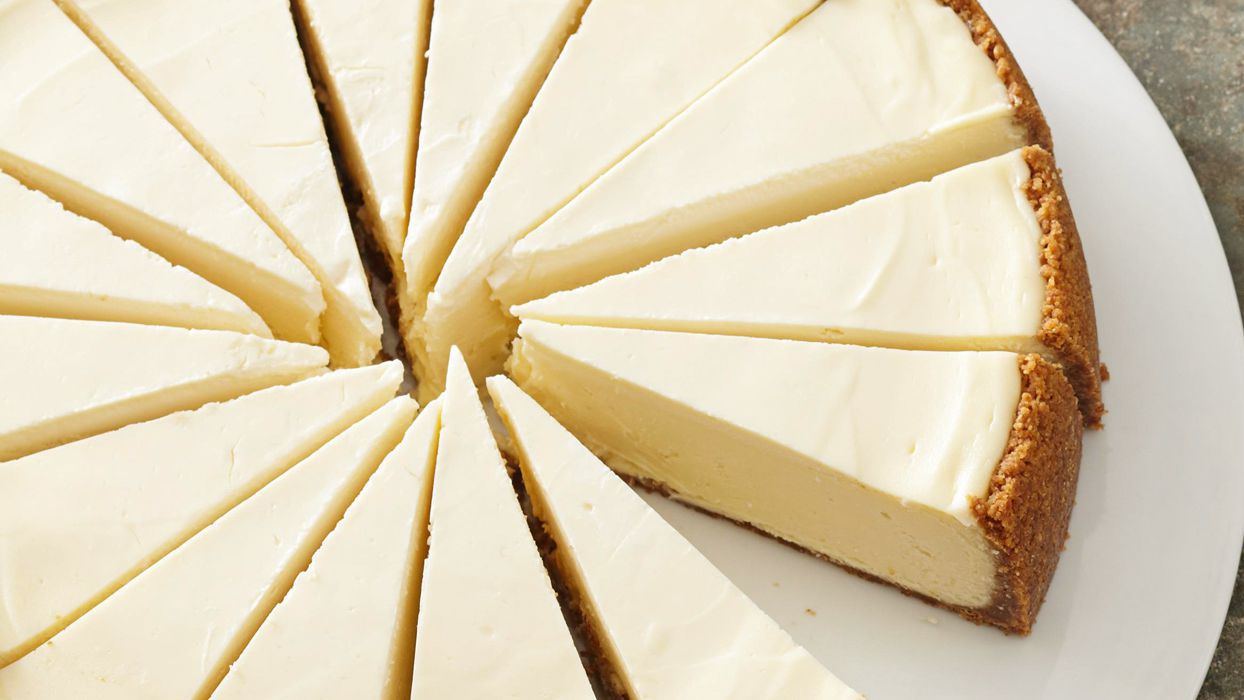
A classic New York-style cheesecake is not shy. It does not whisper from the dessert table. It enters the room wearing a velvet jacket, clears its throat, and says, “Yes, I am rich, creamy, tall, and worth every forkful.” This is the cheesecake people imagine when they dream of a thick slice from a New York bakery: dense yet silky, tangy but sweet, smooth on top, and built on a buttery graham cracker crust that knows its job and does it well.
The beauty of this Classic New York-Style Cheesecake Recipe is that it feels luxurious without requiring pastry-school drama. You do not need a blowtorch, a marble countertop, or a mysterious grandmother from Brooklyn guarding a secret notebook. What you do need is full-fat cream cheese, patience, low-speed mixing, a gentle bake, and the emotional strength to let the cheesecake chill overnight instead of attacking it with a fork at 9 p.m.
This guide walks you through every step: the crust, the filling, the water bath, the cooling process, the best way to slice it, and the small details that separate a good cheesecake from one that makes people pause mid-conversation. Whether you are baking for a birthday, holiday dinner, dinner party, or a Tuesday that clearly needs improvement, this homemade New York cheesecake delivers.
What Makes New York-Style Cheesecake Different?
New York-style cheesecake is famous for its rich, dense, ultra-creamy texture. Compared with lighter cheesecake styles, it usually contains a generous amount of cream cheese, eggs, sugar, vanilla, and often sour cream or heavy cream. The result is a filling that sets firmly enough to slice cleanly but still melts on the tongue like dairy-based velvet.
The flavor should be balanced. You want sweetness, yes, but not candy-level sweetness. The best New York cheesecake has a slight tang from cream cheese and sour cream, a warm vanilla note, and just enough lemon zest or lemon juice to brighten the filling without making it taste like lemon cheesecake. Think of lemon as the backup singer: important, but not trying to steal the microphone.
Classic New York-Style Cheesecake Ingredients
For the Graham Cracker Crust
- 1 1/2 cups finely crushed graham cracker crumbs
- 2 tablespoons granulated sugar
- 1/4 teaspoon fine salt
- 6 tablespoons unsalted butter, melted
For the Cheesecake Filling
- 4 packages full-fat cream cheese, 8 ounces each, softened to room temperature
- 1 1/4 cups granulated sugar
- 1 cup full-fat sour cream, room temperature
- 2 teaspoons pure vanilla extract
- 1 teaspoon fresh lemon juice
- 1 teaspoon finely grated lemon zest, optional but recommended
- 3 large eggs, room temperature
- 1 large egg yolk, room temperature
- 2 tablespoons all-purpose flour or cornstarch
Optional Toppings
- Fresh strawberries, blueberries, or raspberries
- Cherry topping
- Salted caramel sauce
- Chocolate ganache
- Whipped cream
Equipment You Will Need
A 9-inch springform pan is the classic choice for New York-style cheesecake because it lets you release the sides without flipping the cake. You will also need a large roasting pan for the water bath, heavy-duty aluminum foil, mixing bowls, a hand mixer or stand mixer, a rubber spatula, measuring cups, and a sharp knife for slicing.
If your springform pan has ever leaked, betrayed you, or generally behaved like a kitchen villain, wrap the outside tightly with two layers of heavy-duty foil. You can also place the springform pan inside a large oven-safe bag before setting it into the roasting pan. The goal is simple: hot water outside, cheesecake inside, no soggy-crust tragedy.
How to Make Classic New York-Style Cheesecake
Step 1: Bring Ingredients to Room Temperature
This step matters more than many bakers realize. Cold cream cheese does not blend smoothly, and cold eggs can tighten the batter. Set the cream cheese, eggs, egg yolk, and sour cream on the counter for about 1 to 2 hours before baking. Room-temperature ingredients mix faster, which means less air in the batter and a lower chance of cracks.
Step 2: Prepare the Pan
Preheat the oven to 350°F. Lightly grease a 9-inch springform pan. Wrap the outside of the pan with two layers of heavy-duty aluminum foil, making sure the foil reaches up the sides. This protects the crust when the cheesecake bakes in a water bath.
Step 3: Make the Graham Cracker Crust
In a medium bowl, stir together the graham cracker crumbs, sugar, and salt. Add the melted butter and mix until the crumbs look evenly moistened, like damp sand at the beach, only more delicious and less likely to get in your shoes.
Press the mixture firmly into the bottom of the prepared springform pan. Use the bottom of a measuring cup to compact the crust into an even layer. Bake for 9 to 10 minutes, then remove from the oven and let it cool slightly while you prepare the filling. Reduce the oven temperature to 325°F.
Step 4: Mix the Cream Cheese and Sugar
In a large mixing bowl, beat the softened cream cheese on low speed until smooth and creamy. Add the sugar and continue mixing on low until fully combined. Scrape down the sides and bottom of the bowl often. Cheesecake batter loves to hide little lumps of cream cheese near the bottom, and those lumps will not magically disappear in the oven.
Step 5: Add Sour Cream, Vanilla, Lemon, and Flour
Add the sour cream, vanilla extract, lemon juice, lemon zest, and flour or cornstarch. Mix on low speed just until smooth. Do not whip the batter. This is cheesecake, not a motivational speech for egg whites. Too much air can cause the cake to puff dramatically in the oven and then sink or crack as it cools.
Step 6: Add the Eggs Gently
Add the eggs one at a time, mixing on low speed after each addition just until the yolk disappears. Add the egg yolk last. Use a spatula to give the batter a final gentle fold, making sure everything is evenly combined.
Step 7: Fill the Pan
Pour the cheesecake filling over the cooled crust. Smooth the top with a spatula. Tap the pan gently on the counter a few times to release large air bubbles. Do not slam it like you are trying to settle a personal dispute with dessert.
Step 8: Prepare the Water Bath
Place the foil-wrapped springform pan inside a large roasting pan. Pour hot water into the roasting pan until it reaches about 1 inch up the sides of the springform pan. The water bath creates a moist, gentle baking environment that helps the cheesecake cook evenly and reduces the risk of cracks.
Step 9: Bake Until Just Set
Bake at 325°F for 70 to 85 minutes. The cheesecake is done when the edges look set and the center still has a gentle wobble when you nudge the pan. It should not slosh like liquid, but it should not be completely firm either. The center will continue to set as the cheesecake cools.
Step 10: Cool Slowly
Turn off the oven, crack the oven door open, and let the cheesecake rest inside for 1 hour. This gradual cooling step helps prevent sudden temperature changes, which are one of the main causes of cracks. After 1 hour, remove the cheesecake from the water bath, discard the foil, and place the pan on a wire rack to cool completely.
Step 11: Chill Overnight
Once the cheesecake reaches room temperature, cover it loosely and refrigerate for at least 8 hours, preferably overnight. This is where the magic happens. The texture firms up, the flavor deepens, and the cheesecake becomes sliceable instead of spoonable. Overnight chilling is not a suggestion; it is the cheesecake’s beauty sleep.
How to Slice Cheesecake Cleanly
Run a thin knife around the edge of the chilled cheesecake before releasing the springform ring. For clean slices, dip a sharp knife in hot water, wipe it dry, and cut one slice. Repeat the hot-water-and-wipe routine between every cut. Yes, every cut. It sounds fussy until you see those smooth bakery-style slices and suddenly feel like a dessert professional.
Why Did My Cheesecake Crack?
Cheesecake cracks usually happen for a few reasons: overmixing, overbaking, skipping the water bath, using cold ingredients, or cooling the cake too quickly. The good news is that cracks do not ruin the flavor. A cracked cheesecake is still cheesecake, which means it is already winning at life.
To prevent cracks, keep your mixer on low speed, use room-temperature ingredients, bake gently, stop when the center still wobbles, and cool the cake slowly. If a crack appears anyway, cover it with berries, caramel, whipped cream, or chocolate sauce. This is not failure. This is “decorative strategy.”
Best Toppings for New York Cheesecake
A classic New York cheesecake is beautiful plain, but toppings can add color, contrast, and a little drama. Fresh berries bring brightness. Cherry topping adds a nostalgic diner-style finish. Salted caramel makes the cheesecake taste richer and more buttery. Chocolate ganache turns it into a special-occasion dessert that should probably come with applause.
If you want a simple fruit topping, simmer 2 cups of berries with 2 tablespoons of sugar and 1 tablespoon of lemon juice until syrupy. Cool completely before spooning over chilled cheesecake. Never pour hot topping onto a cold cheesecake unless you enjoy chaos.
Storage and Make-Ahead Tips
Cheesecake is an excellent make-ahead dessert. In fact, it tastes better after a night in the refrigerator. Store it covered in the fridge for up to 5 days. Keep it away from strong-smelling foods because cheesecake can absorb refrigerator odors. Nobody asked for onion-scented vanilla cheesecake.
To freeze cheesecake, chill it completely first. Freeze the whole cake or individual slices uncovered until firm, then wrap tightly in plastic wrap and foil. Freeze for up to 2 months for best quality. Thaw overnight in the refrigerator before serving. Add fresh toppings after thawing for the best texture and appearance.
Classic New York-Style Cheesecake Recipe Card
Prep Time
30 minutes
Bake Time
70 to 85 minutes
Cooling and Chilling Time
At least 9 hours
Total Time
About 11 hours, mostly inactive
Servings
12 slices
Instructions Summary
- Bring cream cheese, eggs, egg yolk, and sour cream to room temperature.
- Preheat oven to 350°F and prepare a 9-inch springform pan.
- Mix graham cracker crumbs, sugar, salt, and melted butter.
- Press crust into pan and bake for 9 to 10 minutes.
- Reduce oven temperature to 325°F.
- Beat cream cheese and sugar on low speed until smooth.
- Add sour cream, vanilla, lemon juice, lemon zest, and flour or cornstarch.
- Add eggs one at a time, mixing gently.
- Pour filling over crust and smooth the top.
- Place pan in a water bath and bake for 70 to 85 minutes.
- Cool in the turned-off oven for 1 hour with the door cracked.
- Cool to room temperature, then refrigerate overnight.
- Slice with a warm, clean knife and serve.
Common Cheesecake Mistakes to Avoid
Using Low-Fat Cream Cheese
Low-fat cream cheese may sound responsible, but New York cheesecake is not the time to negotiate with dairy. Full-fat cream cheese creates the rich texture and classic flavor this dessert is known for.
Mixing Too Fast
High-speed mixing adds too much air. Air bubbles expand in the oven, then collapse as the cheesecake cools. Keep the mixer low and steady.
Skipping the Chill
A warm cheesecake will not slice properly. It needs several hours in the refrigerator to set. If you cut it early, you may end up with cheesecake pudding. Delicious? Yes. The goal? Not exactly.
Overbaking the Center
The center should wobble slightly when the cheesecake comes out of the oven. If you wait until the middle is completely firm, the cheesecake may become dry or grainy.
Serving Ideas for Any Occasion
For a holiday dessert table, serve this cheesecake with cranberry compote or sugared berries. For a summer party, add fresh strawberries and a spoonful of whipped cream. For a birthday, drizzle with chocolate ganache and scatter chocolate curls over the top. For a dinner party, keep it plain and elegant with a dusting of powdered sugar.
New York-style cheesecake also pairs beautifully with coffee, espresso, black tea, or a small glass of dessert wine. The rich filling loves something bold or slightly acidic on the side to balance its creaminess.
Personal Baking Experience: Lessons from the Cheesecake Trenches
Baking a classic New York-style cheesecake teaches patience in the most delicious way possible. The first lesson is that cheesecake does not like to be rushed. It wants room-temperature ingredients, gentle mixing, a calm oven, a slow cool-down, and a long nap in the refrigerator. In other words, cheesecake has better self-care habits than most adults.
One of the most useful experiences with this recipe is learning how much texture depends on small choices. When the cream cheese is properly softened, the batter becomes smooth almost immediately. When it is too cold, little lumps appear and cling to the whisk like they signed a lease. Those lumps may seem minor, but they can affect the final texture. Letting the ingredients sit out before baking feels like a tiny step, yet it makes the whole process easier.
Another big lesson is that low-speed mixing is your friend. It can be tempting to crank up the mixer and make the batter look fluffy, especially if you are used to baking cakes. But cheesecake is different. It does not need volume; it needs smoothness. The best batter looks glossy, thick, and calm. If the batter has lots of bubbles, the finished cheesecake may puff up like it has exciting news, then sink as it cools.
The water bath can feel intimidating the first time, mostly because nobody wants to place a beautiful pan of cheesecake into hot water and hope for the best. But once you do it, the method makes sense. The steam helps the cheesecake bake gently, and the water protects the edges from cooking too quickly. The key is wrapping the pan well. Two layers of heavy-duty foil are worth the extra minute. A dry crust is a happy crust.
The hardest part of the recipe is not mixing, baking, or slicing. It is waiting. When the cheesecake comes out of the oven, it smells incredible. The top looks creamy, the crust smells buttery, and your brain may begin making bad decisions. Do not listen. Warm cheesecake has not finished setting. The overnight chill transforms it from soft custard into the dense, smooth dessert everyone expects from a real New York-style cheesecake.
Slicing is another place where experience helps. A hot knife wiped clean between slices may seem like bakery fussiness, but it works. Each slice comes out neat, with sharp edges and a creamy interior. If you are serving guests, this one small habit makes the cheesecake look polished. If you are eating alone at midnight, neat slices are still nice, though no one is judging your fork-to-pan strategy.
Finally, this cheesecake is wonderfully flexible. Plain is classic. Strawberry topping is cheerful. Cherry topping feels nostalgic. Salted caramel is rich and dramatic. Chocolate ganache makes it party-ready. Once the base recipe is mastered, toppings become a playground. The most important thing is to keep the cheesecake itself balanced: creamy, tangy, sweet, and smooth. That is the heart of the recipe.
In the end, a classic New York-style cheesecake rewards careful baking without being overly complicated. It is a dessert that asks for patience and gives back elegance, comfort, and the kind of silence that happens when everyone at the table takes the first bite at the same time.
Conclusion
A Classic New York-Style Cheesecake Recipe is one of those desserts every home baker should have in their back pocket. It is rich enough for celebrations, simple enough for beginners who follow the steps carefully, and impressive enough to make people ask whether you secretly bought it from a bakery. The secret is not complicated: use full-fat ingredients, mix gently, bake slowly, cool gradually, and chill overnight.
With its buttery graham cracker crust, creamy filling, subtle tang, and smooth finish, this homemade cheesecake brings classic New York flavor straight to your kitchen. Serve it plain, dress it up with fruit, or go all-in with caramel or chocolate. However you top it, the foundation stays the same: a tall, creamy, unforgettable cheesecake that deserves a spot at the center of the dessert table.
Note: This article is written as original web-ready editorial content. It contains no source-code artifacts, citation placeholders, or unnecessary publishing elements.