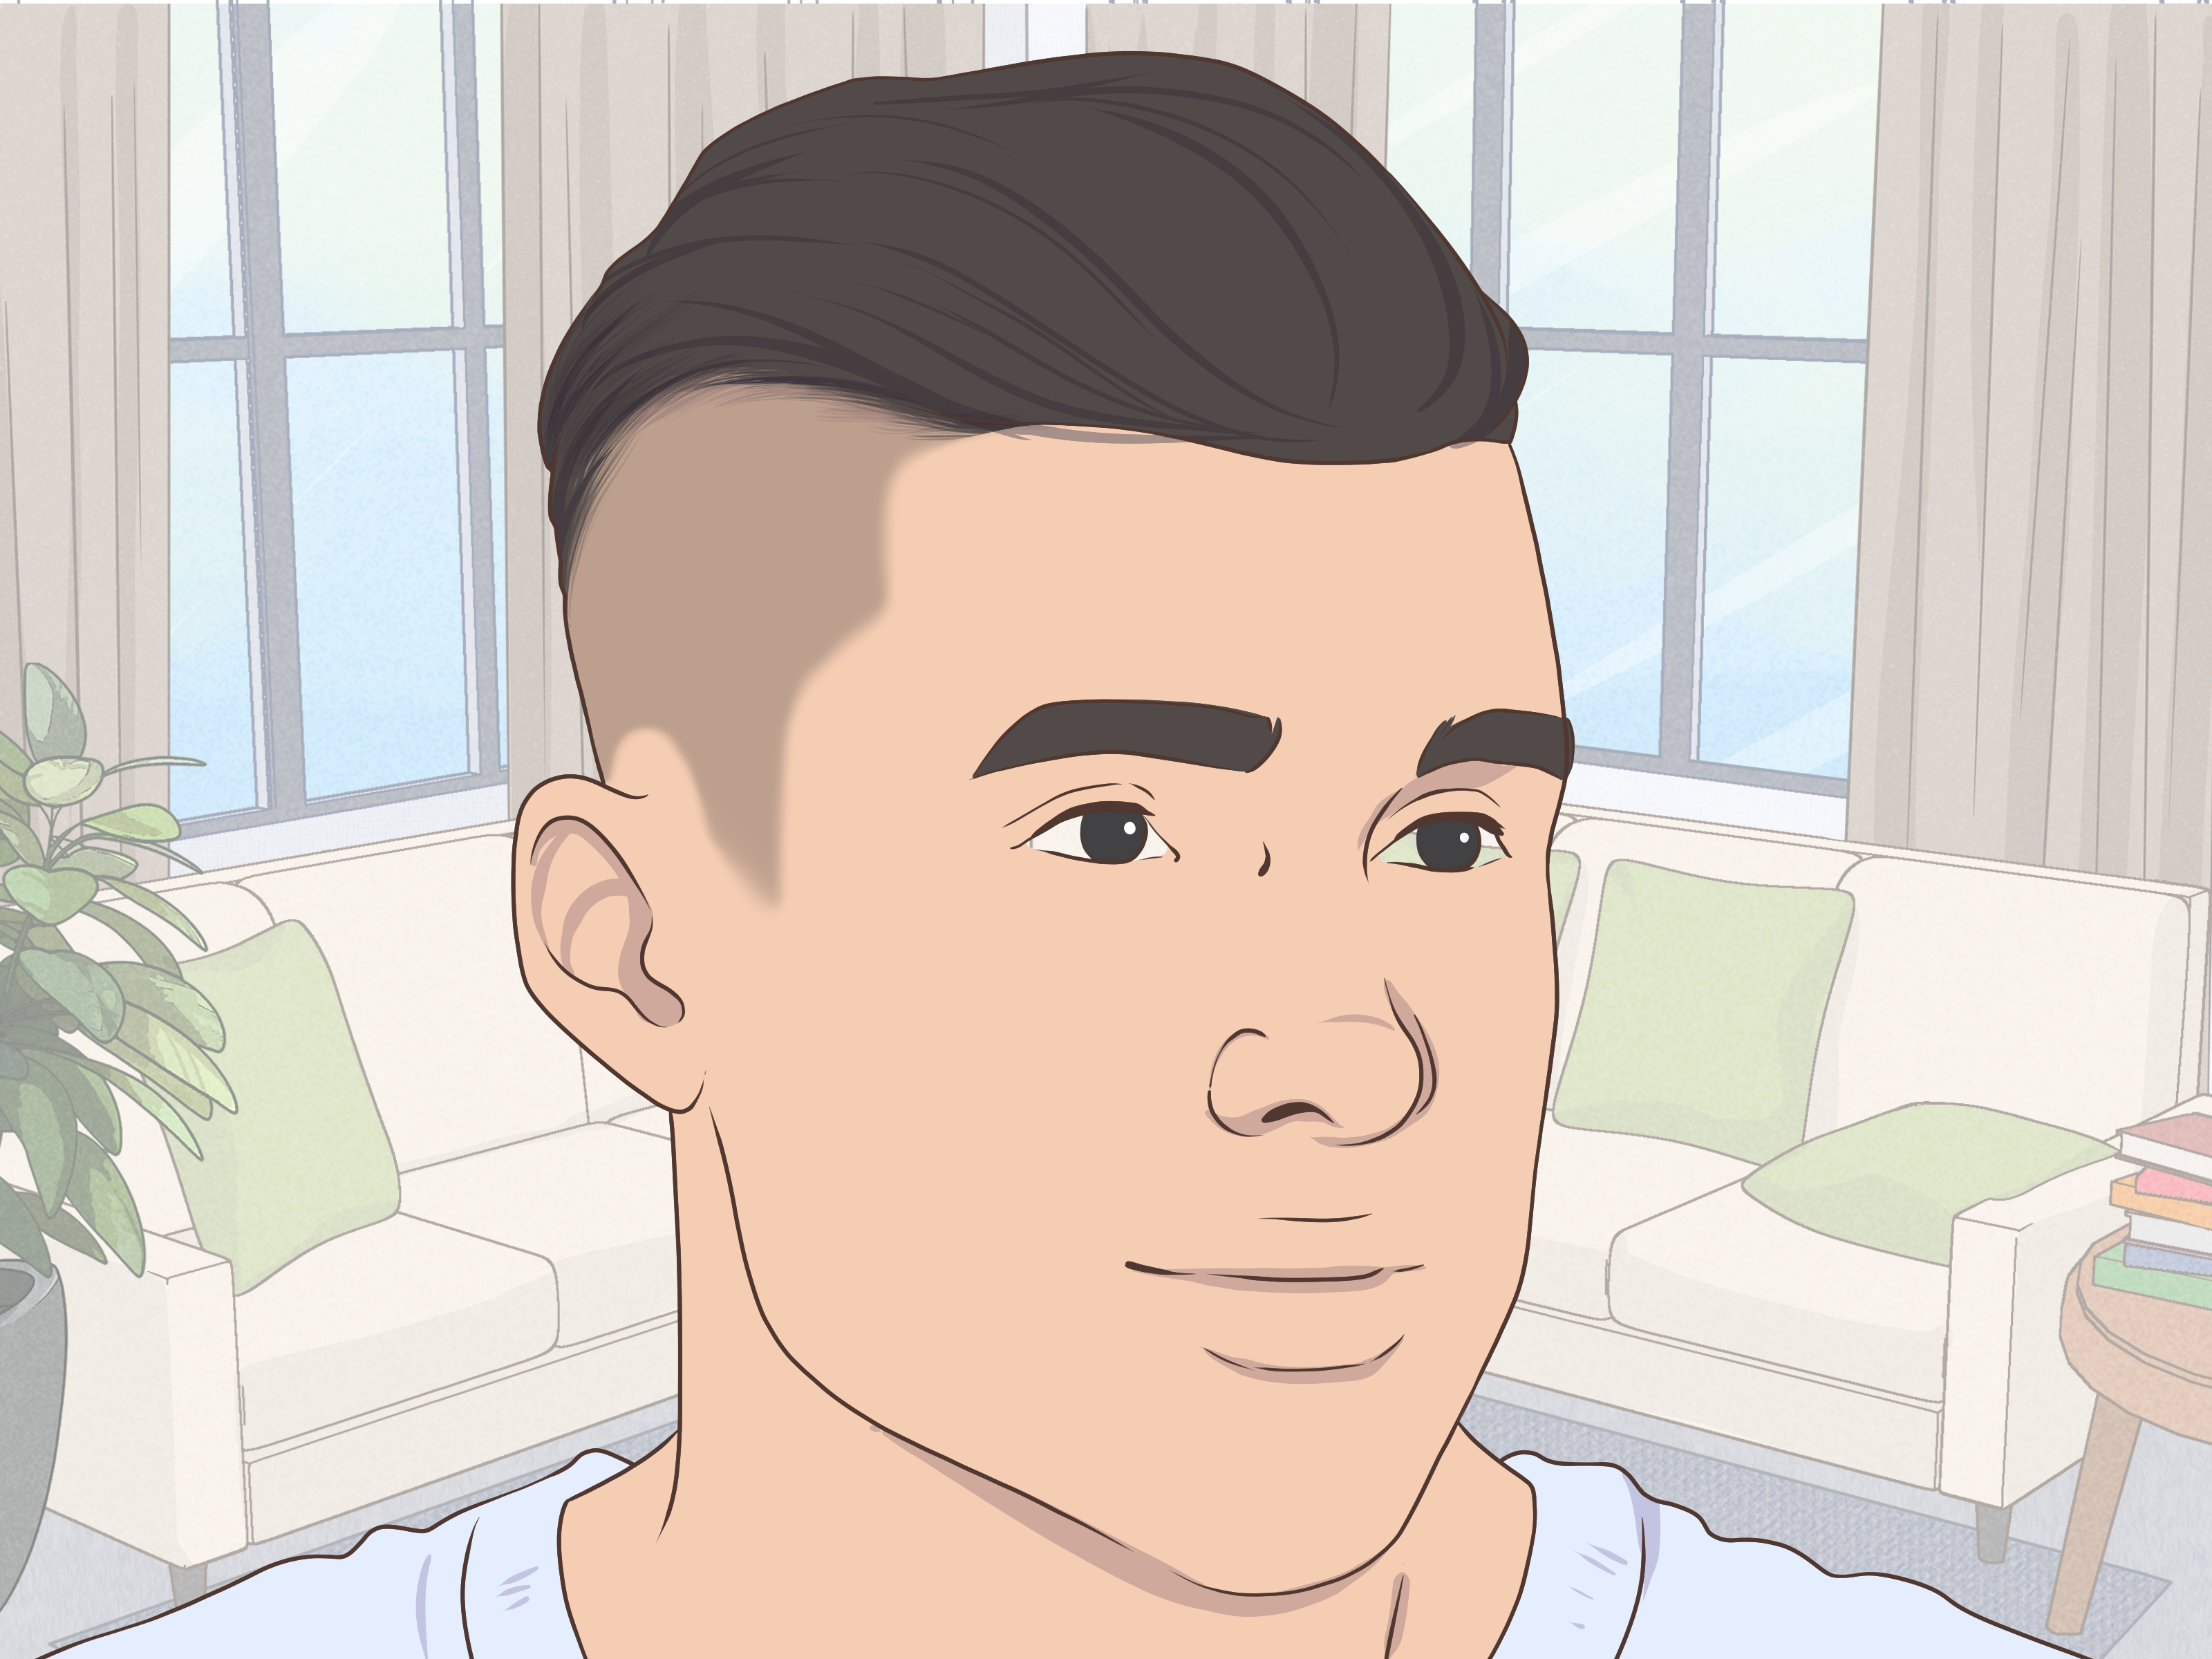
Brad Pitt has worn enough memorable hairstyles to fill an entire barbershop lookbook, but his haircut in Fury remains one of the most requested. As Don “Wardaddy” Collier, Pitt sports a hard-edged, military-inspired undercut with closely cropped sides and a long, slicked-back top. It looks disciplined, rugged, and just untidy enough to suggest that its owner has more important things to do than check a mirror every six minutes.
The style is often called the Brad Pitt Fury haircut, but that is not the technical description you should rely on in the salon. Ask for a disconnected undercut with a long, slicked-back top. Those words give your barber a useful starting point, but photographs, precise length preferences, and an honest discussion about your hair type will produce a much better result.
Here is exactly what to request, how to adapt the cut to your face and hair, and how to style it without making your head look as though it fell into a tub of cooking oil.
What Is Brad Pitt’s Haircut in Fury Called?
The hairstyle is best described as a disconnected slick-back undercut. It combines two recognizable elements:
- An undercut with very short sides and back
- A substantially longer top combed backward with controlled volume
“Disconnected” means the barber does not smoothly blend the long top into the short sides. Instead, there is a visible and intentional contrast between the two sections. That sharp separation gives the haircut its bold silhouette.
The original look also has a subtle pompadour influence. The front is lifted slightly before being directed backward, rather than ironed completely flat against the scalp. It is not a towering rockabilly pompadour, however. The height is controlled, masculine, and practical.
Although the style reflects the 1940s setting of Fury, modern versions often incorporate a fade, taper, or more textured finish. That flexibility is one reason the haircut has survived well beyond the film’s 2014 release.
What to Ask Your Barber or Stylist For
The safest opening request is: “I want a disconnected undercut inspired by Brad Pitt in Fury, with enough length on top to slick it back.”
Then clarify the following details. Barber terminology can prevent misunderstandings, but a clear photograph remains the best translation device ever invented. Bring front, side, and back reference images if possible.
Keep About Three to Five Inches on Top
Ask for approximately three to five inches of length on top, depending on your hair texture and current length. The fringe should generally be longer than the crown so it can travel backward without sticking straight up.
People with straight, cooperative hair may be able to create the shape with around three inches. Thick, wavy, or stubborn hair often needs additional length and careful weight removal. The goal is to let the hair reach backward comfortably while retaining some lift at the front.
Ask the barber to cut the top with scissors and preserve enough weight for a solid slick-back shape. Excessive thinning can create wispy ends and flyaways, while a blunt, overly heavy top may collapse like a wet camping tent. Strategic point-cutting or light internal texturizing usually provides movement without sacrificing control.
Request Short Sides and Back
For a strong interpretation, ask for the sides to be clipped between skin length and a No. 1 guard. A No. 1 guard leaves approximately one-eighth of an inch. If exposed scalp feels too severe, choose a No. 1.5 or No. 2, which creates a softer, more wearable result.
In Pitt’s look, the sides are extremely short and the back is slightly more graduated. You can request:
- Very close or skin-length sides
- A high undercut line around the upper sides of the head
- A softer taper or fade through the back
- Clean edges around the ears and neckline
Guard numbers are useful, but they are not universal promises. Clippers, blades, lever positions, hair density, and barber technique can affect the visible result. Tell the barber how much scalp you are comfortable showing rather than treating one guard number as sacred scripture.
Preserve the Disconnection
This is the defining instruction: do not fully blend the top into the sides. The longer section should sit over the short undercut with a visible change in length.
If you want the strongest resemblance to Wardaddy, ask for a pronounced disconnection. If you need something friendlier for an office, wedding, or parent-teacher conference, request a slightly softened transition around the temples and back. You will keep the general silhouette without looking as though you are reporting for tank duty.
Ask for a Natural, Swept-Back Shape
Pitt’s hair is not merely flattened backward. It has lift at the hairline, subtle direction, and a slightly imperfect finish. Ask the stylist to leave enough length and density for the front to rise before sweeping back.
You can also request a very subtle side direction rather than combing every strand directly toward the back. This often looks more flattering and can help work with a natural part, cowlick, or uneven hairline.
A Copy-and-Show Barber Request
“I’d like a disconnected undercut similar to Brad Pitt’s haircut in Fury. Please leave roughly four inches on top, with extra length through the fringe so I can brush it up and back. Keep the sides very short, around a No. 1, but use a slightly softer taper through the back. I want a visible separation between the top and sides, not a fully blended fade. Please keep enough weight on top for a controlled slick back and add only light texture.”
Adjust the numbers according to your preferences. If this is your first dramatic undercut, starting with a No. 2 can be wise. Hair can always be cut shorter during the appointment. Reattaching it requires technology your neighborhood salon probably has not acquired.
Does the Brad Pitt Fury Haircut Suit You?
The haircut is adaptable, but its high contrast emphasizes the shape of the head, hairline, and face. That does not mean only movie stars can wear it. It means customization matters.
Face Shape
The height and swept-back top can visually lengthen the face. It tends to complement oval, square, and round faces particularly well. Someone with a round face can use more height and tighter sides to create definition. A longer face may look better with less volume and a slightly lower undercut.
For a very angular face, softening the finish with finger styling can prevent the haircut from appearing overly severe. If your forehead is prominent, avoid lifting the front too dramatically. A slightly diagonal sweep may create better balance.
Hair Density and Hairline
Medium-to-thick hair provides the easiest foundation because it creates the solid top seen in the film. Fine hair can still work, although it usually benefits from a volumizing pre-styler, a lighter product, and a less aggressive contrast on the sides.
A slicked-back hairstyle exposes the hairline, so receding corners become more noticeable. That is not automatically a problem; many people wear mature hairlines confidently. If you would rather soften the area, ask for a looser, textured sweep instead of a tight, glossy comb-back.
If your hair is thinning substantially on top, a shorter textured crop may be easier to manage. Heavy pomade can separate fine strands and reveal more scalp, which is not normally the dramatic reveal anyone requested.
Straight, Wavy, Curly, or Coily Hair
Straight hair produces the closest match and is generally easiest to comb into place. Wavy hair adds attractive texture and may create a more relaxed version. Curly or coily hair requires individualized cutting because shrinkage, density, and growth patterns affect how much length is needed.
Instead of forcing textured hair into an exact copy, ask your barber to preserve the character of your natural pattern. A curly slick-back undercut can look excellent, but it may need a moisturizing cream or flexible gel rather than a dense traditional pomade.
How to Style the Fury Haircut at Home
The haircut does much of the architectural work, but styling supplies the finish. Expect to spend about five to ten minutes on the style once you have practiced it.
Step 1: Begin With Clean or Lightly Damp Hair
Wash and condition as appropriate for your scalp and hair type. Towel-blot instead of aggressively rubbing. Hair should be damp, not dripping. Excess water dilutes many products and makes it harder to build volume.
Step 2: Apply a Pre-Styler
Use a small amount of styling cream, mousse, or volumizing spray. Distribute it from the roots through the top. If you will use a blow-dryer, choose a product that provides heat protection.
Fine hair usually needs lightweight volume. Thick or coarse hair may benefit from a smoothing cream that makes the strands easier to direct.
Step 3: Blow-Dry Up and Back
Direct the hair backward using your fingers, a vent brush, or a small round brush. Lift the front at the roots while drying to create controlled height. Follow the direction in which you want the finished hair to sit.
Use moderate or low heat, keep the dryer moving, and avoid holding it directly against the hair or scalp. The idea is to train the shape, not roast the top of your head like a holiday turkey.
Step 4: Add the Styling Product
Start with a pea- or fingernail-sized amount. Rub it thoroughly between your palms, then work it through the hair from roots to ends. Begin near the back of the top section before moving forward; this helps prevent a heavy blob of product from landing at the hairline.
Add more only if necessary. Too much product can remove volume, create buildup, and make the finish look greasy rather than deliberately polished.
Step 5: Comb and Refine
Use a fine-tooth comb for a neat, defined finish or a wide-tooth comb for broader lines and more texture. Comb the hair back while gently lifting the front. Follow with your free hand to control loose strands.
For Pitt’s rugged screen version, break up the perfect comb lines with your fingers. A small amount of wax can tame flyaways. Hairspray is optional and is most useful in humid weather or on hair that likes to stage a rebellion around lunchtime.
Choosing the Right Hair Product
The best product depends on hair type, desired shine, and how firmly the style must stay in place.
| Product | Best For | Typical Finish |
|---|---|---|
| Water-based pomade | Classic slick backs and easy washing | Medium to high shine |
| Wax or clay | Thick hair and a rugged interpretation | Low to medium shine |
| Gel | Maximum hold and very sleek styling | High shine, sometimes firm |
| Styling cream | Fine, wavy, dry, or naturally textured hair | Natural finish and flexible hold |
| Mousse or volume spray | Fine hair needing lift before styling | Lightweight and natural |
A medium- or strong-hold water-based pomade is the simplest starting point. It creates the familiar controlled shine while being easier to wash out than many oil-based formulas. For a modern, touchable result, use a matte paste or clay and style with your fingers.
Maintenance and Growing the Haircut Out
The short sides lose their sharpness quickly. Schedule a cleanup approximately every two to four weeks if you want to preserve the dramatic contrast. The top may need reshaping every four to eight weeks, depending on growth rate and desired length.
Growing out a disconnected undercut can be awkward because the sides must catch up with the much longer top. If you might change styles soon, ask for a softer undercut or blended back. During the growing phase, regular shaping appointments can prevent the sides from expanding into what experts informally call “surprised mushroom territory.”
Frequent product use also makes proper cleansing important. Wash according to your hair and scalp needs, rinse thoroughly, and use conditioner where appropriate. If a styling product causes itching, flaking, or bumps around the forehead, stop using it and try a lighter, noncomedogenic alternative.
Common Mistakes to Avoid
Requesting a Standard Fade
A smooth fade can look excellent, but it changes the defining disconnected structure. Be explicit about whether you want a hard separation, a softened disconnection, or a fully blended modern variation.
Cutting the Top Before It Is Long Enough
If the top does not reach backward, no heroic quantity of pomade will solve the problem. You may need to grow it for several weeks or months before getting the complete cut. Ask the barber for an interim shape that preserves length.
Using Too Much Product
Heavy application flattens volume and produces oily patches. Start small, distribute the product evenly, and build gradually. Your hair should look intentionally styled, not recently rescued from an engine compartment.
Ignoring Growth Patterns
Cowlicks and natural parts influence the final direction. A skilled barber can modify the length and styling path rather than fighting your hair every morning. Mention stubborn areas before the cutting begins.
A Realistic Salon Experience: From Reference Photo to Final Style
Imagine arriving at the salon with a single front-facing photograph of Brad Pitt and announcing, “Give me this.” The barber studies Pitt’s face, studies yours, and briefly considers requesting hazard pay. The problem is not your ambition. It is that one photograph does not show the side, back, undercut height, or transition.
A more successful appointment begins with several reference images. You explain that you like the long swept-back top and close sides but do not want the scalp completely exposed. The barber recommends a No. 1.5 rather than a skin shave and suggests softening the back so the style works in a professional setting. This is not a failure to reproduce the movie haircut. It is the consultation doing its job.
During the cut, the stylist sections the top away from the sides before using clippers. That sectioning is important because it establishes the disconnection. The sides suddenly become much shorter, and for a moment you may wonder whether you have made a terrible cinematic mistake. This is normal. An undercut often looks alarmingly unfinished until the top is released and styled.
The barber then trims the top with scissors, leaving the fringe longer and removing selected bulk from dense areas. Instead of thinning every section, the stylist preserves weight so the hair forms one strong shape when combed back. The back receives a subtle taper to avoid an abrupt shelf.
Next comes the styling demonstration, arguably the most useful part of the appointment. The barber applies a light pre-styler to damp hair, blow-dries it up and back, and adds only a small amount of pomade. You discover that the dryernot a fistful of productcreates most of the volume. That single lesson can save weeks of blaming innocent jars of pomade.
The first morning at home may still be less cinematic. One side lies perfectly while the other points toward the ceiling. You use more product, which makes matters worse. On the second attempt, you restart with damp hair, use less pomade, and spend more time directing the roots with the dryer. The result improves immediately.
After two weeks, the style becomes faster and more natural. You learn whether your hair prefers a fine-tooth comb or a loose finger-combed finish. You also discover that the haircut has multiple personalities: polished with shiny pomade, modern with matte clay, and casual when worn with natural waves.
The most common real-world lesson is that the best Fury haircut is rarely a frame-by-frame replica. It is a tailored version that respects your density, hairline, face shape, lifestyle, and tolerance for morning styling. Brad Pitt supplied the inspiration; your barber supplies the engineering.
Conclusion
To get Brad Pitt’s Fury haircut, ask for a disconnected undercut with very short sides, a softer back, and approximately three to five inches of scissor-cut length on top. Keep the fringe long enough to lift and sweep backward, and specify that you do not want the top fully blended into the sides.
Bring multiple photographs and discuss how closely you want to copy the original. A No. 1 or skin-length side creates the strongest contrast, while a No. 1.5 or No. 2 and a softened transition make the haircut easier to wear. At home, blow-dry the hair into shape before applying a modest amount of pomade, wax, or styling cream.
The result should feel sharp but not costume-like, polished but not plastic, and rugged without requiring access to a Sherman tank.
Note: Hair length, density, curl pattern, growth direction, and hairline can change how this cut appears. Ask your barber to personalize the reference style rather than copying measurements without adjustment.