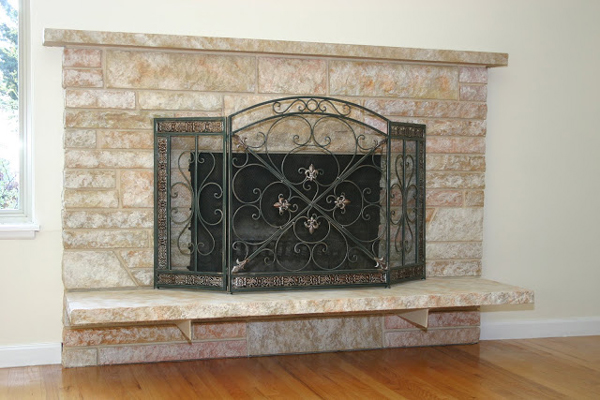
A painted stone fireplace is one of those home features that can inspire two very different reactions. Some people see “cozy cottage charm.” Others see “why did someone paint a mountain?” If your fireplace has been coated in white, gray, black, beige, or an adventurous shade best described as “landlord latte,” restoration can bring back texture, depth, and the rugged character that made stone worth installing in the first place.
Restoring a painted stone fireplace is not just about removing paint. It is about identifying the stone, protecting the room, choosing the least damaging method, cleaning away residue, repairing mortar, and finishing the surface so it looks intentional rather than attacked by a weekend warrior with a scraper and too much confidence. Done carefully, fireplace stone restoration can transform a heavy, flat-looking wall into a natural focal point. Done carelessly, it can scar the stone, spread lead dust, stain the mortar, or create a mess that looks like an archaeological dig in a snow globe.
This guide explains how to restore a painted stone fireplace safely and realistically, whether you are removing latex paint from fieldstone, refreshing a painted stone surround, cleaning soot from masonry, or deciding whether a full strip is even worth the effort.
Why Restore a Painted Stone Fireplace?
Paint can be useful when a fireplace is damaged, stained, mismatched, or visually overwhelming. But paint also flattens the natural variation that makes stone beautiful. Limestone, granite, sandstone, slate, river rock, and manufactured stone all have different colors, pores, edges, and mineral patterns. Once paint covers those details, the fireplace can look more like a drywall sculpture than a masonry feature.
Restoring a painted stone fireplace can improve the room in several ways. It can reveal natural stone color, add texture, increase visual warmth, and make the fireplace feel more permanent and custom. In older homes, removing paint may also uncover original craftsmanship. In newer homes, restoration can correct a trendy paint job that aged about as gracefully as avocado appliances.
However, restoration is not always the right choice. If the stone was painted to hide severe staining, smoke damage, mismatched repairs, or crumbling mortar, stripping the paint may reveal problems rather than solve them. That is not a failure; it is information. A smart fireplace restoration plan begins with inspection, not optimism wearing safety goggles.
Step 1: Identify What You Are Working With
Before buying paint stripper, brushes, or enough plastic sheeting to wrap a small boat, study the fireplace. Stone fireplaces are not all the same. Porous stones such as limestone and sandstone can absorb paint deeply. Harder stones such as granite may release paint more easily from the surface, but rough texture can still trap pigment in crevices. Manufactured stone veneer may be more delicate than natural stone and can lose its colored surface if aggressively scraped or blasted.
Check the stone type
If the surface is rough, layered, or sandy, assume it is vulnerable. If it flakes when scratched lightly with a fingernail or soft wood pick, avoid harsh tools. If it looks like molded concrete with repeated patterns, it may be manufactured stone veneer. In that case, test carefully because the face color may be thin.
Check the paint type
Latex paint is common on interior fireplaces and often softens with modern gel strippers. Oil-based paint can be more stubborn. Multiple coats, primer, limewash, whitewash, or specialty masonry coatings may respond differently. A fireplace painted decades ago may also contain lead-based paint, especially in homes built before 1978.
Check the fireplace function
If the fireplace is wood-burning or gas-burning, treat it as more than decor. Before using it after restoration, inspect the firebox, damper, flue, and chimney. Paint removal does not fix cracked firebrick, creosote buildup, poor draft, loose mortar, or unsafe clearances. A beautiful fireplace that smokes into the living room is not restored; it is just dramatic.
Step 2: Put Safety Before Scraping
Paint removal from stone can create dust, fumes, chips, slurry, and chemical residue. Start with safety, especially in older homes. If your house was built before 1978, assume the paint may contain lead unless testing proves otherwise. Lead-safe practices matter because sanding, grinding, scraping, and demolition can create hazardous dust.
Use a lead test kit or hire a certified lead inspector if there is any doubt. If lead is present, the safest route is hiring a lead-safe certified contractor. If you proceed with a small DIY project in your own home, use containment, avoid dry sanding, wear proper protection, and follow lead-safe cleanup practices. Keep children, pets, and curious relatives who say “I just want to look” out of the work area.
Basic safety gear
For a typical non-lead paint removal project, wear chemical-resistant gloves, eye protection, long sleeves, and a respirator suitable for the products you use. Open windows when weather allows, run ventilation away from occupied spaces, and read every product label. A paint stripper that is safe for wood furniture is not automatically ideal for stone near a heat source.
Avoid dangerous shortcuts
Do not use open flame, heat guns on unknown paint, sandblasting, aggressive grinding, or high-pressure washing indoors. Abrasive cleaning can permanently remove the stone’s surface, leaving it rough, uneven, or oddly pale. Wire brushes can leave metal marks or scratch softer stone. Pressure washing inside a living room is also a fast way to learn humility, mold remediation, and why flooring has enemies.
Step 3: Prepare the Room Like You Mean It
Restoring a painted stone fireplace is messy. Paint stripper can drip, softened paint can smear, and rinse water can carry residue. Protect the room before touching the stone.
Remove fireplace tools, decor, logs, screens, and anything on the mantel. Tape plastic sheeting over nearby walls, built-ins, flooring, and hearth extensions. Lay heavy canvas drop cloths under plastic where people will walk because plastic alone can become slippery. Tape off trim and mantel surfaces. If the mantel is wood, protect it carefully because paint remover may damage the finish.
For the firebox, remove cold ash with a metal shovel and use a shop vacuum with appropriate filtration. Never vacuum hot ash. If you are working around a gas fireplace, turn off the gas supply and follow manufacturer instructions before cleaning or disassembly.
Step 4: Test Before Full Paint Removal
The test patch is the difference between a restoration project and a cautionary tale. Choose a low, hidden, or side area and test your paint removal method on a small square. Observe how the paint softens, whether the stone stains, how much pigment remains in pores, and whether the mortar reacts differently from the stone.
Give the test area time to dry fully before judging the result. Wet stone often looks darker and more successful than it will when dry. If the test patch leaves ghosting, blotchy residue, or a roughened surface, adjust the method before continuing. Sometimes the best restoration is not full paint removal but partial removal, limewash, mineral coating, or a new breathable finish.
Step 5: Choose the Right Paint Removal Method
For most painted stone fireplaces, a gel or paste paint stripper is more practical than liquid solvent. Thick products cling to vertical surfaces and stay active longer. Many modern strippers are designed without methylene chloride, a chemical historically used in strong paint removers but now heavily restricted for consumer paint stripping because of serious health risks.
Gel paint stripper
A gel stripper is often the best starting point for latex or oil-based paint on stone. Apply it thickly with a natural-bristle brush, working it into crevices without scrubbing aggressively. Covering the area with plastic film may help keep the stripper wet and active. After the dwell time recommended by the manufacturer, gently remove softened paint with plastic scrapers, nylon brushes, or wood picks.
Poultice paint remover
A poultice is useful when paint has settled into pores. It combines a cleaning or stripping agent with an absorbent material that draws softened paint out of the stone. Some commercial masonry paint removers use a paste-and-paper system: apply paste, press on the paper, let it dwell, then peel away the coating. This can reduce smearing and help keep residue contained.
Manual detailing
After the main paint layer is removed, small bits will remain in pits, joints, and texture. Use nylon detail brushes, bamboo skewers, wood craft sticks, or plastic picks. Avoid gouging mortar. The goal is not to make old stone look factory-new. The goal is to make it look clean, natural, and cared for.
Step 6: Rinse and Neutralize Properly
Paint removal is not finished when the visible paint comes off. Stone and mortar can hold chemical residue. Follow the stripper manufacturer’s instructions for rinsing or neutralizing. Some products require water washing; others require a specific after-wash. Use as little water as practical, especially indoors, and collect runoff with towels, sponges, and disposable absorbent pads.
Work from top to bottom. Change rinse water often. If residue remains, it may interfere with future sealers, limewash, or mortar repairs. Allow the fireplace to dry thoroughly. Depending on stone porosity, room humidity, and how much water was used, drying may take longer than expected. Stone is very good at looking dry while quietly holding moisture like a grudge.
Step 7: Clean Soot, Smoke, and Old Grime
Once the paint is removed, you may discover soot stains, old wax, dust, or discoloration. Start with the mildest cleaner first. Warm water with a small amount of mild dish soap can remove surface dirt. A soft or medium nylon brush can help reach texture without cutting into stone.
For soot, dry-cleaning sponges can lift carbon residue without adding moisture. These sponges are often used before wet cleaning because wetting soot too early can smear it. For stubborn areas, a baking soda paste may help on durable stone, but always test first. Avoid acidic cleaners such as vinegar on limestone, marble, or other calcium-based stones because acid can etch the surface.
Heavy smoke staining may require a masonry cleaner formulated for fireplace fronts. Use caution with strong alkaline cleaners, ammonia, or TSP substitutes, especially around finished floors and metal fireplace parts. Rinse well and never mix cleaners. The fireplace should look restored, not chemically surprised.
Step 8: Repair Mortar and Small Damage
Paint often hides mortar problems. After stripping, inspect joints for cracks, gaps, sandy areas, or missing sections. Loose mortar should be removed carefully and replaced with compatible mortar. Matching matters. Mortar that is too hard can damage softer stone over time. Mortar that is the wrong color can make repairs look like a dental filling in a family photo.
For older masonry, consider consulting a mason familiar with historic mortar, especially if the fireplace is original to the home. Lime-rich mortar may be more appropriate for some older fireplaces than modern high-strength cement mortar. For newer fireplaces, a standard masonry repair mortar may be suitable, but compatibility with stone type, joint width, and heat exposure still matters.
Small chips in stone can sometimes be softened visually by cleaning and leaving them alone. Not every nick requires repair. Overfilled patches can look worse than honest age. If a stone is cracked, loose, or spalling, bring in a masonry professional before using the fireplace.
Step 9: Decide Whether to Seal the Stone
Sealing a stone fireplace is optional, not automatic. A breathable penetrating sealer may help reduce soot absorption and make future cleaning easier. However, film-forming sealers can change the appearance, add unwanted shine, trap moisture, or discolor near heat. Always choose products rated for masonry and appropriate for the fireplace location.
Do not seal until the stone is completely dry and free of chemical residue. Test the sealer in a hidden spot. If it darkens the stone too much, makes the surface glossy, or highlights blotches, skip it or choose another product. Natural stone does not need to look laminated to be protected.
When Full Paint Removal Is Not Realistic
Sometimes painted stone cannot be fully restored without damage. Paint may have penetrated deeply, especially into sandstone, limestone, mortar, or rough fieldstone. Multiple paint layers can leave shadows even after careful stripping. In these cases, consider alternatives.
Option 1: Soft limewash look
If the original stone looks blotchy after paint removal, a breathable limewash-style finish can create a softer, aged appearance while allowing texture to show. This works especially well when the goal is rustic charm rather than raw stone perfection.
Option 2: Mineral masonry paint
Mineral-based masonry coatings can offer a more natural look than standard latex paint. They bond differently and may be more vapor-permeable, depending on the product. Choose carefully and avoid coating the inside of an active firebox unless the product is specifically rated for that use.
Option 3: Reface the surround
If the stone veneer is damaged or unattractive under the paint, refacing may be smarter than stripping. Stone veneer, tile, plaster, or a new mantel design can update the fireplace while avoiding endless paint removal. This is the “know when to stop digging” option, and it deserves respect.
Common Mistakes to Avoid
The most common mistake is rushing. Paint removal from stone takes time because stone is textured and porous. A second mistake is using tools that are too aggressive. Metal scrapers, wire wheels, sanders, and blasting methods may remove paint quickly, but they can also remove the face of the stone. Once that surface is gone, no amount of inspirational playlist energy will bring it back.
Another mistake is skipping the test patch. Stone can react unpredictably to cleaners and strippers. Some products stain. Some leave residue. Some work beautifully on paint but poorly on mortar. Test first, wait, then decide.
Finally, do not ignore fireplace safety. If the fireplace will be used, schedule a chimney inspection and cleaning as needed. Restoration improves appearance; inspection protects the house.
Estimated Tools and Supplies
A typical painted stone fireplace restoration may require plastic sheeting, painter’s tape, canvas drop cloths, chemical-resistant gloves, eye protection, a respirator, gel paint stripper, natural-bristle brushes, plastic scrapers, nylon scrub brushes, buckets, sponges, microfiber cloths, dry-cleaning soot sponges, mortar repair tools, and disposable bags for waste. For older homes, lead testing and certified professional help may also belong on the list.
Budget varies widely. A small DIY cleanup may cost under a few hundred dollars in supplies. A full professional restoration involving lead-safe containment, chemical stripping, masonry repair, and chimney inspection can cost much more. The fireplace size, paint layers, stone type, location, ventilation, and damage level all influence the final price.
Maintenance After Restoration
After restoring the fireplace, keep it clean with gentle habits. Dust the stone regularly with a soft brush or vacuum brush attachment. Clean soot before it becomes embedded. Burn seasoned wood if the fireplace is wood-burning. Keep the firebox maintained, and do not allow ashes to pile up against masonry for long periods.
Avoid spraying household cleaners directly onto natural stone. Many general cleaners are too acidic, too alkaline, too fragrant, or too mysterious. Use mild soap and water when appropriate, and test any new cleaner in a hidden spot. If you sealed the stone, follow the sealer manufacturer’s maintenance recommendations.
Real-World Experience: What Restoring a Painted Stone Fireplace Actually Feels Like
Restoring a painted stone fireplace sounds charming in the planning stage. You imagine a weekend project, a cup of coffee, maybe some music, and then a grand reveal where the original stone glows like it has been waiting decades for its close-up. The real experience is usually more complicated, but also more satisfying. The first lesson is that paint removal is not one dramatic peel. It is a series of small victories. A patch softens. A groove clears. A stone suddenly shows tan, gray, rust, or charcoal under the paint. Then the next six inches refuse to cooperate, because apparently that section signed a lifetime contract with primer.
One useful experience is learning to slow down. On rough stone, aggressive scraping feels productive for about ten seconds, then you notice scratches, loosened mortar, or a weird shiny spot where the surface has been burnished. Plastic tools and nylon brushes may feel too gentle at first, but they protect the texture. Patience is cheaper than repairing damaged stone.
Another lesson is that mortar and stone rarely clean at the same speed. Paint may lift from the stone face but cling to mortar joints like gum under a school desk. This is where detail work matters. A bamboo skewer, a soft brush, and repeated light passes often work better than one heroic attack. If some paint remains in the deepest pores, that may be acceptable. Natural stone is imperfect. A fireplace with a few traces of age can look authentic, while an over-scrubbed fireplace can look oddly artificial.
Homeowners are also often surprised by color variation. Painted fireplaces hide everything: warm stones, cool stones, patched stones, smoke stains, old repairs, and the one rock that seems to belong to a completely different geological family. Do not panic during the ugly middle stage. Wet stone, chemical residue, and uneven drying can make the fireplace look blotchy. Wait until it dries fully before making design decisions.
The final experience is emotional. A restored stone fireplace changes the room. Furniture looks different around it. The mantel may need restyling. Wall color may suddenly feel too cool or too yellow. That is normal. Natural stone has presence. It does not sit quietly in the background like painted drywall. It becomes part of the architecture again.
The best advice from experience is simple: test first, protect everything, use the gentlest method that works, accept some character, and know when to call a professional. A fireplace restoration project rewards steady hands more than brute force. Treat the stone like a feature worth preserving, not a stubborn object to defeat, and the finished result will have the kind of charm paint can imitate but never quite equal.
Conclusion
Restoring a painted stone fireplace can revive one of the most important focal points in a home. The process requires patience, safety planning, careful testing, and respect for masonry. Start by identifying the stone and paint, check for lead risk in older homes, prepare the room thoroughly, and use gentle paint removal methods such as gel strippers or poultice systems. Clean soot carefully, repair mortar with compatible materials, and consider sealing only when it truly benefits the stone.
The goal is not perfection. The goal is a fireplace that looks natural, safe, and intentional. When restored well, a painted stone fireplace can shift from “why is that wall wearing makeup?” to “has this room always been this beautiful?” That is the quiet magic of good restoration: it makes the best version of the house feel like it was there all along.