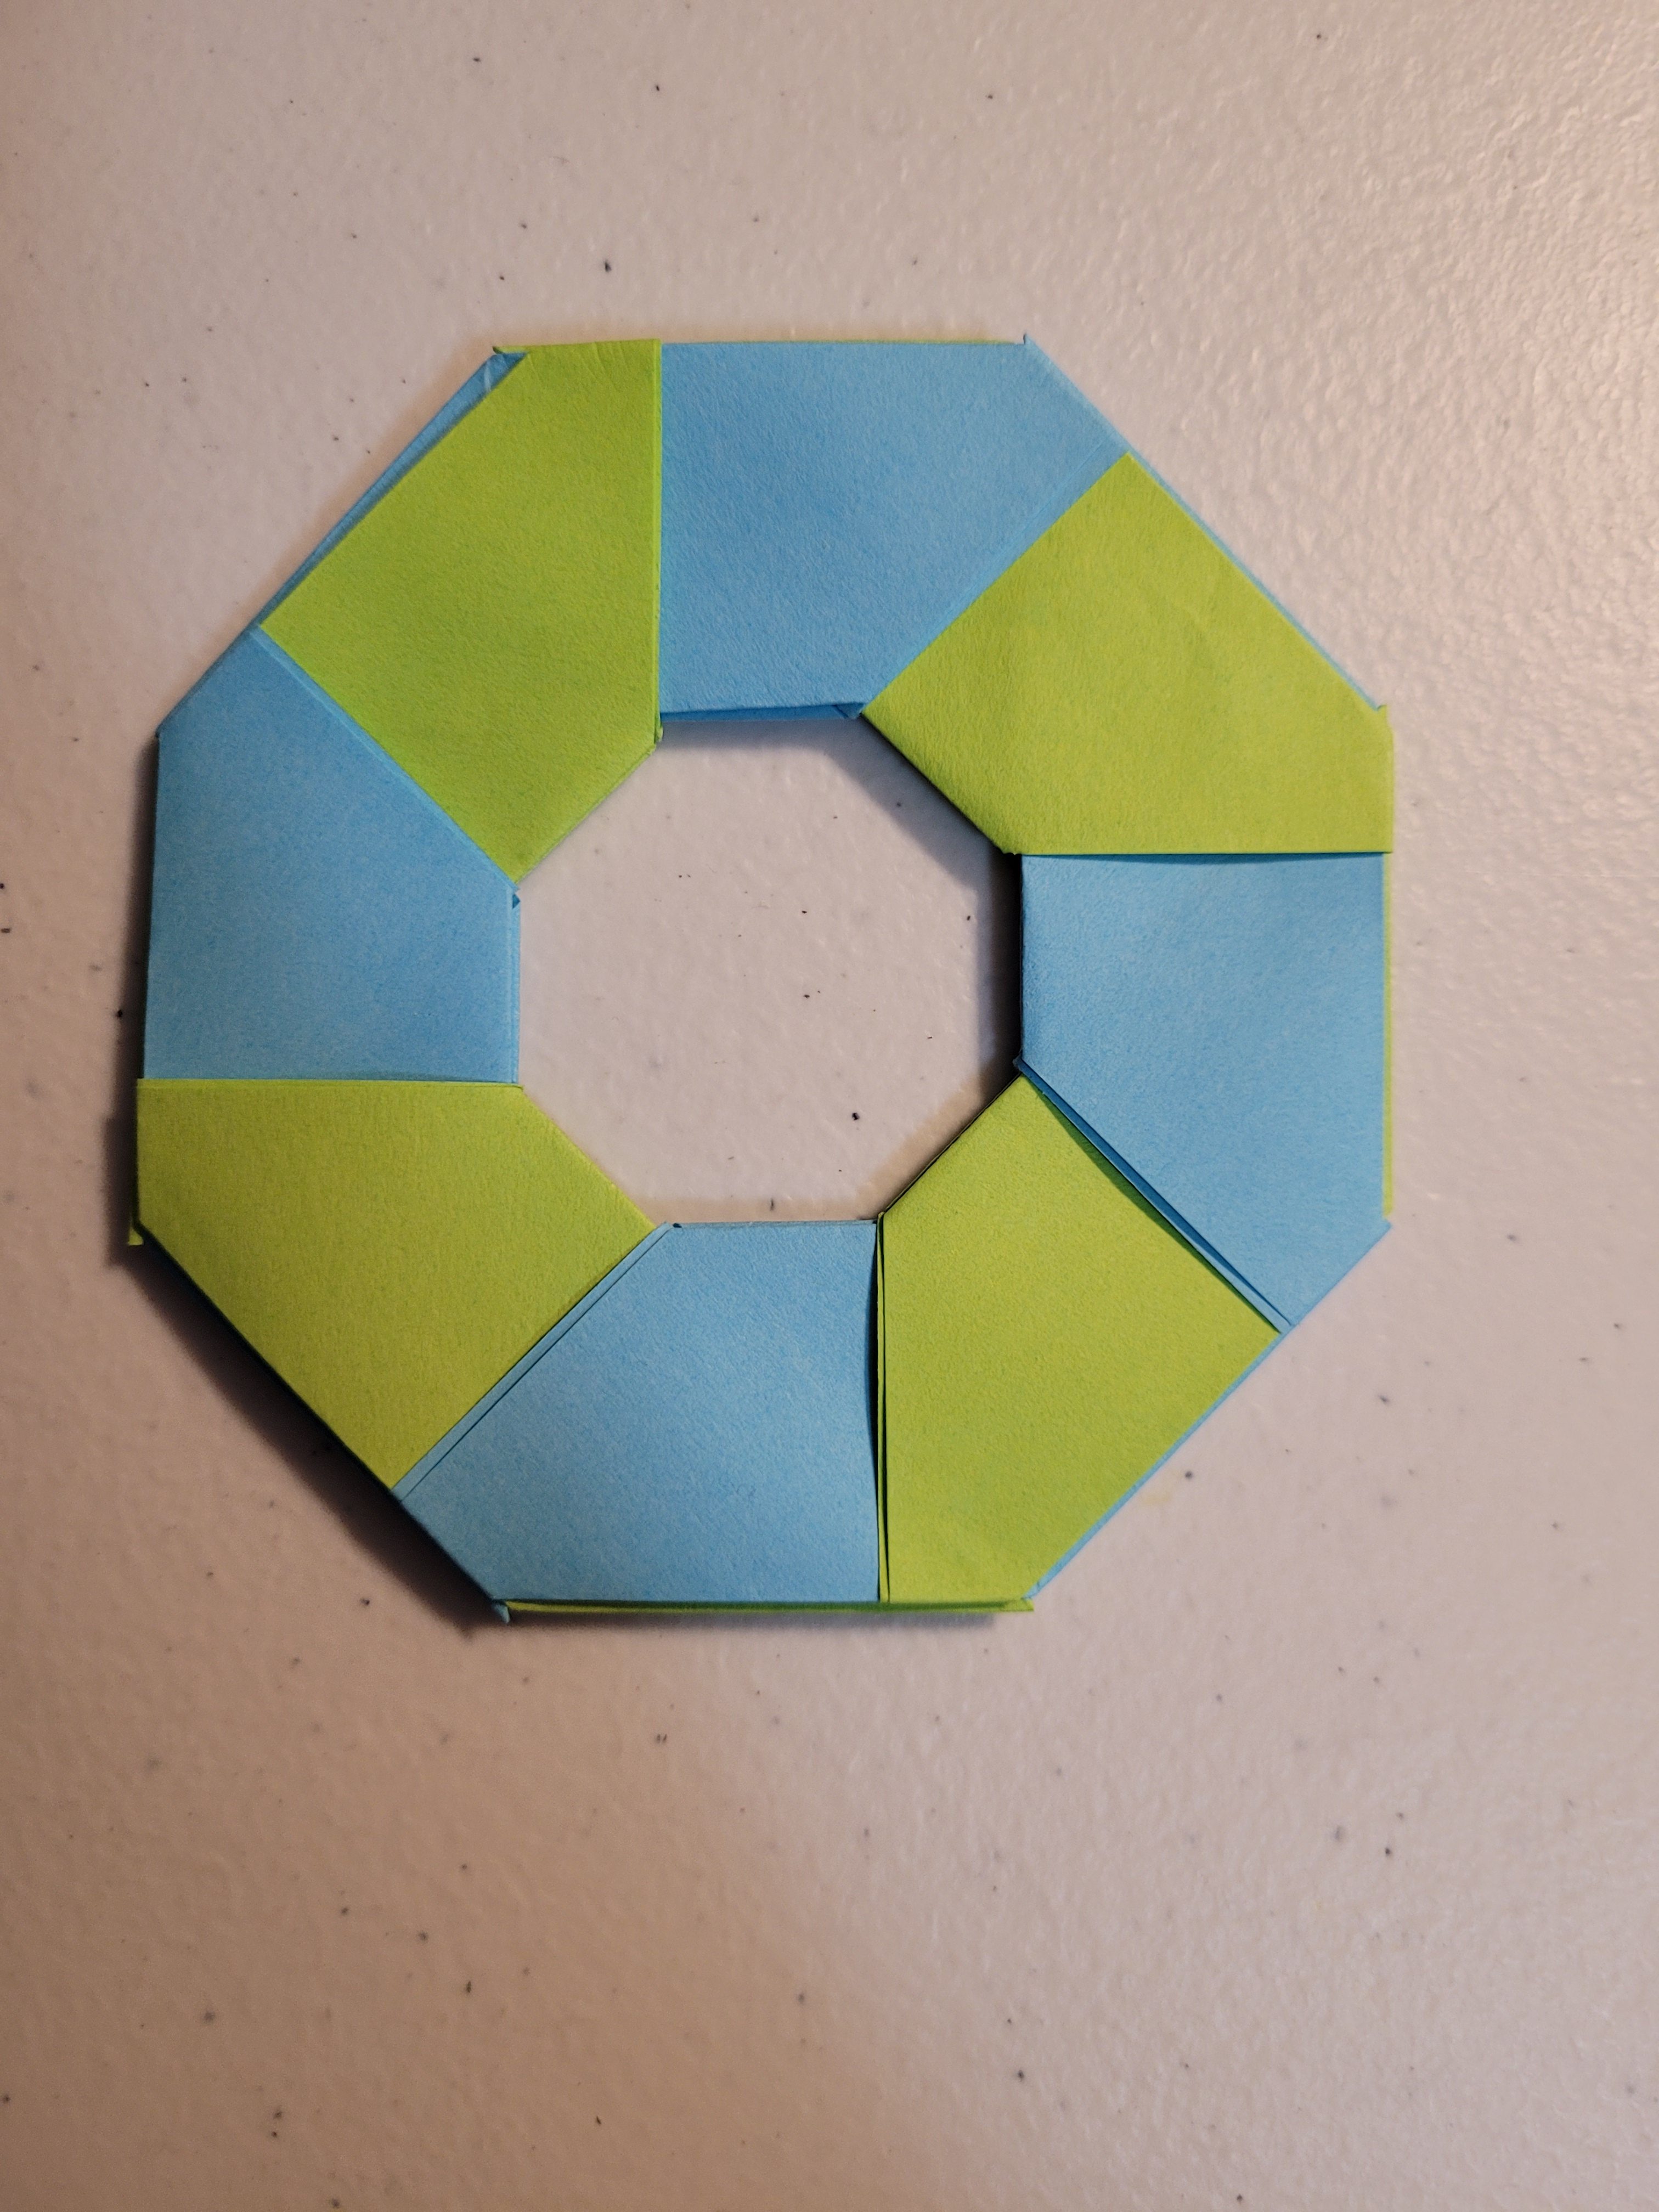
Note: This guide is for paper crafting only. Your finished origami transforming ninja star is a fun desk toy, fidget craft, or classroom projectnot something to throw at people, pets, ceiling fans, or your sibling’s carefully stacked snack tower.
Some origami projects sit quietly on a shelf looking elegant. Others flap, spin, pop, slide, and make you feel like you have unlocked a tiny paper engineering degree. The origami transforming ninja star belongs proudly in the second group. It starts as eight simple folded paper units, joins into a circular ring, and then transforms into an eight-pointed paper shuriken with one smooth push. It is part origami, part puzzle, part “wait, how did paper just do that?” magic trick.
The best part is that you do not need fancy tools, glue, tape, or years of folding experience. You only need eight square sheets of paper, a flat surface, and a little patience while your fingers learn the rhythm. Once you understand the basic module, the project becomes surprisingly relaxing. Fold, crease, repeat, connect, transform. That is the whole dance.
In this easy step-by-step tutorial, you will learn how to make an origami transforming ninja star from small square papers, how to connect the pieces securely, how to make the star open and close smoothly, and how to fix the most common mistakes. Whether you are making this as a rainy-day craft, a school activity, a party favor, or a cool paper toy for your desk, this guide will help you get a clean, colorful result without turning your craft table into a paper crime scene.
What Is an Origami Transforming Ninja Star?
An origami transforming ninja star is a modular paper model made from eight folded units. “Modular” simply means the final design is built from separate pieces that fit together. Each piece is folded the same way, then tucked into the next one until the whole shape forms a loop. When assembled correctly, the model can slide between two shapes: a round ring or wheel and a pointed eight-tip ninja star.
This project is often called a transforming paper ninja star, an 8-point origami ninja star, or a paper transforming shuriken. Unlike a traditional one-piece origami model, this design depends on repetition and accurate assembly. The magic comes from the interlocking pockets and flaps. If the folds are neat and the paper size is consistent, the finished star moves beautifully. If the folds are sloppy, the star may still workbut it may complain like a shopping cart with one wobbly wheel.
Supplies You Need
You do not need much to make this craft, which is one reason it is so popular. Gather these materials before you begin:
- 8 square sheets of paper, all the same size
- A flat folding surface
- Your fingers, preferably attached and ready to crease
- Optional: a ruler or bone folder for sharper folds
Origami paper works best because it is thin, crisp, and already square. A size around 3 inches by 3 inches or 4 inches by 4 inches is comfortable for beginners. Sticky notes can work if they are square, but the sticky strip may make some folds slightly bulky. Printer paper also works if you cut it into eight equal squares, though thicker paper can make the final model harder to transform.
Best Paper for Beginners
For your first transforming ninja star, use lightweight paper with two different colors or patterns if possible. Two-sided color paper makes it easier to see how the flaps and pockets line up. You can use eight different colors for a rainbow star, alternate two colors for a bold pattern, or use one color for a clean, classic look. If your paper is too thick, the finished star may feel stiff. If it is too thin, the points may crumple. Medium-light origami paper is the sweet spot.
Before You Start: Folding Tips That Make a Big Difference
Origami rewards neatness. That does not mean you need robot-level perfection, but the more accurate your folds are, the better your transforming ninja star will move. Line up corners carefully before pressing a crease. Use your fingernail, a ruler edge, or a bone folder to sharpen each fold. Keep every module folded in the same direction so the pieces connect evenly.
Also, do not rush the assembly stage. Many beginners fold the eight pieces correctly, then try to jam them together like they are assembling furniture at midnight. Slow down. Each unit has two points and a pocket area. The next unit slides into that pocket, then the flaps fold over to lock it in place. Once you understand that connection, the rest is repetition.
How to Make an Origami Transforming Ninja Star: Easy Steps
Follow these steps carefully. You will make one folded unit first, then repeat the same folds seven more times. After that, you will connect all eight pieces into the transforming star.
Step 1: Start With One Square Sheet
Place one square sheet of paper on the table. If your paper has a colored side and a white side, start with the colored side facing down. This usually helps the color show nicely on the finished model. Turn the paper so it looks like a diamond, with one corner pointing toward you.
Step 2: Fold Diagonally Both Ways
Fold the top corner down to meet the bottom corner. Crease well, then unfold. Now fold the left corner to the right corner. Crease again, then unfold. You should see an “X” crease pattern across the square. These guide creases help the paper collapse neatly later.
Step 3: Fold the Paper in Half
Turn the paper so it sits like a square again, with a flat edge at the top. Fold the top edge down to meet the bottom edge. Crease firmly, then unfold. Your paper now has diagonal creases and a horizontal center crease. It may not look impressive yet, but neither does cookie dough before the oven. Stay with it.
Step 4: Fold the Top Corners to the Center
Bring the top left corner down toward the center line. Fold it so the top edge lines up neatly with the center crease. Repeat with the top right corner. The top of your paper should now look like a kite or small house roof. Keep the folds sharp and symmetrical.
Step 5: Collapse the Unit
Hold the paper gently and use the existing creases to fold the model inward. The goal is to create a narrow parallelogram-like unit with two pointed ends. One side will have small folded flaps, and the other side will form a pocket area for assembly. If the paper resists, do not crush it. Reopen it slightly, find the creases, and guide them into place.
Step 6: Sharpen the Finished Module
Press the completed unit flat. Make sure the edges are aligned and the point is crisp. This is your first module. Congratulations: you have made one-eighth of the star. That may sound small, but so is one slice of pizza, and we all know how important that is.
Step 7: Make Seven More Identical Units
Repeat the same folding process with the remaining seven square sheets. Try to make every unit as similar as possible. If one is much looser, larger, or folded in the opposite direction, the final ninja star may not transform smoothly. A good trick is to fold assembly-line style: do Step 2 on all eight papers, then Step 3 on all eight, and so on. This keeps your folds consistent.
Step 8: Connect the First Two Units
Take two folded units. Hold the first unit so its pocket area faces you. Slide the pointed end of the second unit into the pocket of the first. The pieces should overlap at an angle, forming the beginning of a ring. Fold the small flaps of the first unit over the inserted point of the second unit to lock it in place.
This connection is the heart of the entire transforming ninja star. The inserted piece should be snug but not strangled. If the joint is too tight, the model will not slide well. If it is too loose, the star may fall apart during transformation. Aim for “secure handshake,” not “paper wrestling match.”
Step 9: Continue Adding Units
Add the third unit by sliding it into the pocket of the second unit. Fold the flaps over to lock it. Continue this process with the fourth, fifth, sixth, and seventh units. You should see a curved chain forming. Keep the colors in your chosen pattern as you go. If you are alternating colors, check the order before locking each piece. Nobody wants to notice a color mistake at the very end, although yes, that is how character is built.
Step 10: Close the Ring With the Eighth Unit
The final connection is the trickiest part because you need to close the loop. Slide the eighth unit into the seventh unit and lock it as usual. Then carefully bring the first unit and the eighth unit together. Tuck the point of the first unit into the pocket of the eighth, or the point of the eighth into the first, depending on how your ring is positioned. Fold the last flaps into place.
Be gentle here. The ring may feel a little awkward until the last connection is secure. Once closed, flatten the model lightly and check that all eight joints are locked.
Step 11: Transform the Ring Into a Ninja Star
Hold opposite sides of the ring with both hands. Slowly push inward toward the center. The points should slide outward and form an eight-point ninja star. To turn it back into a ring, gently pull the points outward or slide the sections back around the circle. Do this a few times to loosen the movement. The first transformation may feel stiff, but the paper usually relaxes after a few careful motions.
Common Mistakes and How to Fix Them
The Star Falls Apart
If your origami ninja star falls apart, the flaps may not be tucked tightly enough. Go around the ring and check every connection. Each unit should be inserted into the next pocket, and the locking flaps should be folded over the inserted point. If one joint is backwards or shallow, the whole star can pop open.
The Star Will Not Transform Smoothly
If the star is stiff, your paper may be too thick or your joints may be locked too tightly. Try loosening each connection slightly. Do not unfold the whole thing unless necessary. Gently wiggle each joint so the paper has room to slide. For your next attempt, use thinner origami paper.
The Points Look Uneven
Uneven points usually come from inconsistent folding. One module may be larger, reversed, or folded with a crooked crease. Compare the uneven section to the others. You can often fix the problem by refolding that single unit and reconnecting it.
The Final Ring Is Hard to Close
This is normal for beginners. The eighth connection has less space to work with because the model is already curved. Bend the ring gently, open the pocket slightly, and slide the last point in a little at a time. Avoid pulling too hard or you may tear the paper.
Creative Ideas for Your Paper Transforming Ninja Star
Once you know the basic technique, you can customize your origami transforming ninja star in many ways. Use red, orange, and yellow paper for a firewheel effect. Try blue and silver for a frosty winter star. Use patterned scrapbook paper for a decorative version, but make sure the paper is not too thick. You can also make a mini version with small squares or a jumbo version with larger paper for display.
For classrooms, this craft works well as a geometry activity because it demonstrates symmetry, rotation, modular construction, and repeated patterns. For families, it is a fun project because everyone can fold a few modules and assemble the final star together. For adults, it makes a surprisingly satisfying desk toy. It is cheaper than most fidget gadgets and much less likely to require batteries, software updates, or a tiny screwdriver you immediately lose.
Safety Tips for Kids and Beginners
Although this project is made from paper, it still has pointed tips. Remind kids not to throw the finished ninja star at people or animals. Use soft, lightweight paper and keep the activity focused on folding, transforming, and decorating. If you are cutting printer paper into squares, adults should help younger children with scissors or paper cutters.
The transforming ninja star is best for kids who can follow multi-step instructions. Younger children may enjoy choosing colors, pressing creases, or helping assemble pieces with guidance. Older kids and teens often enjoy the puzzle-like challenge of making the moving mechanism work.
Why This Origami Project Is So Satisfying
The origami transforming ninja star is satisfying because it gives you a big payoff from simple repetition. You are not folding one extremely complicated sheet into a dragon with eyelashes. Instead, you are making eight manageable pieces and combining them into something that moves. That makes the project feel approachable while still impressive.
It also teaches a useful origami lesson: precision matters, but mistakes are fixable. If one module looks wrong, you do not need to restart the whole project. You can adjust that piece, reconnect it, and keep going. That is a comforting message from a paper toy, honestly. We should all be allowed to refold one awkward section and continue.
Helpful Practice Tips
If this is your first attempt, practice with scrap paper before using your prettiest origami sheets. Make one full star to learn the structure, then make a second one for looks. The second version is almost always cleaner because your hands already understand the folds.
When teaching someone else, fold one module slowly while they watch, then fold another together step by step. After that, let them complete the remaining modules on their own. This keeps the project from feeling overwhelming. It also prevents the classic crafting problem where one person becomes the “folding machine” while everyone else mysteriously disappears for snacks.
Personal Experience: What Making a Transforming Ninja Star Teaches You
The first time many people make an origami transforming ninja star, they underestimate it. It looks like a simple paper toy, so they assume it will be finished in five minutes. Then the eighth unit refuses to connect, one flap pops loose, and suddenly the project becomes a tiny paper negotiation. That is actually part of the fun. This model teaches patience without feeling boring, because every step brings you closer to a moving object you can actually play with.
One of the best experiences with this craft is choosing the colors. A single-color ninja star looks clean and sharp, but using multiple colors makes the transformation easier to see. When the ring slides into a star, the colors rotate and overlap in a way that feels almost animated. A rainbow version is especially fun because each point becomes its own little character. The red point is bold, the blue point is calm, the yellow point is probably talking too muchyes, paper can have personalities if you stare at it long enough.
Another memorable part is the moment the star transforms for the first time. During assembly, the model may look like a lumpy bracelet. You may wonder if you made a mistake. Then you push the sides inward, and the points suddenly appear. It is a small “aha!” moment, but it feels fantastic. That transformation is why this project is so popular. It is not just something you look at; it is something you operate.
This craft is also great for learning how to recover from mistakes. If a unit is backwards, the star will tell you immediately by refusing to behave. If a crease is weak, the connection may slip. If the paper is too thick, the model may move like it just woke up from a nap. Each problem has a clear fix, which makes the process less frustrating. You learn to observe, adjust, and try again.
For families or classrooms, the transforming ninja star becomes even more enjoyable when everyone contributes. One person can fold two red units, another can fold two blue units, and someone else can handle the final assembly. This turns a solo origami project into a teamwork activity. The finished star feels shared, not just made. And because the design uses eight repeated units, it gives beginners plenty of practice without forcing them to learn eight different complicated folds.
There is also something calming about the repetition. Folding the same module eight times gives your hands a rhythm. By the fourth or fifth unit, you stop overthinking. The creases become familiar. The paper starts cooperating. That is the quiet charm of origami: a flat square becomes a structure because you paid attention to it. No screens, no glue, no batteriesjust folds, focus, and maybe a little dramatic sighing when the last pocket refuses to open.
After making a few transforming ninja stars, you may find yourself experimenting. What happens with smaller paper? What if every other piece is patterned? Can you make a giant one from construction paper? Some experiments work better than others, but each one teaches you something about paper thickness, friction, and symmetry. That is why this project is more than a quick craft. It is a hands-on lesson in design, movement, and problem-solving disguised as a cool paper ninja star.
Conclusion
Learning how to make an origami transforming ninja star is a fun way to practice paper folding while creating something interactive. With eight square sheets, careful creases, and patient assembly, you can build a paper toy that shifts from a ring into an eight-pointed star and back again. The key is consistency: fold every unit the same way, connect the pockets and flaps securely, and loosen the joints gently until the star moves smoothly.
This project is perfect for beginners who want a challenge, kids who enjoy hands-on crafts, teachers looking for a geometry-friendly activity, or anyone who needs a satisfying paper project that does more than sit there looking pretty. Make one, transform it a few times, then make another in better colors. That is how origami gets you: first one star, then suddenly your desk looks like a tiny paper galaxy.