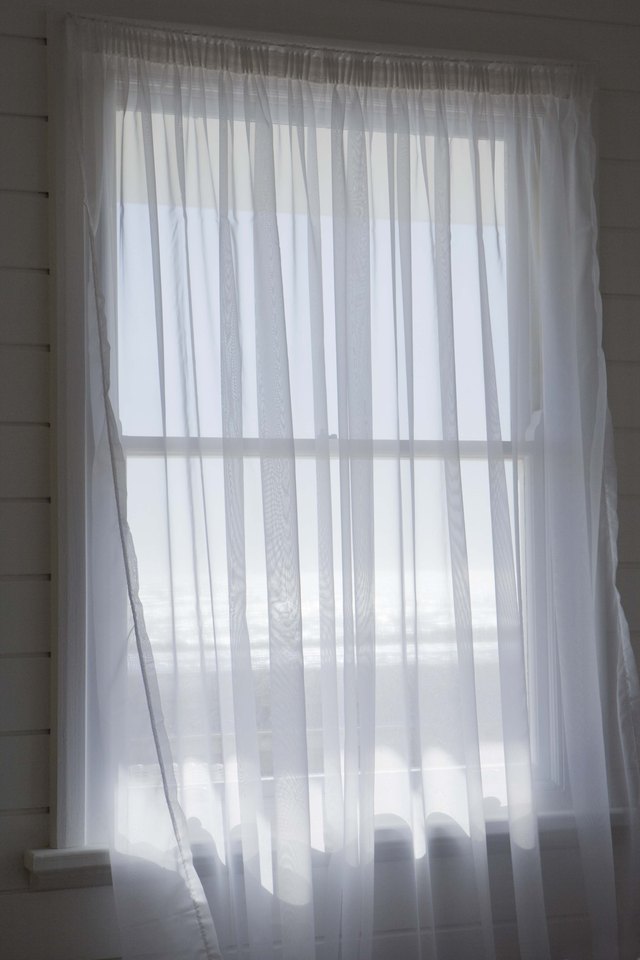
Curtains are supposed to frame a window, soften a room, and make your home look intentionally designednot like the fabric gave up halfway down the wall. Yet even beautiful curtain panels can hang crooked, flare at the bottom, bunch at the top, or lean like they are quietly tired of their job.
The good news? Making curtains hang straight is not magic. It is a mix of accurate measuring, level hardware, the right curtain length, proper fullness, wrinkle removal, and a little “curtain training.” Yes, curtains can be trained. They are basically fabric pets, only less noisy and much better at privacy.
In this guide, you will learn how to make the curtain hang straight from the rod to the hem, whether you are working with grommet curtains, rod-pocket panels, pinch pleats, back tabs, sheers, blackout curtains, or heavy drapes. We will cover the common mistakes, practical fixes, and small finishing tricks that make ordinary curtains look custom.
Why Curtains Do Not Hang Straight
Before fixing the problem, it helps to know what is causing it. Crooked curtains usually come from one or more of these issues: an uneven curtain rod, brackets installed at different heights, fabric wrinkles, panels that are too narrow, hems that are not level, uneven floor surfaces, or curtains that have not had time to settle.
Sometimes the curtain itself is innocent. The wall may be uneven. The ceiling may slope. The floor may dip. Older homes, especially charming ones with “character,” often have surfaces that are not perfectly square. Translation: your curtain may be straight, but the room is doing interpretive dance.
Start With a Level Curtain Rod
If the rod is not level, the curtain will never hang straight. No amount of steaming, tugging, pleading, or dramatic sighing will fix a crooked rod. The rod is the foundation of the entire window treatment.
Measure From the Same Reference Point
Do not measure one bracket from the ceiling and the other from the window frame unless you know both are perfectly level. They often are not. Pick one reference point and stick with it. In many homes, the window frame is more reliable than the ceiling, but you should still confirm with a level.
Mark the bracket positions with a pencil. Use a tape measure to check both height and distance from the window edges. Then use a level or laser level to confirm the marks line up horizontally. This extra minute prevents the classic “why does one curtain look taller?” mystery.
Mount the Rod High Enough
For most rooms, hanging the curtain rod about 4 to 6 inches above the window frame creates a balanced look. If you want the room to feel taller, you can mount the rod closer to the ceiling, especially when using longer panels. The key is consistency: both brackets must be placed at the same height.
Extend the Rod Beyond the Window
A curtain rod that barely covers the window can make panels bunch awkwardly and block too much light. Extending the rod several inches beyond each side of the window gives the curtain fabric room to stack when open and helps the panels fall in cleaner vertical lines.
As a practical rule, add several inches to each side of the window width. Wider windows and heavier curtains usually need more extension. This creates a fuller, more polished appearance and keeps the fabric from crowding the glass.
Choose the Right Curtain Width
One of the biggest reasons curtains hang badly is not the rod, the wall, or your drill. It is the curtain width. Panels that are too narrow look stretched and stiff. They do not form natural folds, so they often hang like flat bedsheets with ambition.
For a full, straight look, the total curtain width should usually be about 1.5 to 2 times the width of the window or rod area. Sheer curtains often look best with even more fullness because thin fabric needs extra volume to create graceful folds.
Example: Measuring Curtain Fullness
If your curtain rod spans 60 inches, your combined curtain panel width should usually be at least 90 to 120 inches. That might mean two 50-inch panels for a simple look or two wider panels for a fuller designer effect.
When curtains have enough width, the folds fall more evenly. The panels also look intentional when closed instead of stretched tight across the window like they are guarding a secret.
Get the Curtain Length Right
Curtain length has a huge effect on whether panels look straight. If the curtains are too short, they can look awkward and unfinished. If they are too long, they may drag, fold, twist, or collect dust like a very fancy broom.
The Three Main Curtain Length Styles
Floating curtains stop about half an inch above the floor. This is clean, practical, and easy to maintain. It is a great choice for curtains that open and close often.
Breaking curtains touch the floor slightly. This creates a relaxed, soft look without too much extra fabric.
Puddled curtains extend several inches onto the floor. This can look luxurious in formal rooms, but it requires more maintenance and works best with fabric that drapes beautifully.
If your goal is to make curtains hang straight, floating or lightly breaking lengths are usually easiest. Puddled curtains can be gorgeous, but they naturally create folds at the bottom, so they will not appear as crisp.
Measure From the Rod, Not the Window
Always measure curtain length from the actual rod position to the desired endpoint near the floor. Do not measure from the top of the window unless the rod is already installed there. A small measuring mistake at the top can become a very obvious problem at the bottom.
Check the Hardware Type
The way curtains attach to the rod affects how straight they hang. Grommet panels, rings, clip rings, pleating hooks, rod pockets, and back tabs all behave differently.
Grommet Curtains
Grommet curtains are easy to hang and naturally create large, even waves. To make them hang straight, arrange each fold in the same direction from top to bottom. The first and last folds should face the wall for a neat edge.
Rod-Pocket Curtains
Rod-pocket curtains slide directly onto the rod. They can look casual and soft, but they sometimes bunch unevenly. If they refuse to hang straight, consider adding clip rings or hidden drapery pins to improve movement and spacing.
Back-Tab Curtains
Back-tab curtains create a tailored look, but they need careful spacing. Spread the tabs evenly across the rod and gently pull each vertical fold into place after hanging.
Pleated Curtains
Pleated curtains usually hang the straightest because the folds are built into the construction. For the best result, insert hooks at the same height on every pleat and use matching rings. Uneven hook placement can make one section sit higher than another.
Steam or Iron the Curtains Before Judging Them
New curtains often arrive folded tightly in packaging. Those creases can make panels twist, flare, or hang unevenly. Before blaming your wall, your rod, or your life choices, remove the wrinkles.
Check the care label first. Some curtains can be ironed on a low setting, while others should only be steamed. Delicate sheers, velvet, linen blends, and blackout-lined panels may require extra care.
How to Steam Curtains While Hanging
Hang the curtains first, then use a handheld steamer from top to bottom. Work slowly in vertical sections. Hold the fabric gently with one hand while steaming with the other, keeping your fingers safely away from the steam. Let gravity help pull the fibers into place.
After steaming, do not immediately tie the curtains back. Let them cool and dry while hanging naturally. Fabric often relaxes over several hours, and the panels may look straighter the next day.
Train the Curtain Folds
Curtain training is the secret step many people skip. It simply means helping the fabric learn where to fold. This is especially useful for new curtains, heavy drapes, linen panels, and grommet curtains.
Simple Curtain Training Method
First, hang the curtains and arrange the folds evenly from top to bottom. Next, use your hands to shape each fold into a clean vertical line. Then loosely tie the curtain in several places using soft fabric strips, ribbon, or wide bands. Do not use anything tight enough to leave dents.
Leave the curtains tied for 24 to 72 hours. When you remove the ties, the folds should fall more naturally. Think of it as sending your curtains to finishing school.
Use Weights for Stubborn Curtains
If the bottom of the curtain flares outward, twists, or refuses to stay vertical, curtain weights can help. Some curtains already have small weights sewn into the hem. If yours do not, you can add them.
Drapery weights are small, flat weights placed inside the bottom hem or at the side seams. They encourage the fabric to fall downward instead of curling or swinging. They are especially helpful for lightweight curtains, outdoor curtains, sheer panels, and curtains near vents.
Where to Place Curtain Weights
Start with the bottom corners. If the whole panel is misbehaving, add additional weights evenly across the hem. Do not overdo it. Too much weight can distort delicate fabric or pull seams out of shape.
Fix Uneven Hems
Sometimes curtains hang crooked because the hem is not straight. This can happen with budget panels, handmade curtains, washed fabric, or panels that stretched unevenly over time.
To check the hem, hang the curtains and let them settle. Measure from the rod or ring bottom to the hem at several points across each panel. If the measurements vary, the hem may need adjustment.
Quick Hem Fixes
If the curtains are too long, use iron-on hem tape for a no-sew solution. If you sew, create a new hem after measuring carefully from the top attachment point. For expensive or lined drapes, professional hemming is often worth it because a small mistake can be very visible.
When hemming, measure while the curtain is hanging if possible. Floors are not always level, so measuring flat on a table may produce a technically straight hem that looks uneven in the actual room.
Make Sure the Brackets Are Strong Enough
Heavy curtains can sag if the rod is too thin or the brackets are weak. A sagging rod makes curtains dip in the middle, even if the side brackets are level.
For wide windows, heavy blackout curtains, velvet drapes, or lined panels, use a sturdy rod and consider a center support bracket. If mounting into drywall, use proper wall anchors. If possible, mount brackets into studs for better support.
Space Rings and Hooks Evenly
Uneven ring spacing makes curtains hang in random waves. For a clean look, count the rings or hooks and distribute them evenly across the panel. The spacing does not need to be measured with scientific seriousness, but it should be consistent enough that the folds look balanced.
If using clip rings, place the clips the same distance apart. If the fabric slips or droops between clips, use more clips. Lightweight fabric may need closer spacing than thick fabric.
Watch Out for Air Vents and Furniture
If curtains hang straight when still but swing, billow, or twist during the day, look nearby. Air vents, ceiling fans, open windows, radiators, furniture, and pets can all interfere with the drape.
Move furniture slightly away from the curtain so the fabric can fall freely. Redirect air vents if possible. For curtains near doors or drafty windows, bottom weights or holdbacks may help keep panels in place.
How to Make Different Curtain Fabrics Hang Straight
Linen Curtains
Linen has a relaxed, natural texture. It may never look perfectly stiff, and that is part of its charm. Steam linen curtains, train the folds, and accept a little movement. Trying to make linen behave like hotel drapery is a recipe for emotional damage.
Velvet Curtains
Velvet is heavy and elegant, but it can crush or mark easily. Steam from the back if the care label allows it, avoid pressing the pile directly, and use strong hardware.
Sheer Curtains
Sheers need fullness to hang beautifully. If they look skimpy or uneven, the problem is often not wrinkles but too little fabric. Use extra-wide panels and gentle steaming.
Blackout Curtains
Blackout curtains can be stiff because of their lining. They may need steaming, training, and a strong rod. Avoid sharp folds when storing them because deep creases can be stubborn.
Step-by-Step: How to Make Curtains Hang Straight
Step 1: Remove the Curtains and Inspect Everything
Take the panels down and check the rod, brackets, rings, hooks, hems, and fabric. Look for loose screws, bent rods, uneven clips, twisted lining, or obvious wrinkles.
Step 2: Recheck the Bracket Height
Use a level to confirm that the brackets are even. If they are not, adjust them before doing anything else. Straight fabric cannot overcome crooked hardware.
Step 3: Confirm the Rod Is Not Sagging
If the rod dips in the center, add a center support bracket or upgrade to a stronger rod. This is especially important for wide windows and heavy curtains.
Step 4: Steam or Iron the Panels
Remove packaging creases and wrinkles according to the care label. Steam vertically for the most natural drape.
Step 5: Hang and Arrange the Folds
Put the curtains back on the rod. Space rings, hooks, tabs, or grommets evenly. Shape the folds by hand so they run straight from top to bottom.
Step 6: Train the Curtains
Loosely tie the arranged folds for one to three days. Remove the ties and let the curtains fall naturally.
Step 7: Add Weights or Adjust the Hem
If the bottom still flares or twists, add drapery weights. If the hem is visibly uneven, remeasure and hem the panels properly.
Common Mistakes That Make Curtains Look Crooked
The first mistake is hanging the rod too low. Low rods can make windows look smaller and panels look cramped. The second mistake is using curtains that are too narrow. Without fullness, curtains cannot form clean folds. The third mistake is ignoring the floor. A floor that slopes slightly can make a perfectly measured curtain appear uneven.
Another common mistake is washing curtains and immediately rehanging them without reshaping. Fabric can shrink, twist, or stretch after washing. Always follow the care label and reshape the panels while damp if the fabric allows it.
Designer Tricks for a Straighter, More Expensive Look
Hang curtains higher and wider than the window when the room allows it. Choose panels with enough fullness. Use rings or pleating hooks for smoother movement. Match the rod finish to other hardware in the room for a cohesive look. Most importantly, make the left and right sides symmetrical.
For multiple windows in one room, mount rods at the same height whenever possible. Even if the windows are slightly different sizes, consistent rod height helps the room feel calmer and more designed.
Experience-Based Tips: What Actually Works in Real Homes
After helping with many curtain installations, one lesson becomes obvious: the problem is rarely just one thing. A curtain that looks crooked often has three small issues working together. The rod is a little low, the panel is a little wrinkled, and the floor is a little uneven. None of those problems seems dramatic alone, but together they create the visual effect of a curtain that had a long day.
The most reliable fix is to slow down during the measuring stage. Many people rush because hanging curtains feels like a quick weekend task. Then they spend the next year noticing that one side is half an inch off. Measure twice, mark lightly, step back, check with a level, and only then drill. The drill should be the final act, not the opening scene.
Another experience-based tip is to hang curtains before hemming them. This matters because real rooms are not perfect. The floor may slope near one corner, or the rod may sit slightly differently once the weight of the curtains is on it. If you hem panels flat on the floor before testing them in place, you may get a beautiful hem that looks wrong after installation. Hang first, let the fabric relax, then mark the final length.
Steaming is also more powerful than many people expect. New curtains can look disappointing right out of the package, especially linen, polyester, and blackout panels. They may appear cheap, stiff, or uneven. After a careful steaming session, the same curtains often look softer, longer, and more expensive. It is like giving them coffee and a pep talk.
For lightweight curtains, small weights can make a surprisingly big difference. Sheer panels near a window, door, fan, or air vent often move too much to stay straight. Adding weights at the lower corners helps the fabric fall vertically. This is especially helpful for balcony doors and outdoor curtain setups where air movement is constant.
For heavy drapes, the hardware matters more than people think. A thin tension rod or weak bracket may work for a week, then slowly sag. Once the rod bows, the curtain line looks uneven no matter how carefully the panels are arranged. Use a rod that matches the fabric weight, and do not skip the center bracket on wide spans. Curtains are decor, but gravity is still in charge.
One of the simplest tricks is to train the folds. Arrange the curtain exactly how you want it, then loosely tie the folds in place for a couple of days. This works especially well with grommet curtains and pleated drapes. When the ties come off, the fabric usually remembers the shape. Not perfectly, of coursecurtains are not robotsbut enough to look cleaner and more intentional.
Finally, avoid judging the finished look too quickly. Curtains often need a day or two to settle after steaming, hanging, or hemming. Fabric relaxes under its own weight. Folds soften. Minor wrinkles release. If the rod is level and the length is right, patience can finish the job. Sometimes the best tool in the curtain toolbox is not a drill, steamer, or measuring tape. It is leaving the room and coming back tomorrow.
Conclusion
Making curtains hang straight is not about one secret trick. It is about building a straight system from top to bottom: level brackets, a sturdy rod, enough panel width, correct length, smooth fabric, even folds, and proper support. When these details work together, curtains stop looking random and start looking custom.
Start with the hardware. Confirm the rod is level and strong enough. Then check the fabric. Steam wrinkles, train folds, add weights if needed, and adjust hems only after the panels have settled. With a little patience, your curtains can hang straight, frame the window beautifully, and make the whole room look more polished.