If summer camp had a Hall of Fame, the candy stripe friendship bracelet would already have a bronze bust, a snack bar named after it, and at least one dramatic documentary narrated by a very emotional craft store employee. This bracelet is a classic for a reason: it is colorful, easy to learn, ridiculously portable, and forgiving enough for beginners who still occasionally tie knots like they are wrestling tiny spaghetti. If you have embroidery floss, scissors, and a little patience, you can make a bracelet that looks cheerful, handmade, and just polished enough to earn compliments from friends, siblings, coworkers, and random people who enjoy staring at wrists.
The candy stripe friendship bracelet is one of the best starting points for anyone learning how to make friendship bracelets. It creates neat diagonal lines, uses a repeating pattern that quickly becomes muscle memory, and does not require you to master an entire encyclopedia of knotting techniques on day one. In plain English, this means you get maximum “Wow, you made that?” energy with minimum “Why is this string trying to ruin my life?” frustration.
In this guide, you will learn exactly how to make a candy stripe friendship bracelet step by step, what supplies to use, how long to cut your string, how to avoid common beginner mistakes, and how to finish your bracelet so it actually looks like a bracelet instead of a colorful mystery rope. You will also get practical tips for choosing colors, fixing curling, and making the process more fun, because crafting should feel more like a vibe and less like a final exam.
Why the Candy Stripe Friendship Bracelet Is Perfect for Beginners
The candy stripe pattern is basically the training wheels of the friendship bracelet universe, but in the best possible way. It gives you a clean diagonal stripe design while teaching one of the most important bracelet-making skills: the forward knot. Once you understand that knot and how the working string travels across the row, the pattern starts to click. Suddenly, what looked like craft sorcery becomes a simple rhythm.
Another reason people love this bracelet is flexibility. You can make it narrow with just a few strands, or wider with more colors. Want a quick afternoon project? Use four strands. Want a chunkier bracelet that looks like it came straight out of a nostalgic summer montage? Add more strands. The finished look can be soft and subtle with pastel floss, loud and happy with neon shades, or timeless with rainbow colors.
It is also one of the most giftable crafts on the planet. A candy stripe bracelet feels personal without being over-the-top. It says, “I made this for you,” which is charming. It also says, “I sat still long enough to count knots,” which is a level of dedication people tend to respect.
What You Need to Make a Candy Stripe Friendship Bracelet
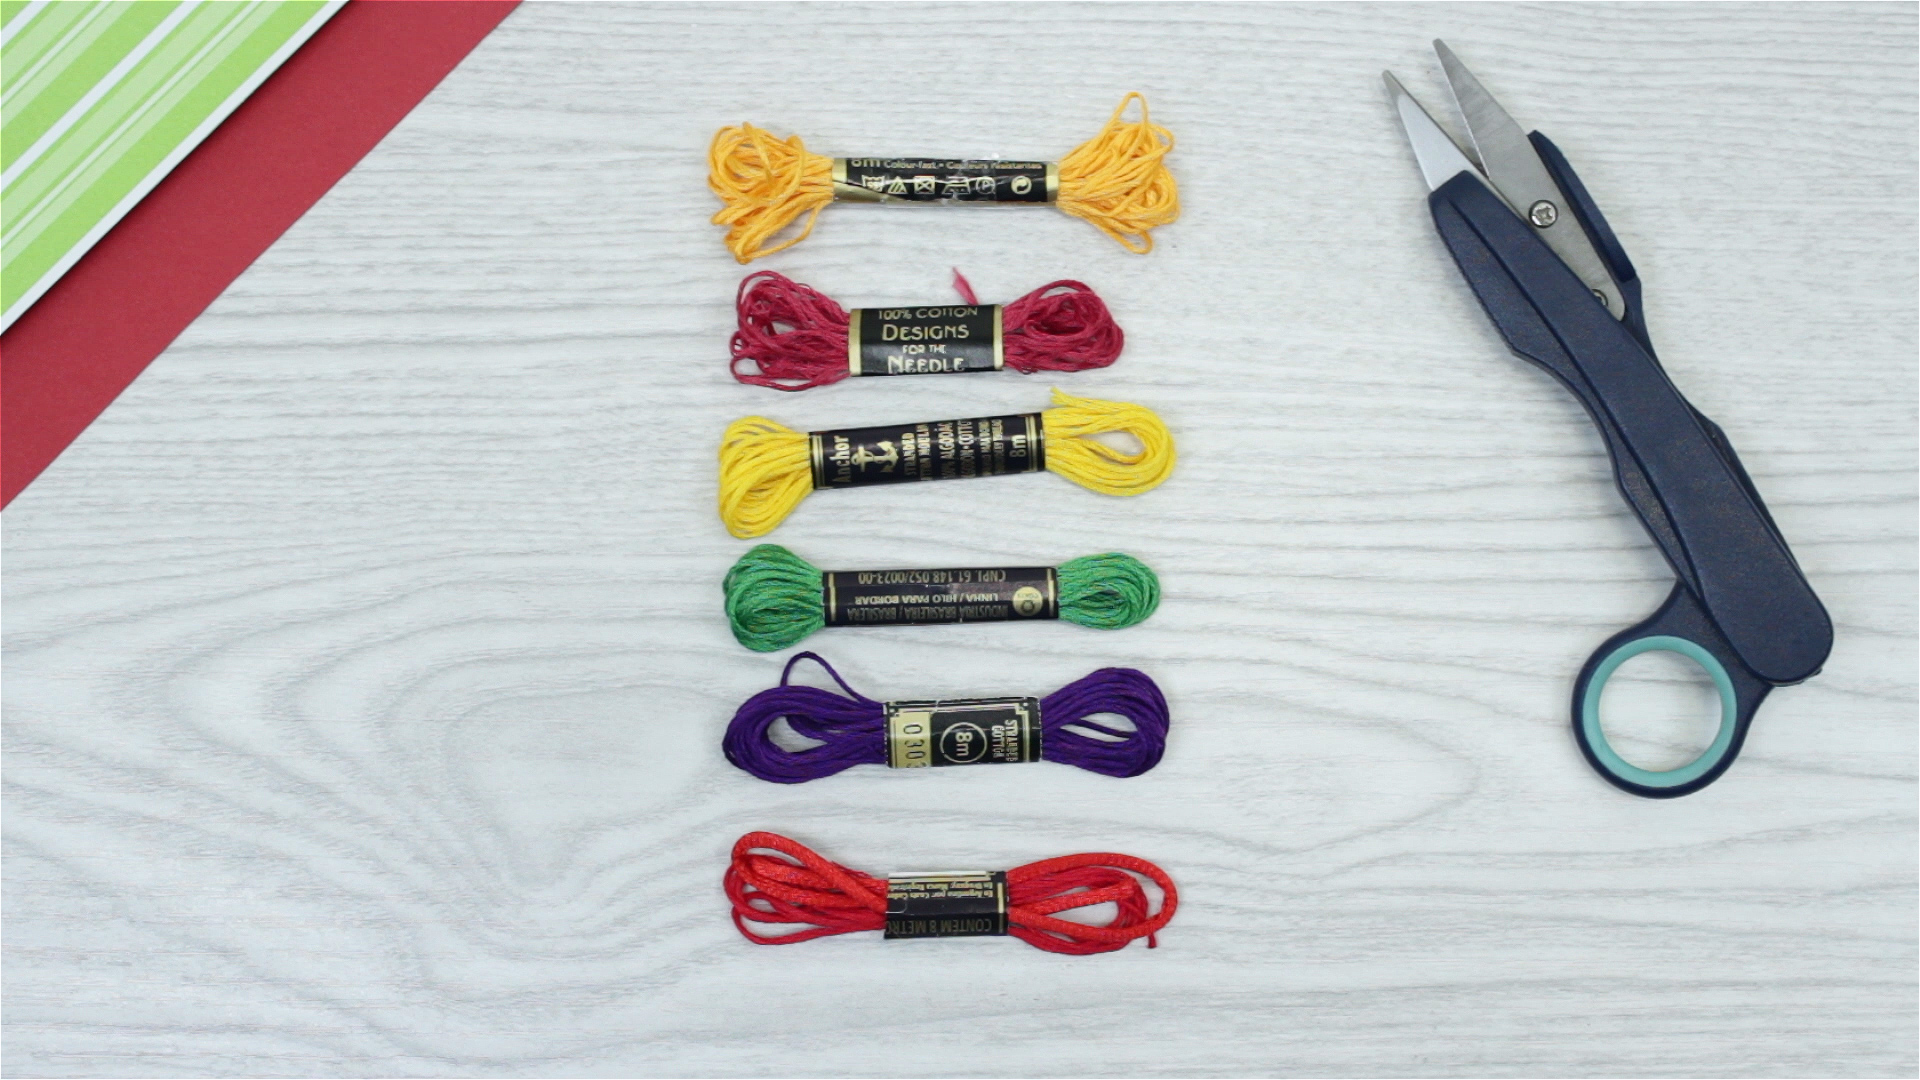
- Embroidery floss in 4 to 8 colors
- Sharp scissors
- A ruler or measuring tape
- Tape, a clipboard, or a safety pin to secure the bracelet while you work
- Optional: a button or bead if you want a closure instead of tying the ends
Embroidery floss is the gold standard for this project because it is smooth, colorful, inexpensive, and easy to knot. Regular yarn is usually too thick for a traditional candy stripe look, while very slippery cord can make beginners question every life choice that brought them to the craft table. Stick with embroidery floss and give yourself a pleasant start.
How Long Should the String Be?
This is the question every beginner asks, usually right after cutting the string too short with the confidence of a person who has never been betrayed by crafting math. A safe beginner range is about 30 to 36 inches per strand for a bracelet with simple ties. If you are making a loop start, using extra strands, or creating a wider bracelet, it is smart to cut a little longer. A good rule of thumb is that you would rather trim off extra floss than discover, near the end, that your bracelet now needs a miracle.
If you are making a bracelet for a smaller wrist, you can go shorter. If you know you knot tightly or want longer braided ends, go longer. Crafters often use handy body-based measuring tricks too, such as the length from fingertips to shoulder or the length of an outstretched arm. Glamorous? No. Effective? Absolutely.
Step-by-Step: How to Make a Candy Stripe Friendship Bracelet
1. Choose Your Colors
The candy stripe bracelet shines when the colors are arranged in a pleasing sequence. A rainbow order is the obvious crowd-pleaser, but you can also go with beachy blues, citrus colors, school colors, or a monochrome palette with different shades of the same tone. Because the stripes repeat in the order you place the strings, your starting lineup matters.
For a first bracelet, four to six strands is a sweet spot. It gives you enough contrast to see the pattern clearly without creating a giant knotting marathon. Arrange your strands from left to right in the order you want the colors to appear in the bracelet.
2. Cut the Floss
Cut one piece of embroidery floss for each strand. For beginners, 36 inches is a comfortable starting length. If you are using four colors, cut four pieces. If you want the bracelet wider, cut more. The more strands you add, the wider the bracelet and the longer the project will take.
3. Tie the Top and Secure It
Gather all the strands together and tie an overhand knot near one end, leaving a short tail. If you want a simple bracelet, this knot is enough to get you started. Tape the knot to a table, clip it to a clipboard, or pin it to your jeans or a pillow. Yes, many friendship bracelets have been made using jeans as a mobile workstation. Craft history is built on improvisation.
If you want a more polished finish, you can fold the strands in half before knotting to create a loop at the top. That loop can later work with a button or tie closure. Both methods work, so choose the one that feels easiest for your first bracelet.
4. Learn the Forward Knot
The candy stripe bracelet mainly uses the forward knot. This knot is made with two forward half-hitches. Take the far-left strand and cross it over the strand next to it to make a shape that looks like the number four. Tuck the end under the second strand and pull it up through the loop. Tighten it. Then do the exact same motion again on that same strand. Two hitches make one complete forward knot.
That second hitch matters. Skip it, and your bracelet may loosen, twist strangely, or curl like it is auditioning to become fusilli pasta. When in doubt, remember this rule: one forward knot equals two pulls.
5. Make the First Row
Take the strand on the far left and make one forward knot onto the second strand. Then continue using that same working strand to make a forward knot onto the third strand, then the fourth, and so on until it reaches the far right side. Congratulations: you have completed your first row.
What happened visually? The original leftmost color just traveled all the way across the bracelet, creating one diagonal stripe. That is the whole candy stripe magic trick. No smoke, no mirrors, just very obedient string.
6. Start the Next Row
Now pick up the new far-left strand and repeat the exact same process. Knot it over each strand moving from left to right until it reaches the far right. Each completed row adds another diagonal line, and the color order rotates through the bracelet over and over.
This is why the pattern becomes easy to memorize. You do not need to read a complicated chart for a basic candy stripe. You simply take the leftmost strand and knot it across the row. Repeat. Breathe. Maybe sip something iced. Repeat again.
7. Keep Going Until the Bracelet Is Long Enough
Continue making rows until the bracelet fits around the wrist with enough length left for tying or fastening. Most bracelets look best when the woven section covers the top of the wrist and the finishing ties handle the rest. Check the length occasionally instead of waiting until the bracelet is long enough to fit a giraffe.
8. Finish the Ends
When the bracelet reaches the right length, tie another overhand knot at the bottom to secure the pattern. From there, you have options. You can leave the ends loose and tie the bracelet directly onto the wrist. You can divide the tails into small groups and braid them for a cleaner finish. Or, if you started with a loop, you can attach a button or bead on the other end for a closure that makes the bracelet removable.
Common Candy Stripe Bracelet Mistakes and How to Fix Them
Your Bracelet Keeps Curling
This is probably the most common candy stripe complaint. Because every row is tied in the same direction, the bracelet can naturally want to curl. A little curl is normal, especially early on. To reduce it, make sure each knot contains two full hitches, keep your tension even, and avoid pulling one row super tight and the next one super loose. Some crafters gently flatten the finished bracelet under a heavy book for a short time, which can help it relax.
The Stripes Look Uneven
Uneven stripes usually come from inconsistent tension. Try to pull each knot snug, but not so tight that the bracelet turns stiff and narrow. Think “firm handshake,” not “competitive arm wrestling.” Consistency matters more than strength.
The Colors Look Out of Order
If the colors seem scrambled, stop and look at which strand you picked up for the new row. In a candy stripe bracelet, you always begin with the far-left strand. If you accidentally grab a middle strand, the pattern gets confused fast. It is not the end of the world, but it may become a one-of-a-kind “abstract interpretation” bracelet.
You Ran Out of String
Every bracelet maker does this at least once. Usually only once, because the emotional damage really sticks. When in doubt, cut longer strands. If you are already midway through and running short, you can sometimes tie in new thread, but for beginners it is much easier to start with generous lengths.
Best Color Ideas for a Candy Stripe Friendship Bracelet
Color is half the fun of this project. Here are a few combinations that work beautifully:
- Classic rainbow: red, orange, yellow, green, blue, purple
- Beach day: white, aqua, turquoise, sandy beige
- Berry mix: pink, magenta, lavender, deep plum
- Sunset: coral, peach, gold, raspberry
- Minimalist: cream, tan, gray, black
- School spirit: your team or school colors
If you want bold stripes, choose colors with high contrast. If you want a softer look, use colors from the same family. If you cannot decide, pick the shades that make you smile and trust the process. Friendship bracelets are supposed to be fun, not a graduate-level color theory seminar.
Ways to Make Your Bracelet Look More Professional
First, take a minute to align your strands neatly before you start. A clean setup leads to cleaner rows. Second, slow down a little for the first few inches. The start of the bracelet is where tension issues usually show up the most. Third, braid or trim the tails neatly at the end. And finally, do not underestimate the power of a simple closure. A loop-and-button finish can make a handmade bracelet feel surprisingly polished.
You can also personalize the bracelet by adding a tiny bead at the end, pairing it with a handwritten note, or stacking several candy stripe bracelets together for a layered look. One bracelet is sweet. Three bracelets say, “I have fully committed to the craft table, and I regret nothing.”
How Long Does It Take to Make a Candy Stripe Friendship Bracelet?
For most beginners, a basic candy stripe bracelet takes around 30 minutes to an hour, depending on the number of strands, your knotting speed, and whether you spend ten minutes debating whether mint green is happier than seafoam. With practice, the process gets much faster. The pattern becomes so repetitive that many people make these bracelets while chatting, watching a show, listening to music, or pretending they are being productive in a very artsy way.
Why Candy Stripe Friendship Bracelets Never Really Go Out of Style
There is something wonderfully low-tech and human about making a bracelet from string. No charging cable. No app update. No mysterious settings menu. Just your hands, a few strands of floss, and a pattern that has charmed generations of kids, teens, and adults. Friendship bracelets carry a little nostalgia, a little personality, and a lot of heart. They are inexpensive to make, easy to share, and personal enough to feel meaningful.
That staying power is part of why the candy stripe bracelet remains such a staple. It looks classic, but it still leaves room for creativity. You can make one in bold pop colors, muted earthy shades, or glittery floss if you are feeling extra. The pattern is simple enough to teach, memorable enough to repeat, and pretty enough to wear long after the last knot is tied.
The Experience of Making a Candy Stripe Friendship Bracelet
Making a candy stripe friendship bracelet is one of those little experiences that seems simple from the outside but feels oddly satisfying once you sit down and do it. At first, there is always a tiny moment of chaos. The strands are everywhere, one color is trying to hide under another, and your table suddenly looks like a rainbow had an administrative accident. Then you tie the top knot, secure the bracelet, make the first proper forward knot, and something shifts. The project starts to feel less like random string and more like a real pattern with a destination.
That is part of the charm. The bracelet teaches patience in the sneakiest possible way. You do not sit down thinking, “Today I will build character.” You sit down thinking, “I am going to make something cute.” But by the tenth row, you realize you have been focusing, repeating a rhythm, and improving without even noticing it. The hands learn before the brain catches up. The movement gets smoother. The tension gets better. The diagonal stripes begin to line up, and suddenly you have proof that progress can happen one tiny knot at a time.
There is also something incredibly personal about the color choices. A candy stripe bracelet can be bright and loud, soft and sentimental, or completely chaotic in a way that somehow still works. People often choose colors that remind them of a best friend, a favorite season, a school team, a vacation, or just a mood they want to wear on their wrist. That makes the bracelet feel less like a generic craft and more like a mini time capsule. Months later, you can look at it and remember exactly why you picked those colors in the first place.
The social side of the experience is just as lovely. These bracelets are great to make alone, but they are even better in company. They turn a quiet afternoon into an activity. Friends can trade floss, compare color combinations, help each other fix mistakes, and laugh over the strange fact that everyone forgets which strand comes next at least once. Even people who claim they are “not crafty” usually get pulled in after watching the pattern appear. It is hard to resist something that starts as thread and ends as wearable proof of effort.
And then there is the finishing moment, which is surprisingly rewarding. You tie the last knot, trim the ends, hold up the bracelet, and admire the stripes like you personally invented geometry. It feels good because the result is visible, useful, and giftable. In a world full of digital everything, making something by hand still has a special kind of magic. A candy stripe friendship bracelet is small, yes, but it carries the unmistakable energy of time, care, and attention. That is why people keep making them. Not because they are trendy, though they certainly have trendy moments, but because the process is calming, the result is cheerful, and the whole experience reminds us that simple handmade things still matter.
For many people, the bracelet becomes more than a craft project. It becomes a ritual. You make one while traveling, one during summer break, one for a birthday, one just because you found the perfect coral floss and needed a reason to use it. Before long, you have a tiny collection of color-coded memories. And honestly, that might be the best part of all. A candy stripe friendship bracelet does not just decorate your wrist. It quietly records a moment, a friendship, or an afternoon when you slowed down long enough to make something kind.
Final Thoughts
If you want a beginner-friendly craft that is affordable, relaxing, customizable, and charmingly nostalgic, the candy stripe friendship bracelet is hard to beat. It teaches core knotting skills, produces a classic diagonal stripe pattern, and leaves plenty of room for creativity. Once you finish one, you will probably want to make another in a different color palette, and then another for a friend, and then maybe another because apparently your embroidery floss has now become your personality.
Start simple, keep your tension even, and do not worry if your first bracelet is not flawless. Handmade charm is part of the appeal. The more you practice, the better your knots will look and the faster the pattern will flow. Before long, you will be the person casually saying, “Oh this? I made it,” which is one of the great small flexes in life.