A failed hydraulic hose has a remarkable sense of timing. It rarely leaks politely in a clean, well-lit shop on a quiet Tuesday. More often, it decides to retire halfway through moving hay, lifting a loader, running a press, or finishing the one job that absolutely could not wait.
Replacing a hydraulic hose is not complicated in the same way brain surgery is complicated, but it is absolutely not a “grab whatever fits and crank it down” project. A hydraulic hose assembly must match the machine’s pressure, fluid, temperature, fitting style, routing, movement, and working environment. Get one of those details wrong, and the replacement hose may become a very expensive oil sprinkler.
This guide explains three practical ways to replace a hydraulic hose: installing an OEM replacement, having a hydraulic shop build a duplicate assembly, or making a verified assembly in-house with the proper equipment. Along the way, you will learn how to identify the right hose, remove the old one safely, install the new one correctly, and avoid the mistakes that turn a simple repair into a repeat performance.
Before Replacing Any Hydraulic Hose: Make the System Safe
Before choosing a replacement method, make the equipment safe. Hydraulic oil under pressure can penetrate skin, rupture a hose violently, or allow a raised attachment to drop when pressure is released. Treat every hose as if it has a grudge and a pressure reserve.
Start with a proper shutdown
- Park the machine on stable, level ground.
- Lower implements, booms, forks, buckets, or attachments to the ground whenever possible.
- Use approved mechanical supports, locks, or stands if any component must remain raised.
- Shut off the engine or electric power source.
- Remove the key and use lockout/tagout procedures when required.
- Operate the hydraulic controls as directed by the manufacturer to relieve trapped pressure.
- Allow hot components and hydraulic fluid to cool before touching them.
Do not assume the system is pressure-free simply because the engine is off. Accumulators, suspended loads, thermal expansion, and certain valve arrangements can keep pressure trapped in a line. Your equipment manual is the boss here, not the confidence you gained from watching one repair video at 1:00 a.m.
Wear the right protection
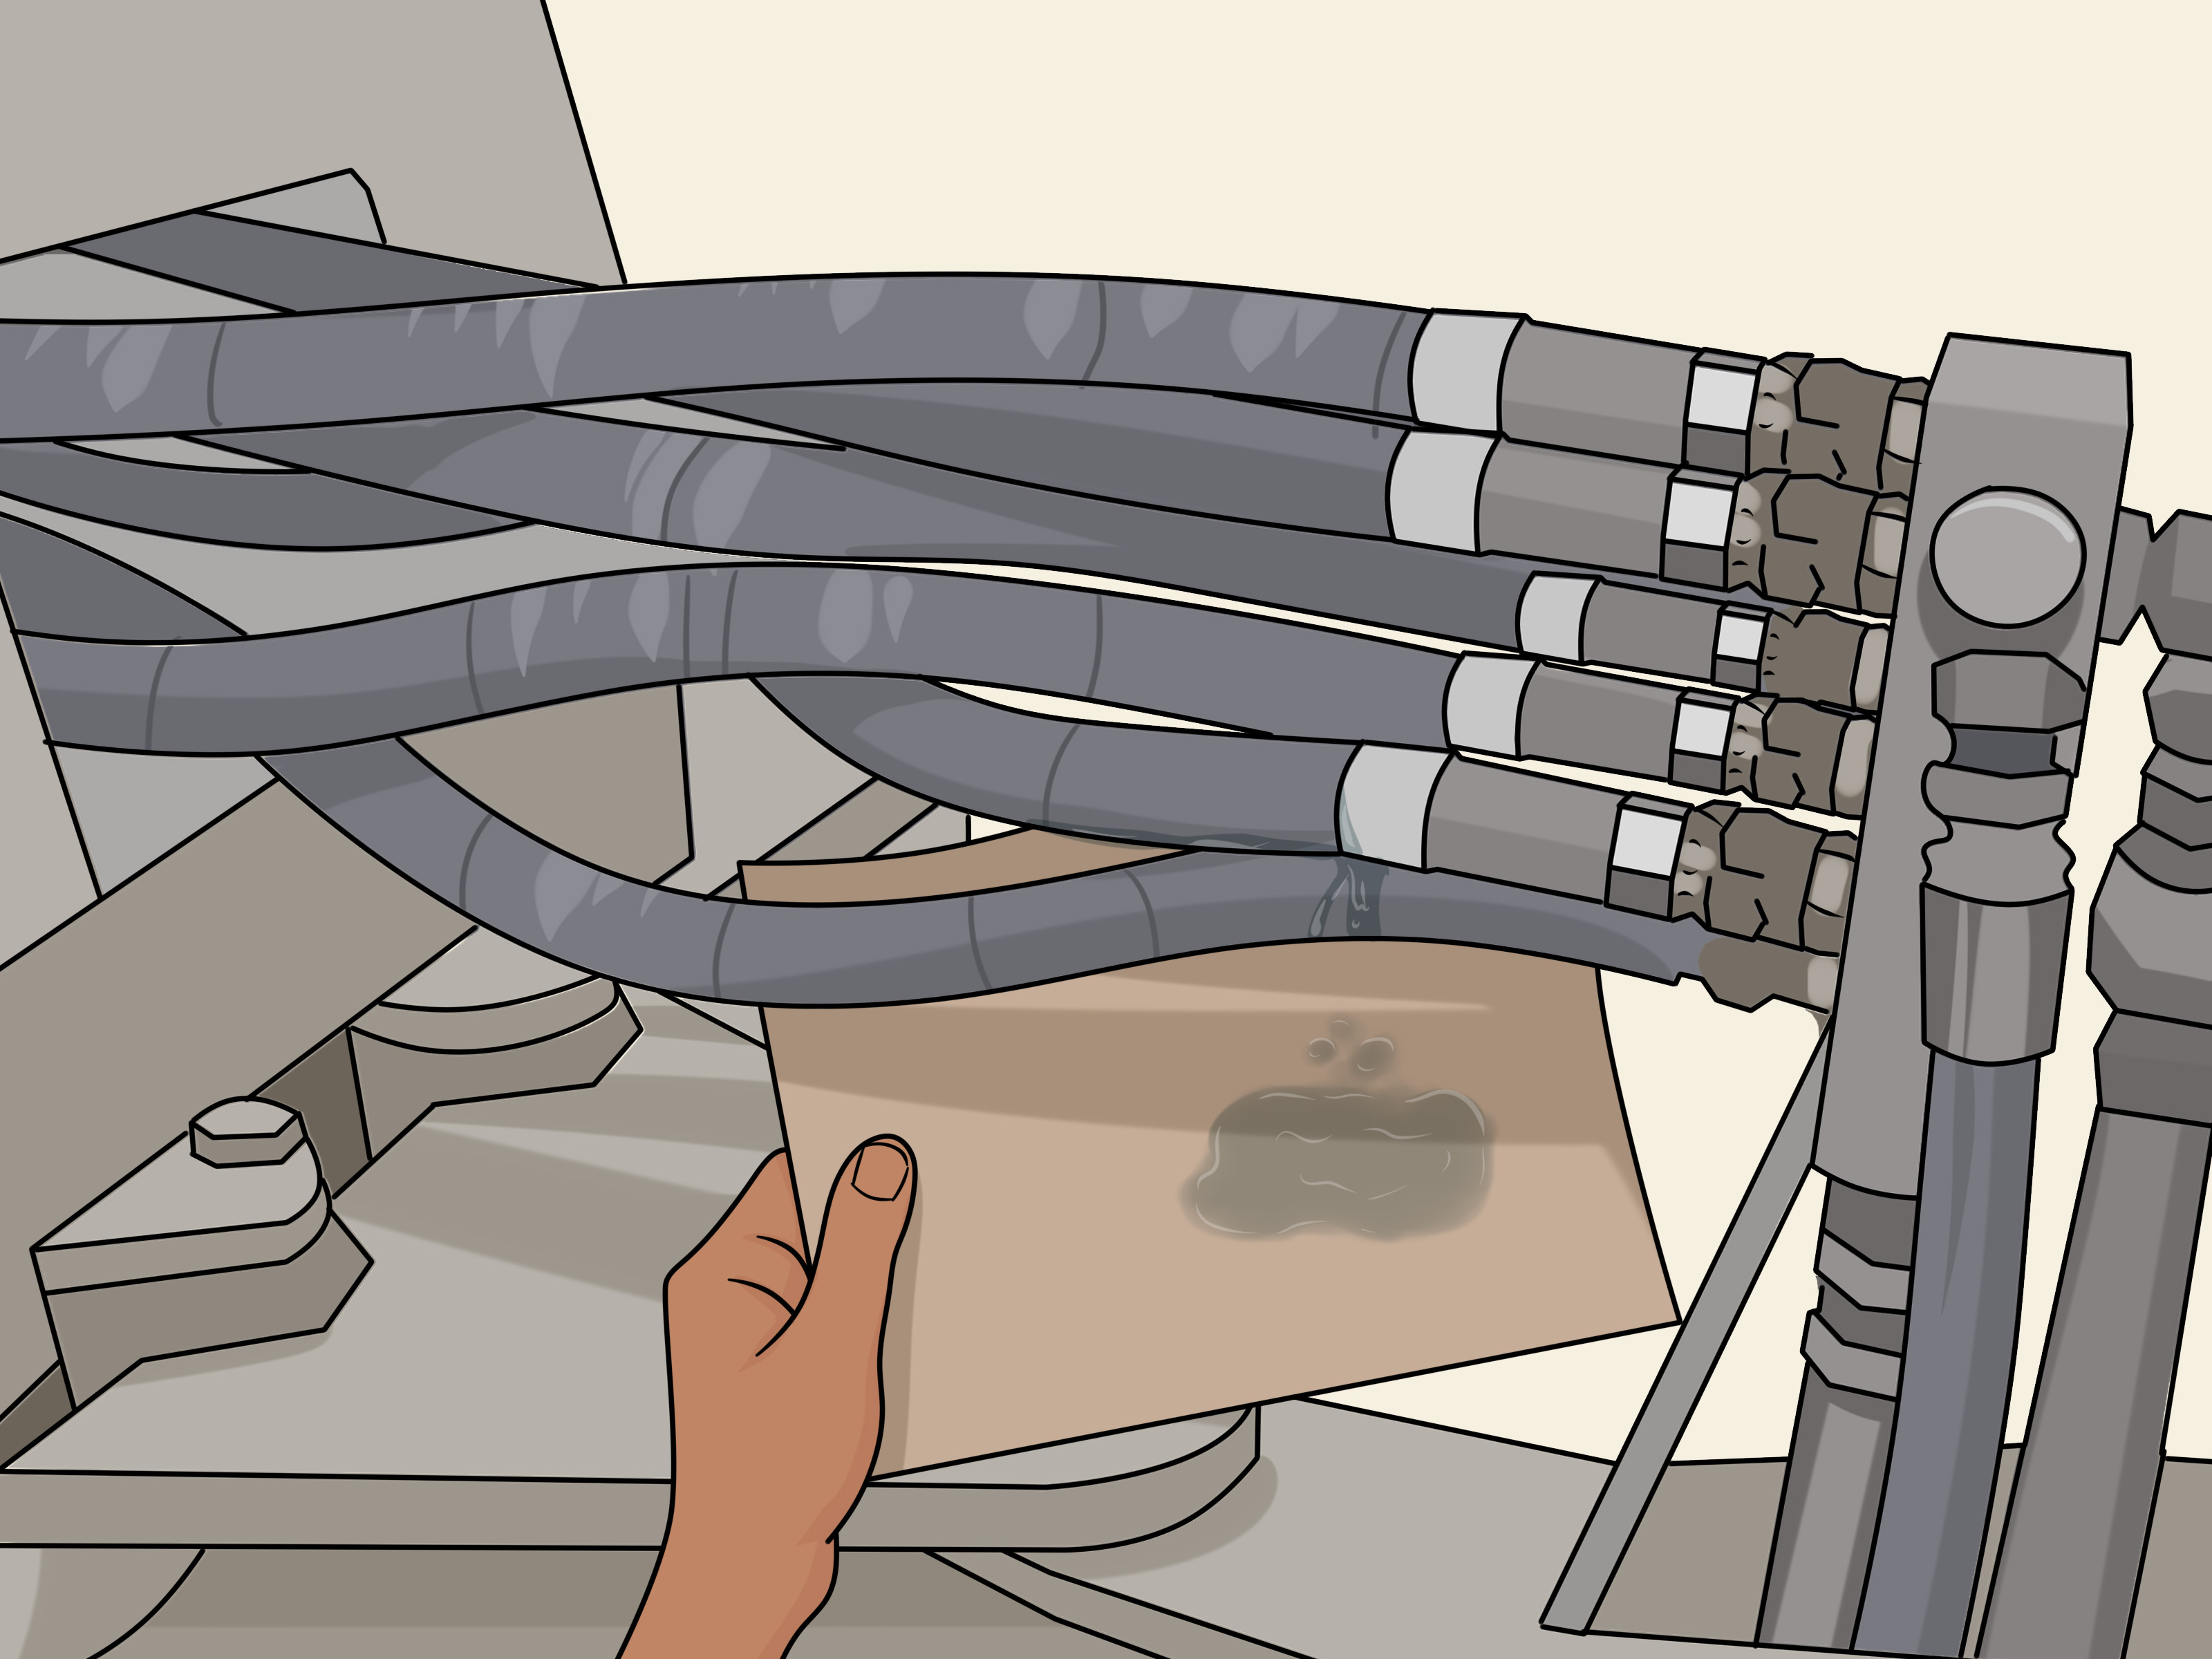
Use safety glasses or a face shield, gloves, long sleeves, and footwear appropriate for the work area. Gloves are useful for handling oily components, but they are not a force field against a pinhole stream of pressurized hydraulic fluid. To check for a suspected leak, use cardboard or wood while keeping your body out of the line of fire. Never sweep a finger over a hose to “find the little leak.” That little leak may be traveling at a speed that has no interest in your career plans.
Identify why the hose failed
Before replacing the hose, inspect the reason it failed. A new hose installed in the exact same bad route may fail just as quickly as the old one. Look for abrasion against metal, sharp bends near fittings, twisting, heat exposure, loose clamps, damaged protective sleeves, crushed sections, corrosion around fittings, or contact with moving parts.
If the original hose burst without obvious external damage, consider whether the system has pressure spikes, incorrect relief-valve settings, fluid contamination, excessive heat, or a hose specification that was never suitable for the application. A hose failure is often a symptom, not merely a broken part.
What Information Do You Need Before Ordering a Replacement?
Whether you buy an OEM hose, visit a hose shop, or build an assembly yourself, collect the details first. Photograph the hose from multiple angles before removing it. Capture both fittings, the routing path, clamp locations, protective sleeves, and nearby components.
Record these hose details
- Machine make, model, and serial number: Essential for locating OEM parts.
- Hose part number: Often printed on the hose or listed in the parts manual.
- Inside diameter: A hose that is too small can restrict flow; one that is too large can create routing and response issues.
- Overall length: Measure from sealing surface to sealing surface, not from random outer edges.
- Working pressure and surge requirements: The assembly must meet or exceed the system’s needs.
- Fluid type and temperature: Hydraulic oil, water-glycol fluid, biodegradable fluid, and specialty fluids may require different hose materials.
- Fitting type and orientation: Straight, 45-degree, 90-degree, JIC, ORFS, NPT, flange, metric, and other connections are not interchangeable just because they look vaguely mechanical.
Pay close attention to fitting orientation. If both hose ends are angled, the relationship between them matters. A 90-degree fitting rotated the wrong way can twist the hose during installation, strain the crimp area, or make the hose route like a confused garden snake.
Way 1: Replace the Hose with an OEM Preassembled Hose
The simplest and often safest option is to purchase the original equipment manufacturer’s replacement hose assembly. This is especially useful for newer equipment, complex machines, warranty-covered equipment, specialty agricultural machines, compact construction equipment, aerial lifts, and systems with unusual fittings.
Why OEM hydraulic hoses are convenient
An OEM hose is designed around the machine’s original routing, pressure requirements, fitting angles, and mounting points. In many cases, it arrives with the correct hose, fittings, protective abrasion cover, clamps, and length already figured out. That can save time and eliminate the guessing game known as “this fitting looks close enough.”
OEM assemblies are also useful when the hose snakes through crowded equipment compartments. A replacement that is only slightly longer, shorter, or differently shaped can rub against a fan belt, pinch under a cover, or become an accidental exhaust-pipe accessory.
How to install an OEM hydraulic hose
- Confirm the hose part number against the machine model and serial number.
- Compare the new hose with the old assembly before removing protective caps.
- Clean the hose ports and surrounding area to keep dirt out of the hydraulic system.
- Place a drain pan beneath the work area.
- Disconnect the old hose using the correct wrench and a backup wrench when needed.
- Cap or plug open ports immediately to limit contamination.
- Inspect threads, sealing faces, O-rings, and adapters for damage.
- Install the new hose in the original routing path without forcing it into a twist or tight bend.
- Reinstall clamps, guards, sleeves, and retention hardware.
- Tighten fittings to the manufacturer’s torque specification.
Do not use thread tape on flare-style fittings, O-ring face seal fittings, or other connections that seal at a face or O-ring rather than on the threads. Thread sealant has a job, but it is not invited to every fitting party.
Best situations for OEM replacement
Choose OEM when the hose is unusual, the machine is still under warranty, the part number is available, downtime matters more than price, or the line serves a safety-critical function. It is also the smart choice when you are unsure about fitting identification, pressure rating, or hose construction.
Way 2: Have a Hydraulic Hose Shop Build a Duplicate Assembly
A qualified hydraulic hose shop can build a replacement hose assembly using a compatible hose-and-fitting system. This is often the best balance of speed, cost, and flexibility when an OEM hose is unavailable, discontinued, expensive, or impossible to obtain quickly.
What to bring to the hose shop
Bring the old hose assembly whenever possible. Do not throw it away until the new one is installed and verified. The old hose gives the technician a physical reference for length, inside diameter, fitting type, angle, protective sleeves, and clocking orientation.
Also bring photos of the hose installed on the machine. A hose can look perfectly ordinary on a counter while hiding a very specific routing challenge inside the equipment. A photo showing that the line must clear a steering linkage, loader arm, or engine cover can prevent an unpleasant second trip.
What a good hose shop will verify
A professional shop should confirm more than hose length. The technician should consider working pressure, hose reinforcement type, fluid compatibility, fitting series, thread style, sealing method, bend radius, and required fitting orientation. They should also use a manufacturer-approved crimp specification for the specific hose, fitting, ferrule, and crimp machine combination.
That last part matters. Hydraulic hose assemblies are systems, not mix-and-match jewelry. A fitting from one family may physically slide onto a hose from another brand or series, but that does not make it a validated assembly. Incorrect crimp dimensions or incompatible components can lead to leaks, fitting blow-off, or early hose failure.
Questions to ask the hose technician
- Is this hose rated for my system’s working pressure and expected pressure spikes?
- Are the hose and fittings approved as a compatible assembly?
- Does the replacement maintain the required fitting angles and orientation?
- Is the hose suitable for the hydraulic fluid and operating temperature?
- Should I add an abrasion sleeve, spring guard, fire sleeve, or protective clamp?
- Can the shop pressure-test the assembly if the application is critical?
For a farm tractor, skid steer, shop press, log splitter, or common industrial machine, a reputable hose shop is often the practical hero of the day. It may not wear a cape, but it can usually make a hose while you drink bad coffee and stare at fittings like they are ancient artifacts.
Way 3: Build the Hydraulic Hose Assembly In-House
Building a hose assembly in-house is a strong option for fleets, maintenance departments, farms, mines, manufacturing plants, and service operations that replace hoses often enough to justify the equipment and training. It is not the right approach for someone who owns one tractor, one adjustable wrench, and an adventurous spirit.
What you need for safe in-house hose assembly
- A compatible hose, fitting, ferrule, and crimper system from the same approved product family.
- The manufacturer’s current crimp charts and assembly instructions.
- A properly maintained hydraulic hose crimper with the correct dies and settings.
- A hose-cutting tool designed to make clean, square cuts.
- Measuring tools, insertion-depth marks, calipers, and cleaning equipment.
- Trained personnel who understand fitting identification, crimp inspection, and hose routing.
- Appropriate test equipment or access to pressure testing for critical assemblies.
The basic in-house assembly process
First, identify the exact hose series and approved fitting. Cut the hose squarely to the correct finished length, remembering that fitting cut-off factors affect the final assembly length. Clean debris from the hose bore, especially if the system is sensitive to contamination. Mark the fitting insertion depth, install the fitting according to the manufacturer’s instructions, and crimp it using the exact die and crimp diameter specified for that combination.
After crimping, inspect the assembly. Verify crimp diameter, fitting insertion, hose condition, orientation, and cleanliness. Confirm that angled fittings are clocked correctly. If the hose is kinked, cut poorly, contaminated, improperly crimped, or built with uncertain components, do not install it. Starting over is cheaper than discovering a mistake when the machine is lifting several thousand pounds.
When not to build a hose yourself
Do not improvise a hydraulic hose repair with hose clamps, generic tubing, plumbing fittings, tape, reused damaged couplings, or a mystery hose from the back shelf. Avoid in-house fabrication when you cannot identify the hose series, do not have approved crimp data, lack the right crimper, or are working on a highly regulated or safety-critical system.
For aircraft, medical equipment, lift equipment, high-pressure industrial systems, fire-resistant systems, or any application governed by a specific service procedure, use qualified technicians and the manufacturer’s approved parts and processes.
How to Route and Install the New Hydraulic Hose Correctly
Installing the correct hose incorrectly is still an incorrect repair. Good hydraulic hose routing prevents abrasion, excessive bending, twisting, heat damage, and tension during machine movement.
Leave room for movement
A hose connected between moving components needs enough length to flex naturally through the full range of motion. Cycle the attachment or machine function slowly after installation and watch the hose. It should not pull tight, stretch, rub, collapse, or bend sharply at either fitting.
Too little slack creates tension. Too much slack can allow the hose to snag, chafe, or loop into moving equipment. The goal is controlled movement, not a hydraulic spaghetti sculpture.
Respect the minimum bend radius
Every hydraulic hose has a minimum bend radius. Bending the hose tighter than its rating can weaken reinforcement layers, restrict flow, shorten service life, and concentrate stress near fittings. Avoid sharp bends directly behind a coupling. Use adapters or angled fittings when needed to improve the route rather than forcing the hose into a shape it clearly dislikes.
Avoid twist during installation
Twist is one of the quiet troublemakers of hydraulic hose life. A twisted hose may look fine while the machine is off, then fight itself once pressure and movement arrive. Use alignment marks along the hose if needed. Tighten swivel fittings carefully and make sure the hose remains relaxed rather than corkscrewed.
Protect against abrasion and heat
Hydraulic hoses should not rub against metal edges, brackets, tires, tracks, belts, or other hoses. Use clamps, abrasion sleeves, guards, grommets, or protective wraps where appropriate. Keep hoses away from hot exhaust components, welding sparks, sharp edges, and areas where debris can collect.
A protective sleeve can help reduce external wear, but it should not be used to hide a routing problem. If a hose is rubbing hard enough to need a medieval suit of armor, the route probably needs attention first.
Testing the Replacement Hose After Installation
Once the new hose is installed, remove tools and loose materials from the work area. Refill hydraulic fluid if needed, then start the machine from a safe position. Run the hydraulic function at low speed and low pressure first, watching from a distance for leaks, hose movement, rubbing, or fitting problems.
Use cardboard or a clean piece of wood to check for fine leaks. Do not stand directly over fittings or put your face near the hose. After the initial inspection, cycle the equipment through its full range of movement. Recheck clamps, routing, and fluid level after the system has operated.
If a fitting leaks, stop the machine, relieve pressure again, and inspect the connection. Common causes include a damaged O-ring, incorrect fitting style, cross-threading, damaged sealing surfaces, improper torque, or a hose that is pulling sideways on the connection. Do not keep tightening blindly. Over-tightening can damage threads, distort fittings, and create a leak that has now become more committed to its craft.
Common Hydraulic Hose Replacement Mistakes
- Replacing a hose without identifying the original cause of failure.
- Using a hose with an inadequate pressure rating.
- Choosing fittings based only on thread diameter.
- Mixing hoses and couplings without approved compatibility data.
- Installing a hose that is too short, too long, twisted, or sharply bent.
- Ignoring damaged O-rings, sealing faces, threads, or adapters.
- Leaving hydraulic ports open long enough for dirt to enter the system.
- Using thread tape where the fitting seals with a flare, face seal, or O-ring.
- Checking a suspected pinhole leak with a hand or finger.
- Skipping the low-pressure test and full-motion inspection.
Field Experience: Lessons Technicians Commonly Share About Hydraulic Hose Replacement
One of the most common field lessons is that the hose people notice first is not always the hose that caused the real problem. A technician may arrive to find a split hose dripping oil onto the ground, replace it quickly, and then watch the new assembly fail weeks later in nearly the same spot. The real culprit is often a loose clamp, a worn bracket, a sharp edge, or a boom movement that pulls the hose tight at full extension. The replacement was correct; the route was not.
Another familiar experience involves the “close enough” fitting. Two fittings may share a similar diameter, similar threads, and an almost identical look. Almost is a dangerous word in hydraulics. JIC flare fittings, O-ring face seal fittings, pipe threads, metric fittings, and flange connections rely on different sealing methods. A connection may screw together several turns and still be wrong. It may even hold briefly before vibration, pressure, or temperature changes reveal the mistake with a dramatic oil shower.
Experienced mechanics also learn to respect hose orientation. A hose with two angled ends is not just a hose with bends; it is a precisely clocked assembly. Install one angled fitting a few degrees off, and the hose may twist as it is tightened. The machine might operate normally for a while, but the twist quietly stresses the reinforcement layers and fitting ends. Months later, the hose fails, and everyone blames the hose instead of the installation angle that made it miserable from day one.
Cleanliness is another lesson that becomes more important after an expensive repair. A hydraulic system does not enjoy dirt, rubber particles, metal shavings, shop towels, or whatever mystery grit lives on the floor of a service truck. Capping ports, cleaning the work area, and keeping replacement hose ends protected may feel slow when equipment is down. Compared with replacing a contaminated pump, valve, or cylinder, however, those few extra minutes suddenly look like genius.
Technicians who work on agricultural equipment often mention how weather changes hose behavior. Cold weather can make hose covers stiffer, while hot conditions can increase fluid temperature and expose weak routing near exhaust components. A hose that looks acceptable in the shop may rub or tighten when the machine is operating outdoors, loaded, vibrating, and moving through its full range. That is why cycling the machine after installation is more than a formality. It is the moment when the hose tells you whether it is comfortable or plotting a complaint.
Another useful field habit is keeping a record of repeated hose failures. Note the machine, hose location, date, operating hours, hose specification, and visible cause. After a few months, patterns appear. Maybe one loader arm needs better abrasion protection. Maybe a certain machine develops a clamp problem after a few thousand hours. Maybe one hydraulic circuit sees pressure spikes that require a different hose construction. Good records turn hose replacement from emergency reaction into preventive maintenance.
The best practical experience is learning when to stop and ask for help. A skilled technician is not the person who forces every repair alone. It is the person who recognizes an unknown fitting, a questionable hose specification, a contaminated system, or a safety-critical circuit and brings in an OEM dealer or qualified hydraulic shop. That decision can save a hose, a machine, a workday, and occasionally a great deal more.
Conclusion
Replacing a hydraulic hose safely comes down to choosing the right method and refusing to cut corners. An OEM assembly offers the easiest fit for many machines. A qualified hydraulic hose shop can build a reliable duplicate when OEM parts are unavailable or impractical. In-house hose fabrication can reduce downtime for organizations with the right equipment, approved component systems, and trained personnel.
Whichever route you choose, focus on safety, proper hose selection, clean installation, correct routing, compatible fittings, and careful testing. A hydraulic hose may be flexible, but the rules around replacing one should not be.