Melted chocolate is the little black dress of dessert decorating: it works almost everywhere, instantly makes things look more polished, and forgives a surprising number of last-minute kitchen decisions. Whether you are dressing up cupcakes for a birthday, making strawberries look fancy enough for a dinner party, or trying to rescue a plain sheet cake from looking like “Tuesday,” a bowl of glossy melted chocolate can do heroic work.
The best part? You do not need to be a pastry chef, own a marble slab, or speak fluent “ganache.” Most chocolate decorating ideas require only a microwave-safe bowl, parchment paper, a spoon, a zip-top bag, and a little patience. The patience part is important. Chocolate is dramatic. It likes gentle heat, dry tools, and compliments.
In this guide, you will learn 10 simple and delicious ways to decorate with melted chocolate, including drizzles, dips, curls, shards, chocolate writing, marbled designs, and more. Along the way, you will also pick up practical tips for melting chocolate smoothly, choosing the right type of chocolate, avoiding common mistakes, and making your desserts look bakery-worthy without turning your kitchen into a reality show challenge.
Before You Start: How to Melt Chocolate for Decorating
Before we get into the fun swirls and swoops, let’s talk technique. Melted chocolate decorating works best when the chocolate is smooth, fluid, and not overheated. You can melt chocolate in the microwave or over a double boiler. For the microwave method, place chopped chocolate or chocolate wafers in a dry microwave-safe bowl and heat in short bursts, stirring between each round. For a double boiler, set a heatproof bowl over a saucepan of gently simmering water, making sure the bottom of the bowl does not touch the water.
The golden rule is simple: keep water away from chocolate. Even a small splash can make chocolate seize, turning it thick and grainy. Also, avoid blasting chocolate with high heat. Chocolate melts gently, not aggressively. Think spa day, not dragon breath.
Best Chocolate for Decorating
For quick decorating, chocolate melting wafers or candy coating are beginner-friendly because they melt smoothly and set with a nice finish. Real chocolate bars also work beautifully, especially if chopped finely. Chocolate chips can be used, but they often contain stabilizers that help them hold their shape, so they may not melt as fluidly as bars or wafers. For glossy decorations that snap cleanly, tempered chocolate gives the best result, but many everyday projects look lovely with simple melted chocolate.
1. Classic Chocolate Drizzle
A chocolate drizzle is the easiest way to make a dessert look intentional. Cookies, brownies, bundt cakes, cheesecake slices, ice cream sundaes, waffles, strawberries, pretzels, and even popcorn all benefit from a thin ribbon of melted chocolate.
To make a clean drizzle, melt the chocolate until smooth, then transfer it to a piping bag, parchment cone, squeeze bottle, or zip-top bag with a tiny corner snipped off. Move your hand quickly back and forth over the dessert, letting the chocolate fall in thin lines. For a rustic look, use a spoon and flick gently. For a neater bakery-style finish, use a piping bag and steady pressure.
Try This
Drizzle dark chocolate over white chocolate-dipped strawberries, or drizzle white chocolate over dark chocolate brownies. The contrast makes the decoration pop and gives each bite a little extra flavor drama.
2. Chocolate-Dipped Fruit
Chocolate-dipped fruit is the dessert equivalent of putting on a blazer: suddenly everything looks more sophisticated. Strawberries are the classic choice, but banana slices, apple wedges, orange segments, pineapple chunks, dried apricots, and cherries also work well.
The most important step is drying the fruit completely before dipping. Moisture can interfere with the chocolate coating and make it slide, streak, or set poorly. After washing fruit, pat it dry with paper towels and let it sit for a few minutes to remove surface moisture.
Hold each piece of fruit by the stem, skewer, or edge, dip it into melted chocolate, let the excess drip back into the bowl, and place it on parchment paper. Add toppings before the chocolate sets. Chopped nuts, sprinkles, toasted coconut, crushed cookies, flaky salt, or freeze-dried fruit powder all make excellent finishes.
Flavor Pairing Ideas
Dark chocolate pairs beautifully with strawberries, raspberries, and orange slices. Milk chocolate works well with bananas and apples. White chocolate is sweet and creamy, making it great with tart berries or dried cranberries.
3. Chocolate-Dipped Cookies and Biscotti
If you have plain cookies, you have a decorating opportunity. Dip half of a sugar cookie, shortbread round, sandwich cookie, madeleine, biscotti stick, or wafer into melted chocolate, then place it on parchment paper to set. This simple technique adds texture, flavor, and a polished look.
For biscotti, dip one end into dark chocolate and sprinkle with chopped almonds or pistachios. For shortbread, try milk chocolate and a tiny pinch of flaky sea salt. For sandwich cookies, use white chocolate and colorful sprinkles for birthdays, holidays, or any day that needs a little edible confetti.
The key is to let excess chocolate drip off before setting the cookie down. Too much chocolate can pool around the base. That still tastes wonderful, of course, but it may look more “chocolate puddle” than “professional finish.”
4. Piped Chocolate Shapes
Piped chocolate shapes are one of the easiest ways to create impressive decorations ahead of time. You can make hearts, stars, swirls, initials, zigzags, leaves, music notes, spiderwebs, or abstract loops. Once set, these decorations can be placed on cupcakes, cakes, mousse cups, puddings, and plated desserts.
Line a baking sheet with parchment paper. Spoon melted chocolate into a piping bag or zip-top bag, snip a small corner, and pipe your designs directly onto the parchment. Let them set at room temperature or chill briefly if your kitchen is warm. Once firm, gently lift them with an offset spatula or clean fingers.
Design Tip
If you are nervous about freehand piping, slide a printed template underneath the parchment paper and trace over it. Hearts, letters, and simple shapes are much easier when your hand has a path to follow. It is like chocolate GPS.
5. Chocolate Curls and Shavings
Chocolate curls and shavings add instant elegance to cakes, cupcakes, trifles, hot chocolate, cream pies, and tiramisu. They look fancy, but the process is surprisingly simple. You can use a vegetable peeler on a slightly warm block of chocolate to create curls, or spread melted chocolate thinly on a baking sheet, let it partially set, and scrape it into curls with a spatula or bench scraper.
The trick is temperature. If the chocolate is too cold, it may splinter. If it is too warm, it may smear. Slightly softened chocolate gives the best curls. For smaller shavings, run a peeler along the edge of a chocolate bar and let the delicate pieces fall directly over your dessert.
Where to Use Chocolate Curls
Add dark chocolate curls to whipped cream-topped pies, white chocolate shavings to raspberry mousse, or milk chocolate curls to a classic birthday cake. They bring height, texture, and that “someone here knows what they are doing” energy.
6. Chocolate Shards for Cakes and Cupcakes
Chocolate shards are dramatic, modern, and much easier than they look. They are perfect for decorating layer cakes, cupcakes, brownies, cheesecakes, and dessert boards. To make them, spread melted chocolate thinly over parchment paper. Let it set until firm, then break it into irregular pieces.
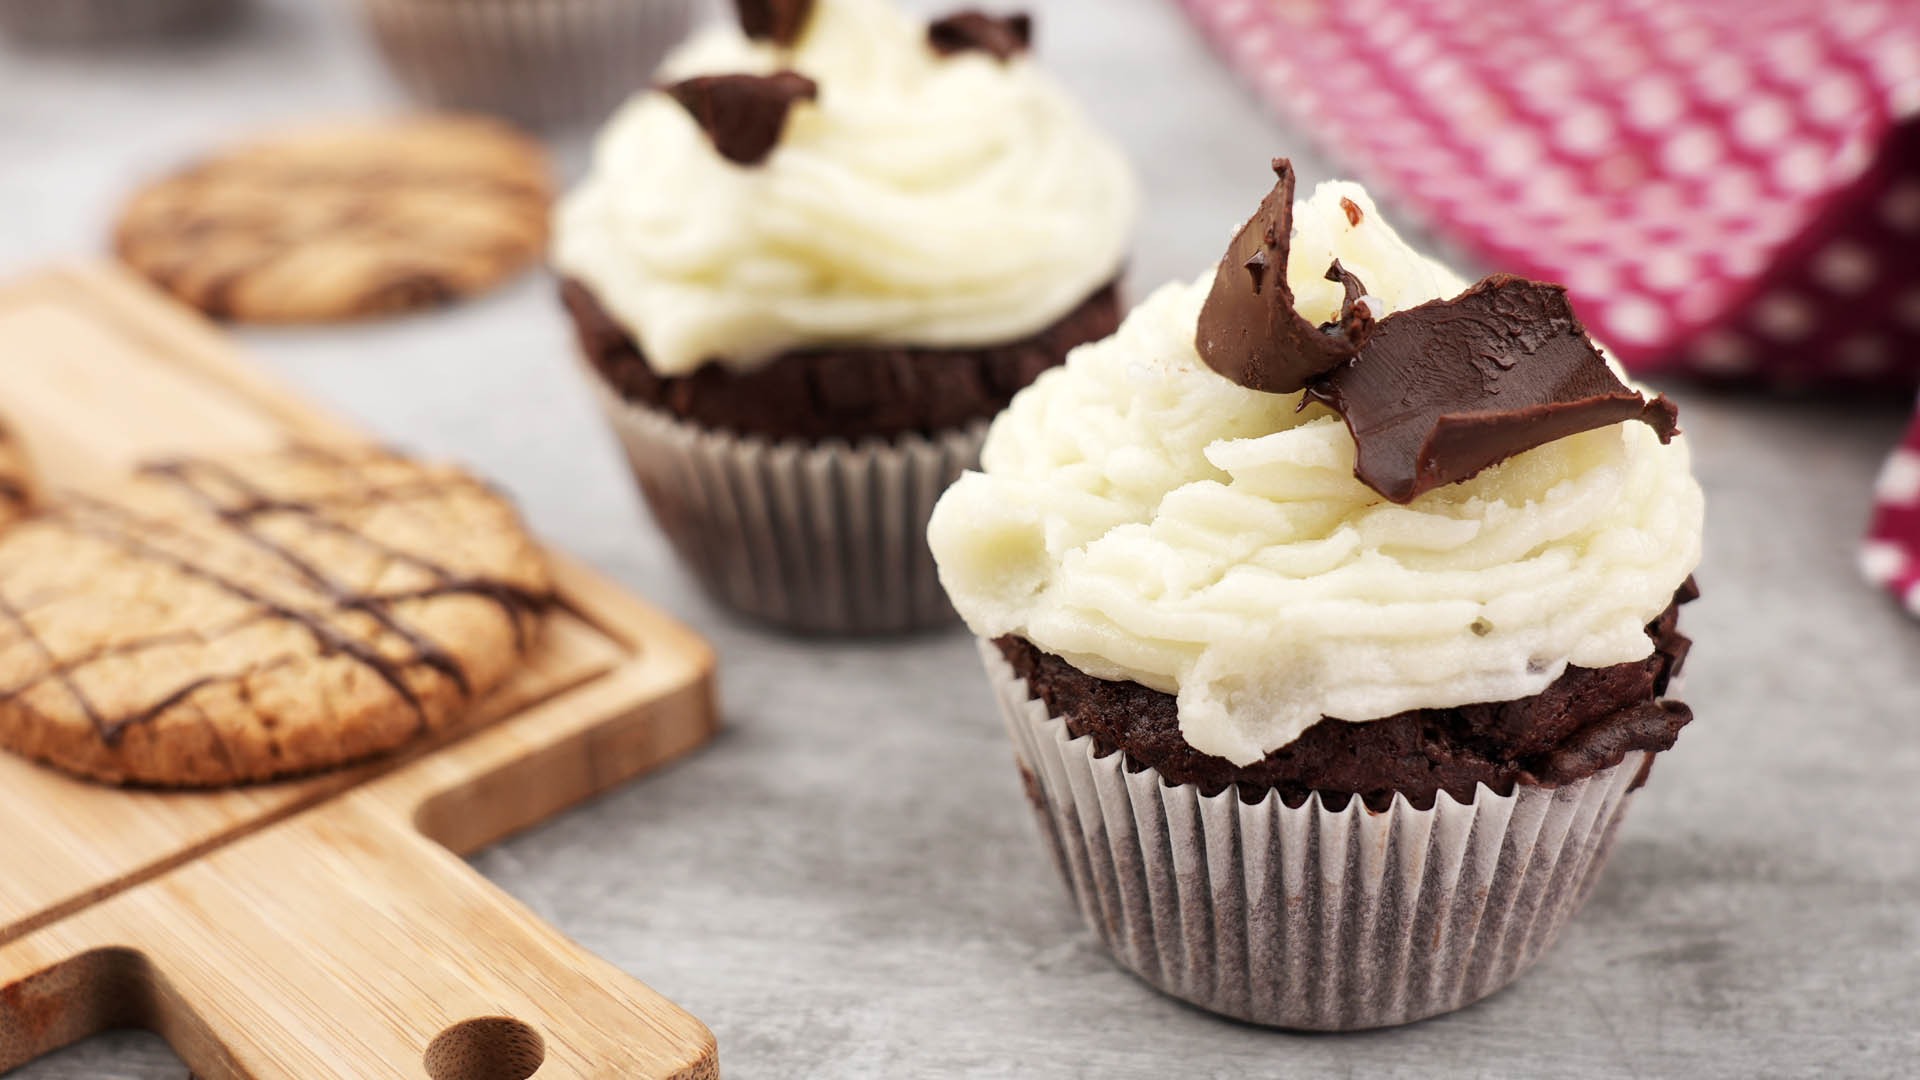
For a more artistic version, swirl two types of chocolate together before the sheet sets. Dark and white chocolate create a bold marbled effect, while milk and dark chocolate give a softer contrast. You can also sprinkle the surface with crushed nuts, edible glitter, sprinkles, cocoa nibs, or freeze-dried raspberries before the chocolate hardens.
Once set, press shards upright into frosting or whipped cream. Tall shards can turn a simple cake into a centerpiece. Small shards can be tucked into cupcakes or mousse cups for a playful crunch.
7. Chocolate Lace and Webs
Chocolate lace is delicate, beautiful, and surprisingly forgiving because abstract lines look intentional. To make lace, pipe thin, overlapping lines of melted chocolate onto parchment paper. You can pipe circles, waves, loops, grids, or web-like patterns. Once the chocolate sets, peel it away gently and use it as a decorative topper.
For curved chocolate lace, pipe the design onto a strip of parchment paper, let it sit for a moment until slightly firm but still flexible, then wrap it around a rolling pin or the outside of a glass. When it sets completely, you will have a curved decoration that looks stunning on plated desserts.
Best Uses
Chocolate lace works especially well on mousse, panna cotta, cupcakes, ice cream, and layered cakes. It adds a crisp texture and makes desserts look refined without requiring perfect symmetry.
8. Marbled Chocolate Decorations
Marbling is the art of making chocolate look like it attended design school. Melt dark chocolate and white chocolate separately, then spoon or drizzle them close together on parchment paper, strawberries, pretzels, cookies, or cake pops. Use a toothpick or skewer to gently swirl the colors together.
The secret is not overmixing. A few soft swirls create beautiful ribbons. Too much swirling turns everything into one muddy color, which may still taste good but will not deliver that dramatic marble effect.
You can marble chocolate bark, dipped strawberries, chocolate-covered pretzels, or even the top of a cheesecake. For seasonal color, tint white chocolate or candy melts with oil-based food coloring. Avoid water-based coloring, which can cause chocolate to seize.
9. Chocolate Writing and Personalized Messages
Writing with melted chocolate is a sweet way to personalize cakes, cupcakes, dessert plates, and cookie boxes. You can write names, short messages, numbers, monograms, or celebration phrases. The result feels thoughtful, even if the message is as simple as “Happy Birthday” or “You survived Monday.”
Use melted chocolate that is fluid but not hot. Spoon it into a piping bag, parchment cone, or zip-top bag with a tiny opening. Practice on parchment paper before writing directly on a cake. If you are worried about mistakes, pipe the words onto parchment, let them set, and transfer the chocolate letters onto the dessert.
Writing Tip
Keep messages short and choose a surface that is smooth and cool. Frosted cakes, chilled cheesecakes, and flat cookies are easier to write on than crumbly or uneven surfaces.
10. Chocolate Bark as Edible Decoration
Chocolate bark is both a dessert and a decoration. Spread melted chocolate onto parchment paper, sprinkle it with toppings, let it set, and break it into pieces. You can serve bark on its own, tuck pieces into cupcakes, use it to decorate cakes, or add it to a dessert board.
The topping possibilities are nearly endless. Try crushed peppermint, toasted almonds, pistachios, dried cherries, mini marshmallows, pretzels, coconut flakes, espresso powder, graham cracker crumbs, or colorful sprinkles. For a sweet-salty combination, add crushed pretzels and flaky sea salt. For a fruit-forward bark, use white chocolate with freeze-dried strawberries and lemon zest.
Chocolate bark is also one of the best beginner projects because it does not require perfect piping or precision. Break it into uneven pieces and call it “artisan.” Works every time.
Common Mistakes to Avoid When Decorating with Melted Chocolate
Overheating the Chocolate
Chocolate can scorch if heated too aggressively. Use short heating intervals and stir often. Residual heat will continue melting small pieces, so stop heating before every bit looks melted and stir until smooth.
Letting Water Touch the Chocolate
Water is the villain in many chocolate stories. Make sure bowls, spoons, fruit, and tools are completely dry. Even steam from a double boiler can cause problems if it drips into the bowl.
Decorating Warm Desserts Too Soon
If you drizzle chocolate over a hot cake or warm cookie, it may melt, run, or lose its shape. Let baked goods cool before decorating unless you intentionally want a soft sauce effect.
Using the Wrong Bag Opening
A huge hole in your piping bag creates thick lines that are hard to control. Start with a tiny opening. You can always cut it bigger, but you cannot un-cut it. Chocolate does not come with an undo button.
How to Store Chocolate Decorations
Most firm chocolate decorations can be stored in an airtight container at cool room temperature, away from sunlight, heat, and strong odors. If your kitchen is warm, refrigerate them briefly, but avoid long exposure to humidity because condensation can dull the surface. Place parchment paper between layers to prevent delicate pieces from sticking or breaking.
Chocolate-dipped fruit is best enjoyed the same day or within 24 hours, especially strawberries and juicy fruit. Cookies, bark, shards, and piped shapes usually hold longer when stored properly.
Experience Notes: What Actually Helps When Decorating with Melted Chocolate
After you decorate with melted chocolate a few times, you start learning the kind of lessons that recipes do not always shout loudly enough. The first lesson is that setup matters. Melted chocolate waits for no one. Before melting anything, line your trays with parchment, open your sprinkles, chop your nuts, dry your fruit, and prepare your piping bag. If you wait until the chocolate is ready to start hunting for scissors, the chocolate will sit there quietly thickening like it has somewhere better to be.
The second lesson is that parchment paper is your best friend. It keeps dipped treats from sticking, makes cleanup easier, and gives you a safe place to practice. If you are piping hearts, letters, lace, or swirls, test a few shapes on parchment before touching the actual dessert. You will quickly learn whether your chocolate is too runny, too thick, or just right. Practice pieces are not failures; they are snacks in training.
Another useful experience is learning to embrace contrast. A chocolate drizzle looks more striking when the color stands out against the dessert. White chocolate over dark brownies, dark chocolate over vanilla cupcakes, milk chocolate over shortbread, and ruby or tinted white chocolate over pale cookies all create visual interest. Texture contrast matters too. Smooth chocolate looks even better with something crunchy, such as chopped nuts, crushed pretzels, toasted coconut, or cookie crumbs.
When decorating for parties, choose techniques that can be done ahead of time. Chocolate bark, shards, curls, and piped shapes are excellent make-ahead decorations. Store them carefully, then add them shortly before serving. This keeps your schedule calmer and prevents the classic party-host moment where guests arrive while you are holding a piping bag and looking personally betrayed by a cupcake.
For beginners, the easiest winning combination is dipped plus drizzled. Dip strawberries, cookies, pretzels, or marshmallows in one type of chocolate, let the coating set slightly, then drizzle with another color. It looks layered and professional, but the technique is simple. You can use the same idea for holiday desserts by changing toppings: red and green sprinkles for Christmas, pastel decorations for spring, orange and black for Halloween, or gold sugar for New Year’s Eve.
It also helps to understand that not every chocolate decoration needs to be perfect. In fact, irregular designs often look more modern and handmade. Uneven bark pieces, abstract drizzles, and jagged shards can look more stylish than decorations that try too hard. The goal is not machine-level precision. The goal is dessert that makes people say, “Wait, you made this?” while reaching for a second piece.
Finally, taste still comes first. A beautiful decoration made with chocolate you do not enjoy will not save the dessert. Choose chocolate with a flavor you actually like. Dark chocolate brings depth and balances sweet toppings. Milk chocolate is creamy and crowd-friendly. White chocolate adds sweetness and color contrast. When the flavor and design work together, melted chocolate becomes more than decoration. It becomes the finishing touch that makes dessert memorable.
Conclusion
Decorating with melted chocolate is one of the simplest ways to turn everyday desserts into something special. A quick drizzle can upgrade cookies, a dipped strawberry can become a centerpiece, and a handful of chocolate shards can make a cake look like it came from a boutique bakery. Best of all, these techniques do not require expensive equipment or advanced pastry training.
Start with one easy method, such as drizzling or dipping, then try piped shapes, curls, lace, marbling, and bark as your confidence grows. Keep your tools dry, use gentle heat, work on parchment paper, and let the chocolate guide you. It may be a little fussy, but it rewards you with shine, sweetness, and the kind of dessert decoration that makes people pause before taking a bite.
Note: For best results, melt chocolate slowly, keep all tools dry, and allow decorated desserts to set fully before serving or packaging.