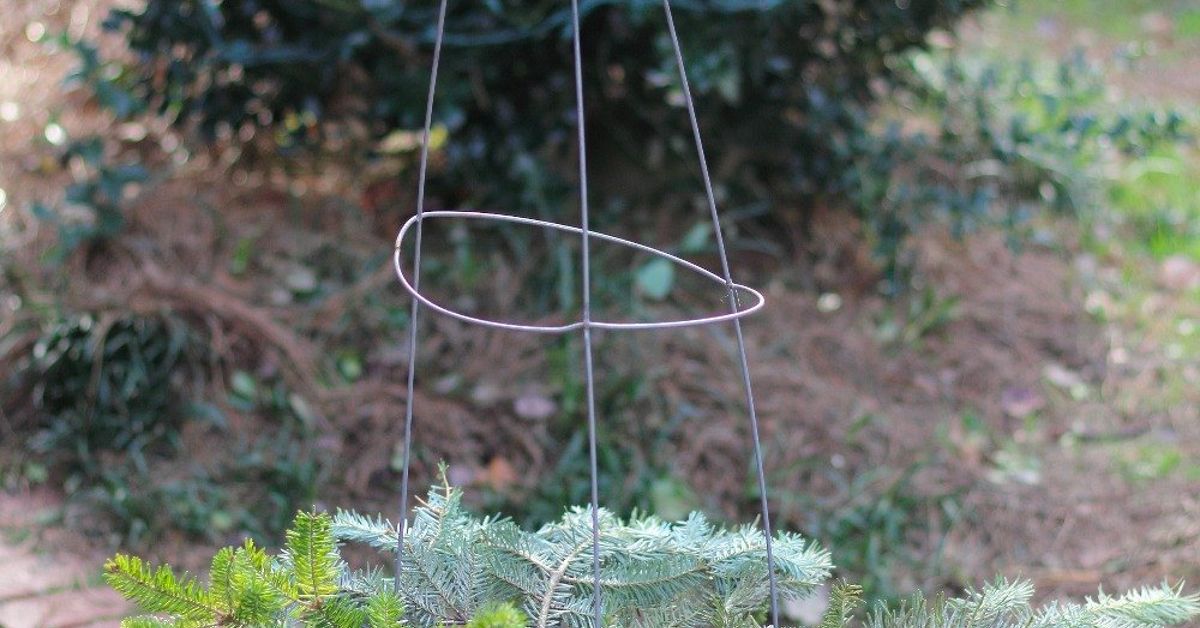
A tomato cage Christmas tree is exactly what it sounds like: a humble garden cage dressed up like it just got invited to the North Pole gala. It is inexpensive, surprisingly sturdy, easy to customize, and perfect for porches, patios, entryways, small apartments, offices, dorm rooms, and anyone who wants holiday charm without hauling a seven-foot evergreen through the front door.
The beauty of this DIY Christmas project is that it starts with something practical and slightly boring. A tomato cage spends most of its life helping summer tomatoes stand tall. Then December rolls around, and suddenly it becomes a sparkling mini tree covered in garland, ribbon, lights, ornaments, bows, pinecones, bells, or whatever festive treasures are hiding in your craft drawer. It is the holiday version of a garden tool getting a makeover montage.
This guide explains how to make a tomato cage Christmas tree step by step, including indoor and outdoor versions, budget-friendly decorating ideas, safety tips, troubleshooting advice, and real-life experience notes that will save you from the classic “why is my tree leaning like it knows a secret?” problem.
What Is a Tomato Cage Christmas Tree?
A tomato cage Christmas tree is a handmade decorative tree built by turning a tomato cage upside down, tying the pointed stakes together to form a cone, and wrapping the frame with garland, lights, ribbon, mesh, greenery, or ornaments. The result looks like a slim artificial Christmas tree, but it costs much less and can be made in many sizes.
Because tomato cages already have circular rings and vertical supports, they create a ready-made tree frame. You do not need carpentry skills, a garage full of tools, or the patience of a saint. If you can wrap garland around a cone and secure it with zip ties, you can make this tree. If your garland gets tangled, congratulations, you are participating in a traditional holiday ritual.
Why This DIY Tree Is So Popular
The tomato cage Christmas tree has become a favorite among DIY decorators because it solves several holiday decorating problems at once. It is affordable, lightweight, compact, reusable, and easy to personalize. You can make one elegant tree for a front porch or create a group of three in different heights for a cheerful outdoor display.
It also works well for small spaces. Not every home has room for a full-size Christmas tree. A tomato cage tree can sit beside a doorway, in a planter, on a balcony, or near a fireplace as long as it is kept safely away from heat. It gives you that classic tree shape without stealing half the living room.
Another big advantage is flexibility. Want a farmhouse Christmas tree? Use burlap ribbon, pinecones, buffalo check bows, and warm white lights. Prefer glam? Try metallic ornaments, silver mesh, and champagne ribbon. Decorating for kids? Add candy cane ornaments, bright lights, and a topper that looks like it was chosen by someone who believes glitter is a food group.
Supplies You Will Need
Before you begin, gather your materials. The exact supplies depend on the style you want, but the basic project is simple.
Basic Materials
- One tomato cage, ideally 42 inches or taller
- Zip ties, floral wire, twist ties, or strong garden wire
- Artificial pine garland, tinsel garland, deco mesh, or faux greenery
- LED Christmas string lights
- Wire cutters or scissors
- Work gloves
- Ribbon, ornaments, bows, pinecones, bells, or picks
- A tree topper, bow, star, ornament cluster, or large ribbon knot
Optional Materials for Outdoor Trees
- Outdoor-rated LED lights
- Outdoor-rated extension cord
- Ground stakes, landscape staples, bricks, sandbags, or a heavy planter
- Weather-resistant ornaments
- Outdoor zip ties
- Timer approved for outdoor use
If you are making several trees, buy supplies in multiples and keep your color palette consistent. Three tomato cage trees in matching garland and lights look intentional. Three tomato cage trees wearing completely different personalities can also work, but only if your theme is “holiday yard sale with confidence.”
Step-by-Step Instructions: How to Make a Tomato Cage Christmas Tree
Step 1: Choose the Right Tomato Cage
Start with a sturdy wire tomato cage. A standard round cage works well, but square and cone-shaped cages can also be used. Taller cages create a more dramatic tree, while smaller cages make cute tabletop or planter trees.
If the cage is rusty, wipe it down and consider spray-painting it green, black, white, gold, or silver. Painting is optional because the frame will be covered, but it helps hide gaps if you are using thinner garland. Let the paint dry completely before adding lights or decorations.
Step 2: Turn the Cage Upside Down
Flip the tomato cage so the pointed stakes face upward. These stakes become the top of your tree. Gather them together and secure them with zip ties, floral wire, or strong twist ties. Bend the stakes gently inward until they form a neat cone shape.
Wear gloves for this step. Tomato cage wires can be sharp, and nothing ruins holiday crafting faster than losing a wrestling match with garden equipment. If the wires are stubborn, use pliers to help shape them.
Step 3: Stabilize the Frame
Before you decorate, make sure the tree stands straight. If you are using it indoors, place it in a basket, bucket, urn, or planter. Add stones, floral foam, sand, or a small brick inside the container to weigh it down.
For outdoor trees, stability matters even more. Wind has no respect for your crafting schedule. Push the bottom ring into a large planter, use landscape staples to secure the base to the ground, or leave part of the cage legs exposed so they can be inserted into soil. On a porch, use sandbags or bricks hidden under greenery.
Step 4: Add the Lights First
Wrap LED string lights around the tomato cage before adding garland. Start at the bottom and spiral upward, spacing the lights evenly. If your tree will be seen from all sides, wrap the lights around the entire frame. If it will sit against a wall, you can focus more lights toward the front.
For a soft glow, use warm white lights. For a playful look, use multicolor lights. For a magical snowy effect, use cool white or twinkle lights. LED lights are a smart choice because they use less electricity and stay cooler than traditional incandescent bulbs.
Check that the lights work before wrapping them around the tree. This sounds obvious, but every holiday decorator eventually learns the hard way that dead lights enjoy waiting until they are beautifully installed.
Step 5: Wrap the Garland
Attach the end of your garland to the bottom ring with floral wire or a zip tie. Then wrap the garland around the cage in a spiral, working from the bottom to the top. Keep the rows close together if you want a full, lush tree. Leave a little space between rows if you prefer a lighter, airy look.
When you reach the end of one garland strand, secure it to the frame and start the next strand where the first one ends. Tuck loose ends inward so they disappear. If your garland has wired branches, twist some of the tips around the cage to hold everything in place.
For a 42-inch tomato cage, you may need two to four strands of garland depending on thickness. Thin dollar-store garland usually needs more layers. Thick pine garland covers faster and looks fuller, but it may cost more. The good news: the tree does not judge your budget.
Step 6: Fill Gaps and Shape the Tree
Step back and look at the tree from several angles. Fluff the garland branches outward and fill visible gaps with extra greenery, floral picks, ribbon loops, or ornaments. If one side looks flat, add more volume there.
For a realistic evergreen look, mix textures. Add cedar-style picks, pine sprays, berry stems, eucalyptus, frosted branches, or small pinecones. Layering textures makes the tree look less like a tomato cage in disguise and more like a boutique decoration that wandered out of an expensive catalog.
Step 7: Add Ribbon or Deco Mesh
Ribbon can make a simple tomato cage tree look polished. Wired ribbon is easiest to shape. Start near the top and let the ribbon cascade downward in loose spirals, or create loops and attach them to the frame with floral wire.
Deco mesh creates a fuller, brighter tree and works especially well for outdoor porch displays. Use red mesh for a candy cane feel, gold mesh for glam, burlap mesh for farmhouse style, or white mesh for a snowy look.
Step 8: Decorate With Ornaments
Choose ornaments that match the scale of your tree. Small and medium ornaments usually look best. Oversized ornaments can be charming, but too many will make the tree look like it is being attacked by festive beach balls.
For outdoor trees, use shatterproof ornaments. Plastic, wood, metal, fabric, and weather-resistant ornaments are better choices than delicate glass. Secure ornaments with wire or twist ties so wind does not relocate them to your neighbor’s yard.
Step 9: Add a Topper
The top of a tomato cage Christmas tree needs a finishing touch. A bow is the easiest option because it hides the tied wires beautifully. You can also use a star, angel, oversized ornament, cluster of bells, pinecone spray, or bundle of ribbon curls.
If the top feels wobbly, reinforce it with extra wire before adding the topper. A secure topper makes the entire tree look more finished.
Step 10: Plug It In and Adjust
Once decorated, plug in the lights and make final adjustments. Evening is the best time to check the glow. You may discover dark spots, uneven ribbon, or one ornament that has decided to face the wall like it is in timeout.
Move lights, fluff garland, and rotate ornaments until the tree looks balanced. The final result should feel festive, full, and intentional.
Indoor Tomato Cage Christmas Tree Ideas
An indoor tomato cage tree can be elegant, whimsical, rustic, or modern. Place one in an entryway to greet guests, beside a fireplace for cozy charm, or in a child’s room as a smaller personal Christmas tree.
Farmhouse Style
Use pine garland, burlap ribbon, wood bead garland, buffalo check bows, pinecones, and warm white lights. Place the tree in a galvanized bucket or woven basket for a cozy country look.
Classic Red and Green
Wrap the tree in green garland, red ribbon, gold bells, candy cane ornaments, and warm lights. This style is cheerful, familiar, and almost guaranteed to make someone say, “That is adorable,” which is the official currency of holiday crafting.
Glam Metallic
Use silver or gold tinsel garland, metallic ornaments, champagne ribbon, and cool white lights. A metallic tomato cage tree works beautifully in apartments, offices, and modern living rooms.
Kids’ Craft Tree
Let children decorate a tomato cage tree with paper ornaments, felt shapes, pom-poms, candy cane decorations, and handmade stars. Because the tree is lightweight and inexpensive, it is less stressful than handing toddlers a box of heirloom glass ornaments and whispering, “Please respect family history.”
Outdoor Tomato Cage Christmas Tree Ideas
Tomato cage Christmas trees are especially popular outdoors because they look great in groups. Place matching trees on both sides of the front door, line a walkway, or create a trio in different heights near the porch steps.
Porch Planter Tree
Set the tomato cage inside a heavy planter. Fill the base with soil, stones, or sand. Cover the surface with pine branches, faux snow, pinecones, or ornaments. This creates the look of a mini evergreen growing from the pot.
Pathway Trees
Make several small tomato cage trees and place them along a walkway. Use matching lights for a cohesive glow. Secure each tree well so winter wind does not turn your charming path into a Christmas obstacle course.
Flocked Winter Tree
Use white garland, frosted greenery, silver ornaments, and cool white lights. Add snowflake ornaments or clear acrylic picks for sparkle. This style looks especially pretty at night.
Rustic Woodland Tree
Decorate with pinecones, red berries, plaid ribbon, small bird ornaments, and natural-looking greenery. This version pairs well with wreaths, lanterns, and wooden porch signs.
Important Safety Tips
Holiday decorations should be fun, not fiery. If you are using lights, inspect every strand before decorating. Do not use light strings with frayed wires, cracked sockets, loose connections, or missing bulbs. Follow the manufacturer’s instructions for how many strands can be connected together.
For outdoor tomato cage Christmas trees, use lights and extension cords rated for outdoor use. Keep plugs and connections dry, avoid overloading outlets, and do not run cords where people can trip. A ground-fault circuit interrupter outlet is recommended for outdoor electrical decorations.
Turn lights off before going to bed or leaving home. A timer makes this easy and saves energy. Also keep indoor trees away from candles, fireplaces, heaters, vents, and other heat sources. Even artificial garland and decorations should be treated with common sense.
Common Mistakes to Avoid
Using Too Little Garland
Thin garland can leave the wire frame visible. If your tree looks sparse, add another layer or tuck in extra greenery picks. Fullness is what makes the project look finished.
Skipping the Base Weight
A lightweight tomato cage can tip over, especially outside. Always anchor the base with soil, stones, stakes, sandbags, bricks, or a heavy container.
Adding Ornaments Before Lights
Lights should usually go on first. Wrapping lights after ornaments is possible, but it is also a fast way to create a tangled comedy scene in your living room.
Ignoring Weather
Outdoor decorations need to handle wind, rain, snow, and temperature changes. Choose weather-resistant materials and secure everything more firmly than you think necessary.
Forgetting to Fluff
Garland often looks flat right out of the package. Spend a few minutes fluffing branches and spreading tips. This small step makes a big difference.
Budget Tips for Making It Look Expensive
You do not need luxury supplies to create a beautiful tomato cage Christmas tree. Start with a simple green cage, add affordable garland, and focus on layers. A few well-placed accents can make basic materials look high-end.
Use one standout ribbon instead of buying dozens of ornaments. Mix cheap filler ornaments with a few larger statement pieces. Add natural elements such as pinecones, twigs, dried orange slices, or faux berries. Shop post-holiday clearance for next year’s trees. Reuse old ornaments that no longer match your main Christmas tree. The tomato cage tree is forgiving; it was a vegetable support in a past life, so it understands reinvention.
How to Store Your Tomato Cage Christmas Tree
If you have storage space, keep the tree assembled and cover it with a large plastic bag or tree storage bag. This preserves the shape and saves time next year. If space is limited, remove ornaments, ribbon, and lights, then store the cage and garland separately.
Label your supplies so next December you do not open a mystery bin and wonder why you own seventeen zip ties, one lonely bow, and a garland strand that looks like it fought a raccoon.
Real-Life Experiences: What You Learn After Making One
The first thing you learn when making a tomato cage Christmas tree is that the project looks almost too easy online. Flip the cage, tie the top, wrap the garland, and boom: instant holiday magic. In real life, it is still easy, but there are tiny lessons that make the difference between “cute DIY tree” and “why does this look like a festive traffic cone?”
One of the biggest experience-based tips is to spend more time shaping the cage at the beginning. If the top wires are not pulled evenly together, the whole tree can look crooked. It may stand fine, but visually it will lean. Taking five extra minutes with gloves and pliers helps create a cleaner cone. This matters most when the tree will be placed near a front door, where every guest gets a close-up inspection whether they asked for one or not.
Another practical lesson is that garland thickness matters more than price. A cheap garland can still work beautifully if you use enough of it and fluff it well. However, one thin strand will not hide the cage. If the frame shows through, add a second layer, overlap the rows, or use ribbon to cover bare spots. Many experienced crafters use the less attractive garland as a base layer and save the nicest garland for the outside. It is basically holiday shapewear for your tree.
Lighting also teaches patience. Warm white lights create a cozy, classic look, while cool white lights look crisp and snowy. Multicolor lights instantly make the tree playful. The trick is to wrap lights evenly before adding garland or ornaments. If the lights are buried too deeply, they disappear. If they sit too far outside, the cords show. The sweet spot is usually just under the outer garland layer, where the glow peeks through without looking tangled.
Outdoor trees bring their own personality. Wind is the main villain. A tomato cage tree may look stable on a calm afternoon, then wobble dramatically during the first cold gust. A heavy planter is the easiest fix. Add rocks, sand, soil, or bricks inside, then hide the weight with greenery or faux snow. If the tree sits in a garden bed, leave some of the cage legs exposed and push them into the soil. It feels less glamorous than ribbon, but it works.
Decorating in groups is another lesson worth remembering. One tomato cage tree is cute. Three trees in different heights look designed. Place the tallest in the back, the medium tree slightly forward, and the smallest near the front. Keep the lights and ribbon consistent so the group feels connected. This arrangement works especially well beside porch steps or in a wide entryway.
Finally, the best tomato cage Christmas trees usually include one personal detail. Maybe it is a bow made from leftover fabric, ornaments from past years, pinecones collected on a walk, or a topper your child made with heroic amounts of glue. That small handmade touch gives the tree character. Store-bought decorations can be beautiful, but a DIY tree should have a little wink in it. That is the whole point: taking an ordinary garden cage and turning it into something cheerful enough to make December feel brighter.
Conclusion
Learning how to make a tomato cage Christmas tree is one of the easiest ways to create affordable, customizable holiday decor. With a tomato cage, garland, lights, ribbon, and a few decorations, you can build a charming tree for your porch, patio, entryway, office, or small living space. The project is beginner-friendly, budget-conscious, and endlessly adaptable.
The key is to build a stable frame, use enough garland for fullness, add lights safely, secure outdoor decorations properly, and finish with a topper that gives the tree personality. Whether your style is farmhouse, classic, glam, rustic, or cheerfully chaotic, a tomato cage Christmas tree can fit right in.
Best of all, this DIY project proves that holiday magic does not always come from expensive decorations. Sometimes it starts in the garden shed, wearing a little dirt and waiting for its big festive comeback.