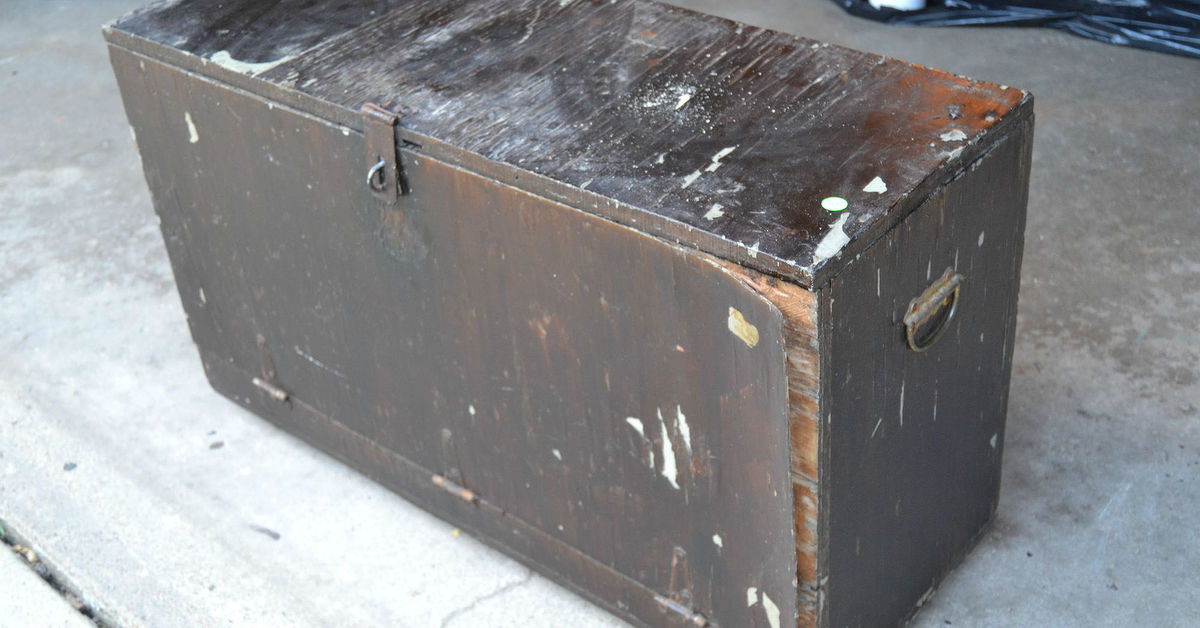
Somewhere in a garage, shed, basement, or mysterious “I’ll deal with it later” corner, there is an old toolbox waiting for a second act. It may be dented. It may be rusty. It may have one handle that squeaks like it is auditioning for a haunted-house soundtrack. But before you toss it, donate it, or let it keep collecting dust beside the half-empty paint cans, consider this: an old toolbox can become some of the most useful storage in your home.
A new storage from old toolbox upcycle project is the perfect mix of practical, affordable, and charming. You take something sturdy that already has compartments, a lid, a handle, and a little personality, then turn it into a storage solution for craft supplies, gardening tools, office clutter, cleaning items, pet accessories, entryway essentials, or even kitchen odds and ends. In other words, the toolbox gets promoted from “rusty garage relic” to “organized home hero.” Not bad for something that once held mystery screws.
This guide walks through how to choose, clean, restore, style, and use an old toolbox as smart DIY storage. Whether your style is farmhouse, industrial, vintage, minimalist, or “I just want the counter to stop looking like a junk drawer exploded,” this upcycle can work beautifully.
Why Upcycle an Old Toolbox Instead of Buying New Storage?
Buying new storage is easy. Sometimes too easy. One minute you are looking for a drawer organizer, and the next minute you own twelve plastic bins, three baskets, and a label maker you suddenly treat like a family member. Upcycling an old toolbox slows things down in the best way. It asks, “What do I already have?” and often the answer is: something stronger, cooler, and more interesting than a brand-new container.
Old toolboxes are typically built to survive weight, movement, dust, and actual work. Metal toolboxes can handle heavy supplies. Wooden tool caddies bring warmth and rustic character. Plastic toolboxes may not have the same vintage charm, but they are lightweight, washable, and great for portable storage. Instead of adding another mass-produced bin to the house, you create a custom piece that fits your needs.
Upcycling also supports a reduce-and-reuse mindset. Reusing an existing object often comes before recycling because it extends the life of the item with minimal processing. A toolbox that might have ended up in the trash becomes a craft caddy, seed-starting station, bathroom organizer, desk supply kit, or mobile repair box. That is a small home project with a bigger purposeand yes, it still counts even if you mainly wanted a cute place to hide glue sticks.
What Kind of Old Toolbox Works Best?
The best toolbox for upcycling is one that is solid enough to use, safe enough to handle, and interesting enough to earn a spot in your home. It does not need to be perfect. In fact, a few dents and scratches can make it better. Upcycling is forgiving. It is not a beauty pageant for storage containers.
Metal Toolboxes
Metal toolboxes are excellent for industrial-style storage. They are strong, durable, and often come with trays or dividers. A red, blue, gray, or green vintage metal toolbox can look fantastic on a shelf, workbench, potting bench, or mudroom cubby. The main thing to check is rust. Surface rust can often be cleaned and sealed, but deep corrosion, sharp edges, or flaking unknown paint should be handled carefully.
Wooden Tool Caddies
Wooden caddies are ideal for farmhouse, cottage, and rustic interiors. They are easy to sand, paint, stain, or stencil. Because many wooden toolboxes have open compartments, they are especially good for items you use often: garden gloves, seed packets, paintbrushes, notebooks, utensils, and small jars of supplies.
Plastic Toolboxes
Plastic toolboxes are practical when you need easy-clean storage. They work well for kids’ art supplies, basic household repair kits, first-aid organization, car supplies, or camping accessories. They may not deliver antique-store drama, but they do deliver convenience. Sometimes function deserves a round of applause too.
Before You Start: Clean, Sort, and Safety Check
Before turning an old toolbox into new storage, empty it completely. This sounds obvious, but old toolboxes have a talent for hiding tiny nails, dull blades, broken drill bits, and at least one screw that belongs to nothing known on Earth. Shake it gently over newspaper or a tray. Remove loose hardware, dirt, cobwebs, and anything sharp.
Next, give it a basic cleaning. For metal or plastic, use mild soap, warm water, and a cloth or soft brush. Avoid soaking wooden boxes, since too much water can warp the wood. For grime in corners, an old toothbrush works well. If the toolbox smells musty, leave it open in a dry, ventilated area. A small bowl of baking soda placed inside overnight can help absorb odors.
If the toolbox has old flaking paint, treat it with caution. Some older painted items may contain lead-based paint. Do not aggressively sand unknown old paint indoors. If you are unsure, keep the original finish sealed with a clear protective coating, use a lead test kit, or choose a newer toolbox for projects that involve children’s supplies, kitchen items, or frequent handling.
Also think about what you plan to store. Avoid using an old toolbox for food unless it has been thoroughly cleaned and lined appropriately. Do not store flammable liquids, oily rags, or unsafe chemicals in a decorative indoor toolbox. If you store sharp tools, use dividers, sheaths, or a lockable box, especially in homes with younger siblings, pets, or curious guests who think “Do not open” means “adventure begins here.”
How to Restore an Old Toolbox for Storage
You can keep the original patina or give the toolbox a full makeover. Both approaches work. The right choice depends on your style, the condition of the box, and how much patience you have before muttering, “This was supposed to be a weekend project.”
Option 1: Keep the Vintage Finish
If your toolbox has great color, readable branding, or charming wear, preserve it. Clean it well, remove loose rust, and seal it with a clear matte or satin topcoat. This keeps the character while making the surface cleaner and more usable. A preserved vintage finish looks especially good in an entryway, bookshelf display, craft room, or potting area.
Option 2: Paint It Fresh
For a cleaner look, paint the toolbox. Remove loose dirt and rust, lightly sand glossy areas, wipe away dust, apply primer suited to the material, and finish with durable paint. Spray paint can create a smooth finish on metal, while brush-on paint works nicely for wood. Classic colors include black, white, navy, sage green, barn red, and soft cream. For a playful craft room, try coral, yellow, teal, or whatever color makes you weirdly happy at the paint aisle.
Option 3: Line the Inside
Lining the inside makes the box feel finished and protects delicate items. Use adhesive drawer liner, cork sheets, felt pads, thin foam, or removable wallpaper. For craft supplies, a wipeable liner is best. For jewelry or office supplies, felt or cork adds softness. For garden storage, skip anything too precious; soil will happen. Soil always happens.
Smart Storage Ideas for an Old Toolbox Upcycle
The magic of an old toolbox organizer is its portability. You can carry supplies to the table, garden, porch, desk, or garage, then put everything away in one trip. That is organization with a handle, and frankly, more things in life should come with handles.
1. Craft Supply Caddy
An old toolbox makes a fantastic craft caddy. Use the main compartment for scissors, glue, markers, washi tape, small paint bottles, embroidery floss, yarn tools, or paper punches. Add small jars or tins inside to separate beads, buttons, clips, and pins. A removable tray is perfect for tiny supplies that disappear the moment you need them.
This idea works especially well because craft supplies need two things: visibility and containment. If everything is buried in a drawer, you forget what you own. If everything is loose on a table, your home begins to resemble a glitter crime scene. A toolbox keeps the fun without the chaos.
2. Garden Tool and Seed Station
A wooden or metal toolbox can become a charming garden caddy. Store gloves, plant labels, twine, seed packets, small pruners, a hand trowel, and a notebook for tracking what you planted. Keep it by the back door, in the shed, or on a potting bench. If the toolbox will be near moisture, use a protective coating and avoid leaving it exposed to rain.
For extra organization, place seed packets in labeled envelopes or small dividers. Add a pencil, because garden notes written with good intentions vanish faster than basil in July.
3. Entryway Drop Zone
Entryways collect keys, sunglasses, receipts, dog leashes, mail, lip balm, and the emotional weight of everyone arriving home at once. A toolbox can bring order to the landing strip. Use it to hold keys, wallets, reusable shopping bags, umbrellas, and small grab-and-go items.
A vintage metal toolbox on a console table adds character while hiding clutter. A wooden caddy on a bench can hold seasonal accessories like gloves, hats, sunscreen, bug spray, or dog-walking supplies. Add labels if your household treats every container like a guessing game.
4. Home Office Organizer
If your desk drawers are full of pens that may or may not work, an upcycled toolbox can help. Store pens, sticky notes, charging cables, stamps, paper clips, highlighters, scissors, tape, and small notebooks. A toolbox is especially useful for shared workspaces because it can be moved when the kitchen table needs to become a dinner table again.
For a polished look, choose a toolbox color that matches your office decor. Add small cups or cardboard dividers inside so supplies stay upright. The goal is not perfection; the goal is finding the tape before you have already used your teeth, your patience, and a questionable amount of determination.
5. Bathroom or Vanity Storage
A clean, lined toolbox can organize hair accessories, nail polish, skincare samples, travel toiletries, makeup brushes, cotton pads, and grooming tools. This works best with a toolbox that has a smooth interior and no lingering workshop residue.
Use small containers inside to separate categories. One section can hold daily items, another can hold extras, and the tray can hold small pieces like hair ties or nail files. Avoid storing damp items in a metal toolbox unless the interior is protected and fully dry after use.
6. Kids’ Art or Homework Kit
A plastic or freshly painted toolbox can become a portable homework station. Fill it with pencils, crayons, glue sticks, child-safe scissors, erasers, index cards, rulers, and sticky notes. When homework starts, the whole kit goes to the table. When homework ends, everything returns to the box. This system is simple enough to maintain, which is the secret sauce of any organizing project.
For younger kids, choose lightweight materials and avoid old boxes with sharp corners or flaking finishes. Add name labels or fun stickers so the toolbox feels personal rather than like a tiny office filing system with a handle.
7. Cleaning Supply Grab-and-Go Kit
A sturdy toolbox can hold microfiber cloths, scrub brushes, gloves, small spray bottles, sponges, and trash bags. This is especially useful for bathrooms, laundry rooms, and quick cleanup tasks. Use a plastic toolbox or lined metal box for easy wiping. Keep products upright, and do not mix chemicals or store anything that should be kept out of reach.
The benefit is speed. Instead of wandering around the house looking for supplies, you grab one box and go. Your future self will be impressed. Possibly suspicious, but impressed.
Design Tips: Make It Look Intentional
The difference between “old toolbox upcycle” and “why is there garage equipment in the living room?” is styling. The toolbox should look like it belongs in the space. Luckily, that does not require a design degree or a dramatic home makeover montage.
First, match the finish to the room. A rusty red metal toolbox looks great with industrial shelves, leather accents, black metal, or warm wood. A white-painted wooden caddy fits farmhouse, coastal, or cottage decor. A matte black toolbox can look modern and clean. If the toolbox is colorful, repeat that color somewhere nearby, such as in artwork, a pillow, a planter, or a book spine.
Second, avoid overfilling it. A toolbox stuffed past capacity looks chaotic. Leave a little breathing room. Storage should reduce visual noise, not create a tiny portable junk mountain.
Third, group items by purpose. A craft toolbox should not also hold batteries, receipts, birthday candles, and a screwdriver unless you enjoy living inside a junk drawer. Give each toolbox one clear job. When an object has a job, it is easier to use and easier to maintain.
Where to Find Old Toolboxes
If you do not already own an old toolbox, look for one at thrift stores, flea markets, estate sales, garage sales, salvage shops, and online local marketplaces. Ask relatives too. Many families have an old toolbox tucked away, quietly guarding a collection of mismatched screws and one wrench nobody recognizes.
When shopping secondhand, check the handle, hinges, latch, bottom, and corners. Open and close it several times. A little stiffness is fine. A lid that requires a wrestling match is not ideal. Smell the inside, too. If it has a strong chemical odor, skip it for indoor storage. For decorative use, you can be more flexible; for bathroom, office, craft, or kids’ supplies, choose something cleaner and safer.
Common Mistakes to Avoid
The first mistake is skipping the cleaning stage. Even if the toolbox looks fine, it may have metal dust, grease, old residue, or sharp bits hiding inside. Clean first, decorate second.
The second mistake is choosing style over function. A gorgeous toolbox that is too heavy, too small, or too awkward to open will become clutter itself. Pick a box that fits the items you actually need to store.
The third mistake is ignoring weight. Metal toolboxes can get heavy fast. If you fill one with books, jars, tools, or canned supplies, make sure the handle and base can support the load. If it feels risky, place it on a shelf as stationary storage instead of carrying it around.
The fourth mistake is storing unsafe items casually. Sharp tools, harsh cleaners, batteries, and heavy hardware should be organized with care. A toolbox is useful, but it is not magic. It cannot turn poor storage choices into good ones just because it looks cute.
Experience Notes: What This Project Teaches You
The best part of a new storage from old toolbox upcycle is not just the finished container. It is the way the project changes how you look at clutter. Once you successfully turn one forgotten object into useful storage, you start seeing possibilities everywhere. A chipped tray becomes a mail station. A mason jar becomes a brush holder. A wooden crate becomes shoe storage. Suddenly your home is not a place full of problems; it is a place full of raw material.
In real use, an upcycled toolbox performs best when it solves one specific daily annoyance. For example, a craft toolbox works wonderfully when it holds the exact supplies used most often: scissors, markers, glue, tape, stickers, and a few small containers. The moment it becomes a storage unit for every craft item ever owned, it loses its usefulness. The same is true for garden storage. A toolbox with gloves, twine, labels, and seed packets is helpful. A toolbox crammed with every garden tool in the shed becomes a weightlifting challenge with dirt.
Another experience worth noting is that imperfect finishes are often easier to live with. A freshly painted toolbox looks beautiful, but the first scratch can feel tragic. A vintage toolbox with existing patina is more relaxed. It already has history, so new marks blend in. That makes it ideal for active storage in busy households. You can actually use it instead of treating it like a museum artifact with hinges.
The project also teaches a useful organizing lesson: portable storage is powerful. Many messes happen because supplies are used in one place but stored in another. A toolbox bridges that gap. Bring art supplies to the table, repair tools to the loose cabinet handle, seed packets to the garden bed, or cleaning supplies to the bathroom. Then return everything in one trip. Fewer trips usually means fewer abandoned items. Fewer abandoned items means less clutter. Less clutter means you can finally see the surface of that table again. Congratulations; it was wood the whole time.
There is also a personal satisfaction that comes from making storage instead of just buying it. The project does not need to be expensive or complicated. Sometimes all it takes is cleaning, lining, and assigning a purpose. Other times, paint and new hardware make it feel completely transformed. Either way, the result carries a story. A new plastic bin can hold supplies, but an old toolbox can hold supplies and make people ask, “Where did you get that?” That is when you get to casually say, “Oh, I made it,” and enjoy a tiny, well-earned moment of DIY glory.
Finally, this upcycle reminds you that organization should fit real life. If your household will not maintain a complicated system, keep it simple. If labels help, label it. If open compartments work better, use them. If the toolbox needs to live by the door instead of in a closet, put it where it is useful. Good storage is not about impressing the internet. It is about making daily life easier, calmer, and slightly less likely to involve searching for scissors while holding a half-wrapped birthday present.
Conclusion
An old toolbox is more than a container from the garage. It is a ready-made storage solution with structure, strength, and character. With a little cleaning, a smart safety check, and a clear purpose, it can become a craft caddy, garden station, entryway organizer, office supply box, bathroom kit, homework helper, or cleaning caddy.
The beauty of this project is its flexibility. You can preserve the worn vintage finish, paint it a bold new color, line the inside, add dividers, or keep it simple. The main rule is to make the toolbox useful for the way you actually live. When storage is attractive, portable, and easy to maintain, it stops being another container and starts becoming part of your routine.
So before you pass by that dusty old toolbox, take another look. It might be rusty. It might be scratched. It might contain three mystery washers and a receipt from another decade. But with a little imagination, it can become new storage with old souland that is the kind of upcycle worth making room for.