Pictures in Excel are wonderfully helpfuluntil they start floating around the worksheet like tiny office ghosts. One minute your product photo is sitting politely inside cell B3. The next minute you sort the table, adjust a row height, or filter a list, and the image has wandered off like it has a meeting in another department.
If you use Excel for inventory lists, employee directories, product catalogs, real estate sheets, student records, restaurant menus, repair logs, or any spreadsheet where images matter, learning how to automatically resize pictures in Excel cell can save a surprising amount of time. It also makes your workbook look less like a collage made during a coffee emergency.
The good news: Excel now gives users better ways to place images in cells than the old “insert, drag, resize, sigh, repeat” method. Depending on your Excel version and your goal, you can either use the built-in Picture in Cell feature or use a formatting-and-macro approach for more control. This guide explains two practical ways to make pictures fit cells automatically, stay aligned, and behave properly when rows and columns change.
Why Pictures Do Not Always Behave Like Cell Content in Excel
Before jumping into the two methods, it helps to understand the main problem. Traditional pictures inserted in Excel are usually placed over cells, not truly inside cells. That means the image is an object floating on top of the worksheet grid. It may look like it belongs to a cell, but unless the right settings are applied, Excel treats it more like a sticker than normal cell content.
This is why pictures may overlap nearby rows, stay behind when you sort data, cover text, refuse to resize with a row, or become misaligned after filtering. For a single logo, that may not be a big deal. For 300 product photos, it becomes a spreadsheet soap opera.
To automatically resize images in Excel cells, you need one of two things:
- A true in-cell image that scales with the cell.
- A floating image that is locked to the cell and set to move and size with it.
Both approaches work, but they are best for different situations. Let’s look at them in detail.
Way 1: Use Excel’s Picture in Cell Feature
The easiest modern way to automatically resize pictures in Excel cell is to use Excel’s built-in Picture in Cell option. This feature places the image directly inside a cell, so the picture behaves more like normal spreadsheet content. When you resize the row or column, the picture adjusts with the cell while keeping the worksheet clean and organized.
Best For
This method is ideal for users who want a simple, no-code solution. It is especially useful for product catalogs, employee photos, school rosters, image-based checklists, book lists, menu sheets, and visual inventory trackers.
How to Insert a Picture Directly Into a Cell
- Open your Excel workbook.
- Select the cell where you want the picture to appear.
- Go to the Insert tab.
- Choose Pictures.
- Select Place in Cell, then choose the image source, such as your device, stock images, or online pictures depending on your Excel version.
- Select the image and insert it.
Once inserted, the image sits inside the cell. If you increase the row height or column width, the picture scales with the cell. If the cell becomes smaller, the picture shrinks. It is a much cleaner experience than manually dragging picture corners until your patience files a resignation letter.
How to Resize the Cell for a Better Image Fit
After inserting the image, adjust the row height and column width:
- Move your cursor to the boundary between row numbers.
- Drag downward to increase row height.
- Move your cursor to the boundary between column letters.
- Drag right to increase column width.
The picture should resize automatically inside the cell. For best results, use consistent row heights and column widths, especially when working with many images. If you are building a product list, for example, you might set each image cell to a square-like shape so every product photo looks balanced.
When to Use the IMAGE Function Instead
If your pictures are hosted online, Excel’s IMAGE function can also place images inside cells. This is useful when your worksheet pulls images from URLs, such as product image links, catalog databases, public image assets, or internal company image servers.
A basic formula looks like this:
The first argument is the image URL. The second argument is alt text, which helps describe the image. Depending on your needs, the IMAGE function can also use sizing options to fit, fill, or display images with custom dimensions. For a web-based catalog, this can be a powerful way to keep images dynamic. Change the URL, and the picture updates without manually reinserting anything.
Advantages of the Picture in Cell Method
- It is simple and beginner-friendly.
- No VBA or macro setup is required.
- Pictures resize when the cell size changes.
- Images stay better organized during sorting and filtering.
- It creates a cleaner workbook for visual data.
Possible Limitations
The Picture in Cell feature depends on your Excel version. If your version does not show the Place in Cell option, you may need to update Excel or use another approach. Also, if you need to insert hundreds of local images based on file names, the manual method can still become slow. That is where the second method earns its coffee.
Way 2: Use “Move and Size with Cells” Plus VBA for Automatic Fitting
The second way to automatically resize pictures in Excel cell is to insert the image over the cell, resize it to fit, and then set the picture property to Move and size with cells. This tells Excel that when the cell changes size or position, the picture should follow along.
This method is especially useful in older Excel versions or in workbooks where pictures are already floating over cells. It also works well when combined with a VBA macro that automatically fits images into selected cells.
Part A: Manually Lock a Picture to a Cell
Here is the basic manual process:
- Go to the Insert tab.
- Choose Pictures, then insert your image.
- Drag the picture so it sits inside the target cell.
- Resize the image so it fits within the cell boundaries.
- Right-click the picture and choose Format Picture.
- Open the Size & Properties section.
- Under Properties, select Move and size with cells.
Now, when you resize the row or column, the image should resize with the cell. If you sort or filter the table, the image is more likely to stay connected to its row. This is the classic fix for pictures that look attached to cells but are actually floating above them.
Part B: Use VBA to Fit Pictures Automatically
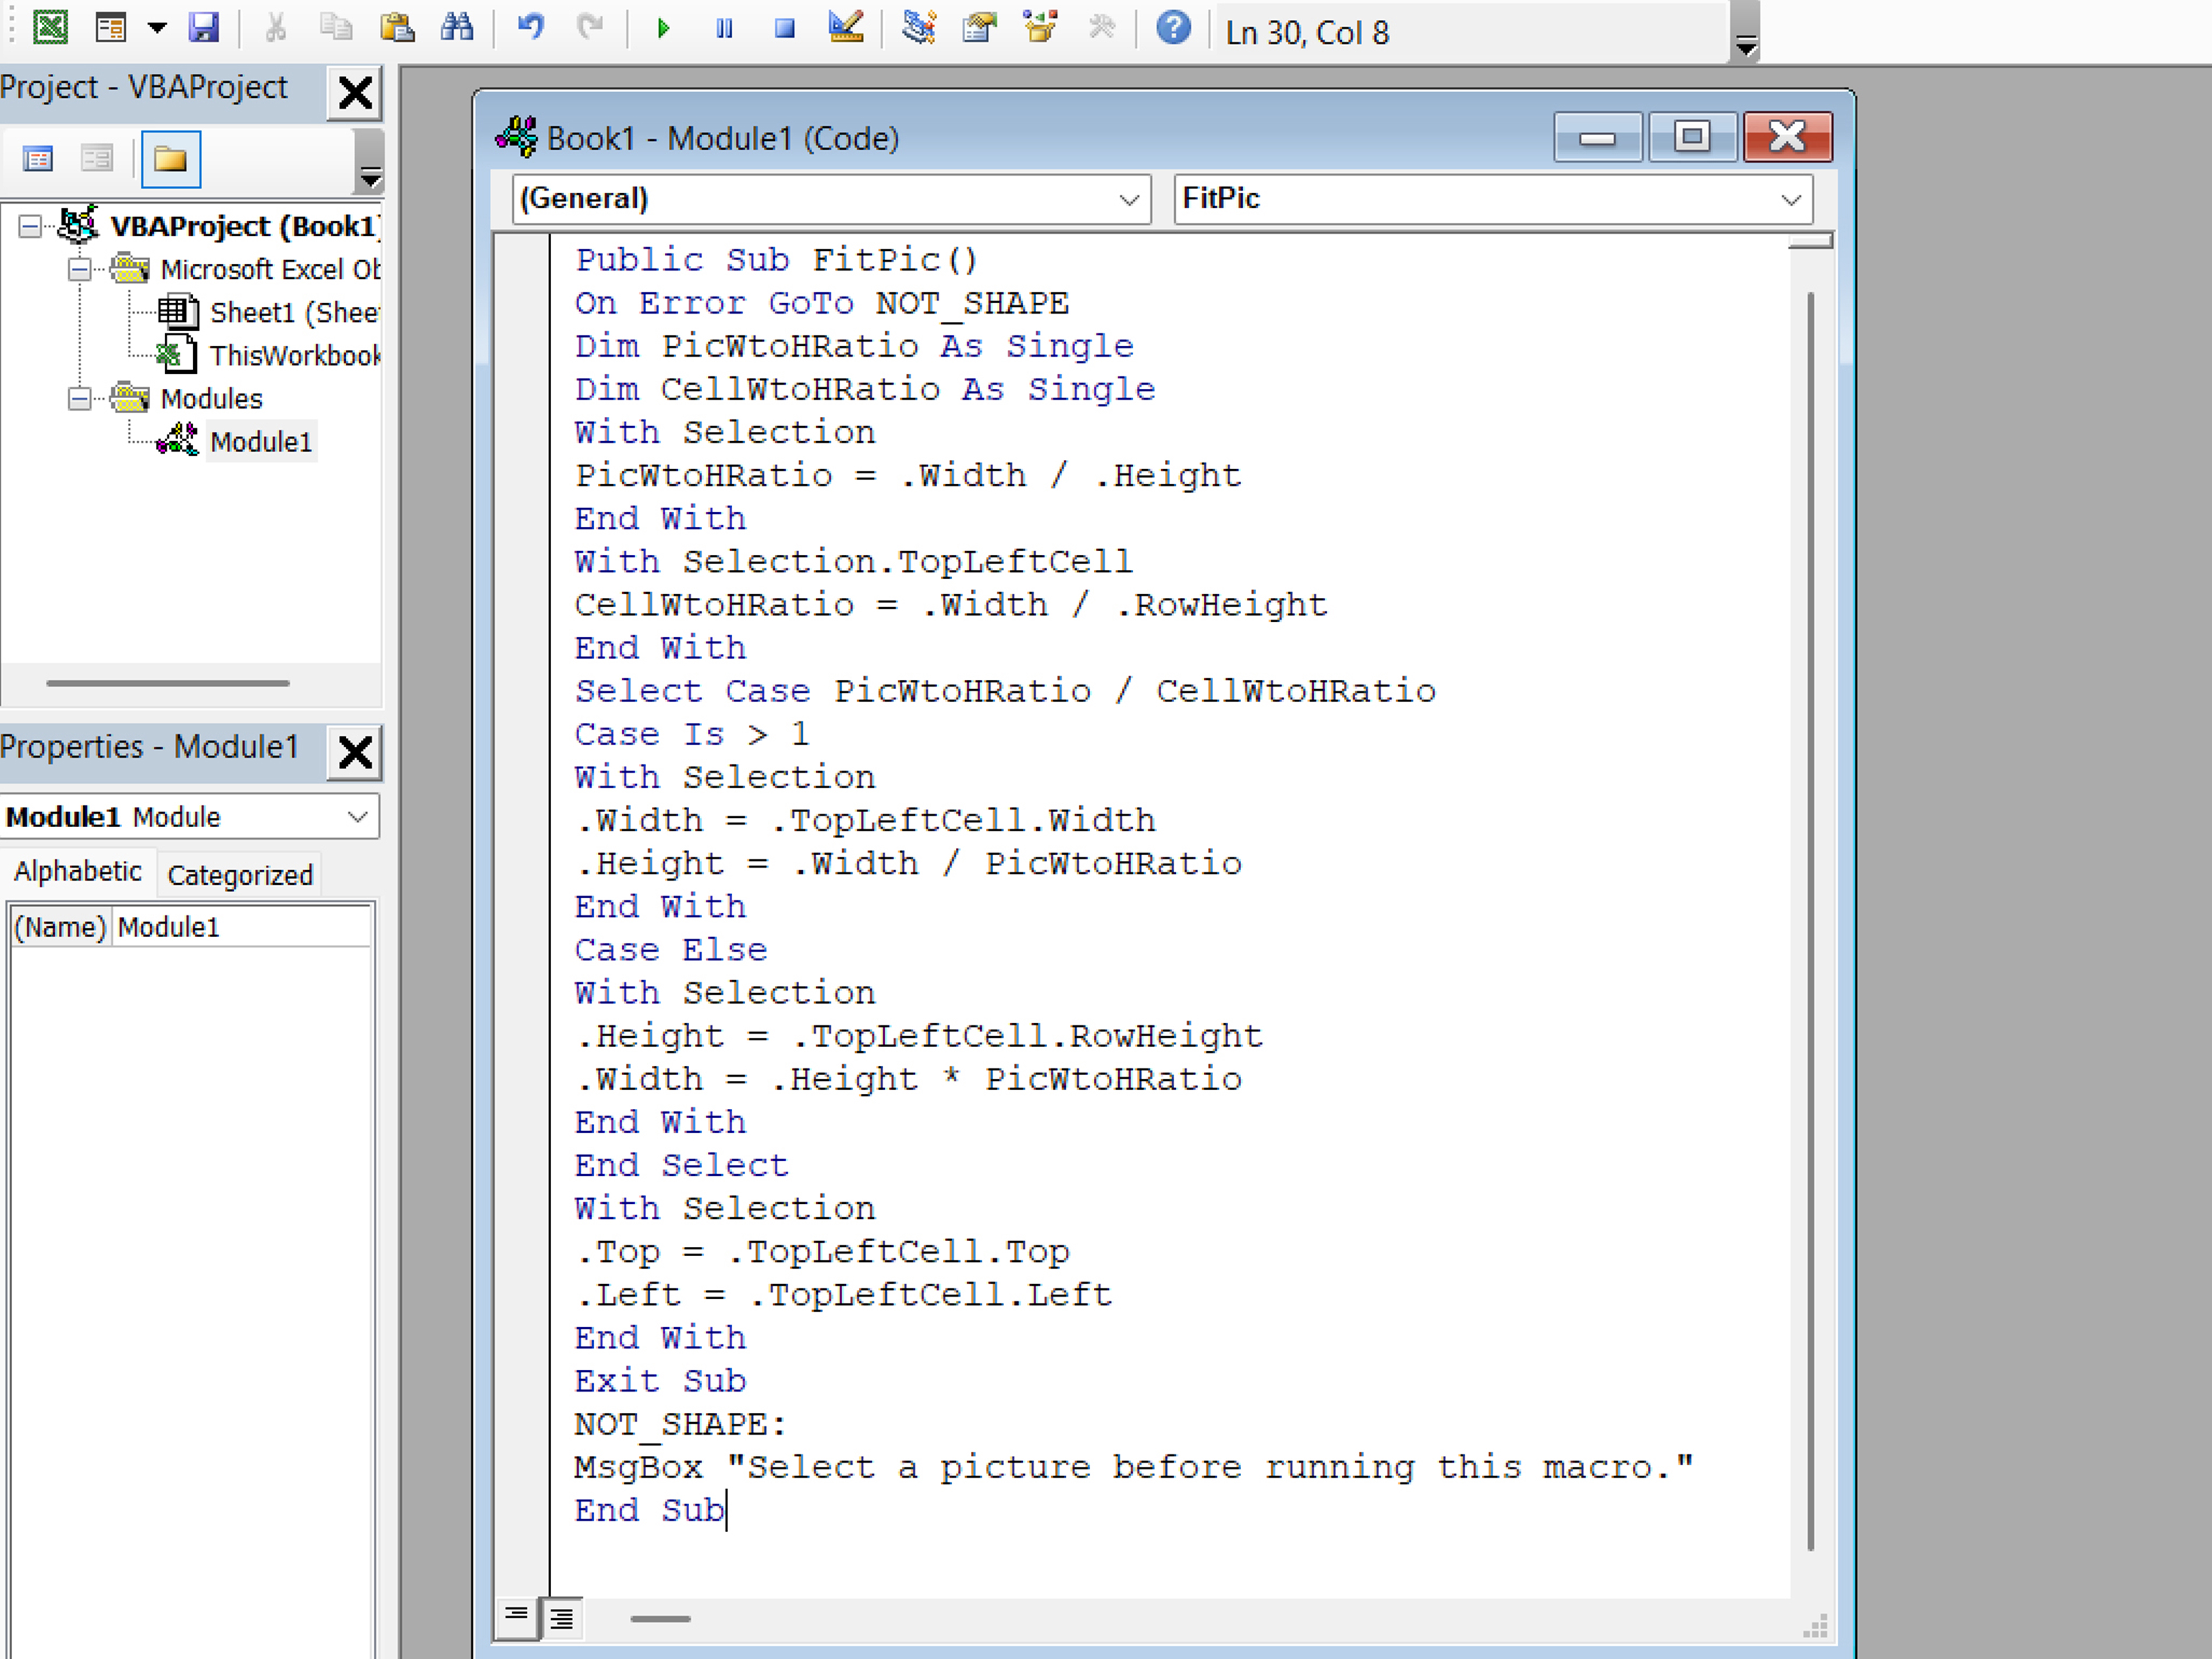
If you have many pictures, manually resizing them one by one is not exactly a thrilling use of human potential. A simple VBA macro can resize selected pictures to match the cells beneath them.
Here is an example macro that fits selected pictures to the cells they are positioned over:
How to Use the Macro
- Save a copy of your workbook first. Macros are powerful, and powerful things deserve a backup.
- Press Alt + F11 to open the Visual Basic Editor.
- Click Insert, then choose Module.
- Paste the VBA code into the module.
- Close the Visual Basic Editor.
- Select the pictures you want to resize.
- Run the macro named FitSelectedPicturesToCells.
The macro checks the top-left cell of each selected picture, then resizes the picture to match that cell’s width and height. It also sets the placement property so the picture moves and sizes with the cell.
Keeping the Aspect Ratio
The sample macro above uses .LockAspectRatio = msoFalse, which means the picture will stretch to exactly match the cell. This is useful for uniform grids, but it may distort photos. If you want to keep the original proportions, change that line to:
With aspect ratio locked, the picture keeps its natural shape. The tradeoff is that it may not fill the entire cell. In many professional workbooks, preserving image proportions looks better than forcing every photo into the same shape. A product photo should look like a product photo, not like it was squeezed through a spreadsheet pasta machine.
Which Method Should You Choose?
If your Excel version supports Picture in Cell, use it for the cleanest and simplest experience. It is the best option for most everyday users because it treats images more naturally as part of the worksheet.
If you are working with older files, floating pictures, or batch image placement, use Move and size with cells and consider VBA automation. This gives you more control and can save a large amount of time when handling dozens or hundreds of images.
| Situation | Best Method |
|---|---|
| You want a simple no-code solution | Picture in Cell |
| You use online image URLs | IMAGE function |
| You already have floating images | Move and size with cells |
| You need to resize many images quickly | VBA macro |
| You need consistent catalog-style image cells | Picture in Cell or VBA |
Common Problems and Quick Fixes
The Picture Does Not Resize with the Cell
Right-click the picture, open Format Picture, go to Size & Properties, and make sure Move and size with cells is selected. If the image was inserted as a floating object, this setting is essential.
The Image Looks Stretched
If the image looks distorted, the cell shape probably does not match the picture’s original proportions. Make the cell closer to the image shape, or preserve the aspect ratio when using VBA. For portraits, use taller cells. For product thumbnails, square cells often work best.
Images Move When Sorting
This usually happens when pictures are not properly attached to their cells. Use Picture in Cell where available, or apply Move and size with cells to each image. Also make sure the entire table range is included when sorting.
The Workbook Becomes Too Large
Large images can make an Excel file heavy. Before inserting photos, resize or compress them. A 4000-pixel product image may look beautiful, but Excel does not need a billboard-sized photo to show a thumbnail in a cell. Smaller images keep your workbook faster and easier to share.
The Place in Cell Option Is Missing
Your Excel version may not support the feature, or it may not be available in your current environment. Check for updates, try Excel for Microsoft 365, or use the manual locking method. The “Move and size with cells” method remains a practical fallback.
Best Practices for Working With Pictures in Excel Cells
To create a professional-looking worksheet, do not just insert images and hope for peace. A little structure makes a big difference.
- Use consistent cell sizes: Set a standard row height and column width before inserting images.
- Compress images first: Smaller image files keep Excel from becoming slow.
- Name image files clearly: Product IDs, employee names, or SKU numbers make automation easier.
- Use alt text: Descriptive alt text improves accessibility and makes your workbook easier to understand.
- Back up before running macros: VBA can save time, but it can also resize a lot of things very quickly.
- Avoid merged cells: Merged cells often cause layout problems with images, sorting, and filtering.
Real-World Examples
Product Inventory Sheet
Imagine a small online store tracking product names, SKUs, prices, stock levels, and product photos. Using Picture in Cell, each item photo can sit neatly beside its product details. When the owner filters by category or sorts by stock quantity, the images remain aligned with the correct products.
Employee Directory
An HR team can build a visual staff directory with names, departments, contact information, and profile pictures. By inserting pictures into cells or locking them to cells, the directory stays tidy even when sorted by department or location.
Repair and Maintenance Log
A maintenance team may track equipment photos, issue descriptions, repair status, and dates. Automatically resizing pictures in Excel cells keeps visual records compact and easy to review. Nobody wants to scroll past a machine photo the size of a movie poster just to find a repair note.
Experience Notes: What Actually Works Best in Daily Excel Use
After working with image-heavy spreadsheets, one lesson becomes obvious very quickly: the best method is the one that matches the workbook’s purpose. If the spreadsheet is simple, modern, and meant for regular users, Picture in Cell is usually the most comfortable choice. It feels natural because the image belongs to the cell, not to some invisible layer floating above the worksheet.
For example, in a product catalog, Picture in Cell makes the sheet easier to maintain. You can add item names in one column, prices in another, and pictures in a dedicated image column. When you adjust the row height, the images resize without requiring careful manual dragging. This is especially helpful when the workbook will be shared with people who are not Excel power users. They should not need a secret handshake with the Format Picture pane just to keep photos in place.
However, older workbooks often contain images that were inserted long before Picture in Cell was available. In those cases, “Move and size with cells” is still a lifesaver. The trick is to be disciplined. First, set your row heights and column widths. Then place each image carefully inside its target cell. After that, apply the property setting. If you do it in the opposite orderinsert everything first, resize later, then sort the datayou may create a layout puzzle that makes Monday morning feel personal.
For larger projects, VBA becomes valuable. Suppose you receive a folder with 150 product images and a spreadsheet with matching product IDs. Manually inserting and resizing each picture can consume hours. A macro can reduce that process dramatically, especially if the file names match the product codes. The key is to test the macro on a small sample first. Run it on five images, check the result, then continue. This avoids the classic macro mistake: clicking Run and discovering that Excel followed your instructions perfectly, just not the instructions you meant.
Another practical tip is to prepare images before inserting them. Many people use photos directly from phones or cameras, which can be huge. Excel can display them, but the workbook may become slow, bloated, and difficult to email. Resize images outside Excel when possible. For thumbnail-style spreadsheet images, you usually do not need extremely high resolution. A smaller, cleaner image often works better and keeps the file responsive.
Finally, think about the reader. A spreadsheet with pictures should still behave like a spreadsheet. Users should be able to sort, filter, scan, and understand it quickly. Images should support the data, not wrestle the data for attention. When pictures automatically resize in Excel cells, the workbook feels intentional, polished, and easier to use. That is the real winnot just prettier cells, but fewer layout headaches and fewer moments of whispering “why are you like this?” to your screen.
Conclusion
Learning how to automatically resize pictures in Excel cell is one of those skills that sounds small until you need it. Then suddenly it feels like the difference between a polished workbook and a visual traffic jam.
For most users, the best first choice is Excel’s Picture in Cell feature. It is simple, clean, and designed for modern image-based spreadsheets. If you need more control, or if you are working with older floating images, use Move and size with cells and consider a VBA macro for batch resizing.
Whether you are building a product catalog, employee directory, inventory tracker, or visual report, properly resized images make your spreadsheet easier to read, easier to sort, and much easier to maintain. Excel may never become a photo-editing appand honestly, nobody asked it to wear that hatbut with the right method, it can handle pictures inside cells surprisingly well.