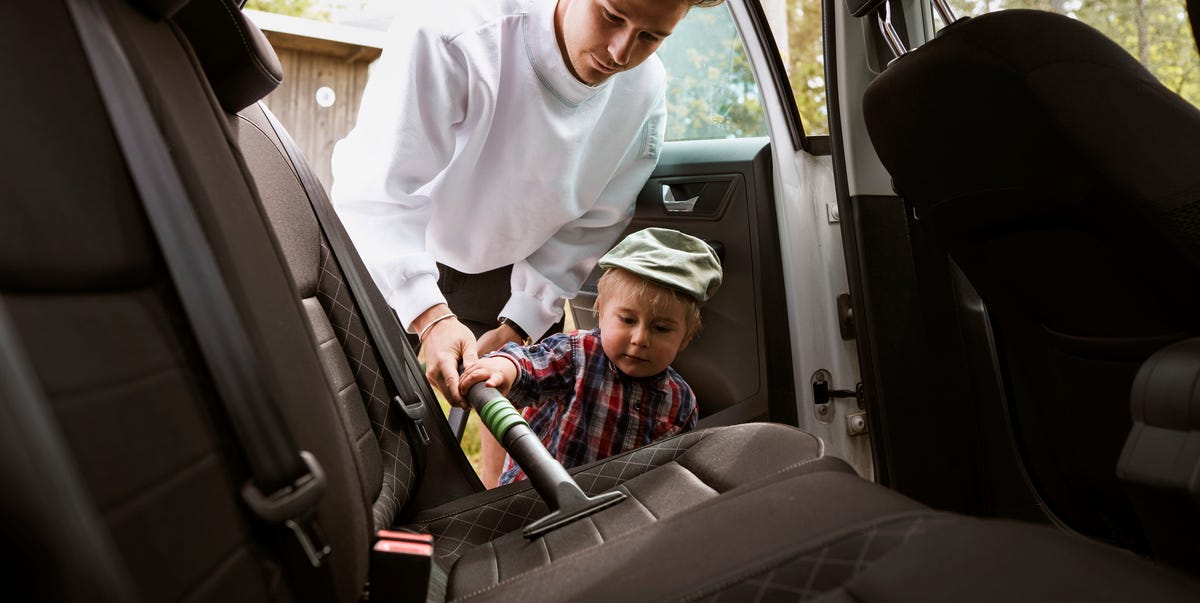
Car seats live a dramatic life. They host coffee spills, snack crumbs, gym sweat, beach sand, mystery smudges, pet hair, and the occasional French fry that disappears into a seat crack like it found a secret portal. The good news? You do not need a professional detailing shop, a hazmat suit, or a garage full of expensive machines to make your seats look fresh again.
Learning how to clean car seats like pros is mostly about using the right method for the right material. Cloth, leather, vinyl, faux leather, and suede-style upholstery all respond differently to moisture, scrubbing, heat, and cleaning products. Treat every seat the same and you may end up with water stains, faded leather, sticky vinyl, or fabric that smells like wet socks with ambition.
This guide walks you through a professional-style process for cleaning car seats safely and effectively. You will learn what tools to use, how to handle different upholstery types, how to remove stains from car seats, and how to keep them cleaner longer. Buckle up. The crumbs are nervous.
Why Professional Car Seat Cleaning Looks Better
Professional detailers do not simply spray cleaner and scrub until their arms file a complaint. They follow a system: inspect, vacuum, pre-treat, agitate, extract or wipe, dry, and protect. Each step prevents a common cleaning mistake.
For example, vacuuming first removes grit that can scratch leather or grind deeper into cloth. Testing a cleaner in a hidden spot helps prevent discoloration. Using microfiber towels reduces lint and streaks. Drying thoroughly keeps odors and mildew from moving in like unwanted roommates.
The pro mindset is simple: clean gently, work in sections, avoid soaking, and let the material tell you what it needs.
Tools and Supplies You Need
You do not need every detailing gadget on the internet. Start with a focused kit that covers most situations:
- Vacuum with crevice and brush attachments
- Soft-bristle interior brush
- Microfiber towels
- Automotive upholstery cleaner
- Leather cleaner and leather conditioner
- Small detailing brush or clean toothbrush
- Spray bottle with clean water
- Wet/dry vacuum or upholstery extractor, if available
- Baking soda for odor control
- Gloves and good ventilation
Choose cleaners made for automotive interiors whenever possible. Household cleaners can be too harsh for car upholstery, especially leather and coated surfaces. Also, avoid bleach, strong solvents, and aggressive degreasers unless the vehicle manufacturer specifically says they are safe. Your seats are not a kitchen floor, even if your kids have treated them like one.
Step 1: Remove Trash, Mats, and Loose Items
Before cleaning car seats, clear the area. Remove cups, papers, toys, jackets, loose change, and anything hiding under the seats. Take out floor mats so you can access the lower seat edges and rails.
This is also the moment when you may find ancient receipts, fossilized crackers, or one lonely mint from 2021. Stay strong. Every professional cleaning job begins with making the workspace manageable.
Step 2: Vacuum Like You Mean It
Vacuuming is the foundation of car seat cleaning. Use the crevice tool along seams, seat backs, bolsters, and the tight space between the seat and center console. Use a soft brush attachment on the seat surface to lift dust, pet hair, and crumbs.
For fabric seats, brushing while vacuuming helps loosen particles trapped in the weave. For leather seats, vacuum gently so grit does not scratch the surface. Move the seats forward and backward to reach hidden debris underneath.
Do not skip this step. If you scrub before vacuuming, you are basically turning dirt into seasoning and rubbing it into the seat. That is not detailing. That is upholstery betrayal.
Step 3: Identify Your Seat Material
The best way to clean car seats depends on the material. Look at your owner’s manual if you are unsure. Many modern vehicles use coated leather, synthetic leather, vinyl, cloth, microfiber, or suede-like materials such as Alcantara.
Cloth Seats
Cloth seats are comfortable but absorb spills quickly. They need careful moisture control and thorough drying.
Leather Seats
Most automotive leather is coated, but it still needs gentle cleaning and conditioning. Harsh scrubbing can dull the finish or damage stitching.
Vinyl and Faux Leather Seats
Vinyl and synthetic leather are easier to wipe clean, but sticky spills and body oils can cling to textured surfaces.
Suede or Alcantara-Style Seats
These materials require extra caution. Too much water or aggressive brushing can flatten the nap and leave marks.
How to Clean Cloth Car Seats
Cloth upholstery is the most common target for stains because it absorbs liquids fast. The goal is to clean the fibers without soaking the foam underneath.
1. Pre-Treat Stains
Spray a small amount of automotive fabric cleaner onto the stained area or onto a microfiber towel. Do not drench the seat. Let the cleaner sit briefly so it can loosen dirt and oils.
2. Agitate Gently
Use a soft-bristle brush and work in small circles. For stubborn stains, brush from the outside of the stain toward the center to avoid spreading it. If you are dealing with dried mud, vacuum thoroughly first before adding moisture.
3. Blot and Extract
Blot with a clean microfiber towel. If you have a wet/dry vacuum or upholstery extractor, use it to pull out moisture and loosened dirt. This is one reason professional detailers get such crisp results: they remove the dirty solution instead of letting it dry back into the fabric.
4. Rinse Lightly
If the cleaner leaves residue, mist a towel with clean water and wipe the area. Avoid pouring water directly onto the seat. Residue attracts dirt, so a light rinse helps the seat stay clean longer.
5. Dry Completely
Leave the doors or windows open in a safe, shaded place. Use fans if possible. Seats should feel dry before you drive or close up the car for hours. Moisture trapped in fabric can create odors faster than a forgotten gym bag.
How to Clean Leather Car Seats
Leather car seats need a gentler approach. The wrong cleaner can strip oils, damage coatings, or leave a shiny, greasy finish that looks less “luxury sedan” and more “buttered movie popcorn.”
1. Vacuum First
Use a soft brush attachment and carefully vacuum seams, stitching, and perforated areas. Dirt caught in perforations can be stubborn, so take your time.
2. Apply Leather Cleaner to a Towel or Brush
Do not spray heavily onto the seat, especially if it is perforated leather. Apply leather cleaner to a microfiber towel or soft interior brush, then work one small section at a time.
3. Wipe Away Dirt Immediately
After gentle agitation, wipe the area with a clean microfiber towel before the cleaner dries. Flip the towel often so you are not spreading grime around.
4. Condition the Leather
Once the seat is clean and dry, apply a small amount of leather conditioner if the manufacturer recommends it. Use a thin, even layer. More conditioner is not better; excess product can leave seats slippery or greasy.
5. Buff the Finish
Use a dry microfiber towel to buff the surface. Properly cleaned leather should look natural, not wet or overly shiny.
How to Clean Vinyl and Faux Leather Car Seats
Vinyl and faux leather seats are generally easier to clean than cloth, but textured surfaces can trap body oils, sunscreen, food residue, and dust.
Start with vacuuming, then wipe the seats with a microfiber towel dampened with a mild interior cleaner. Use a soft brush on textured areas and seams. Wipe again with a clean damp towel, then dry with another microfiber towel.
For protection, use a product designed for vinyl or synthetic interior surfaces. Avoid greasy protectants that leave seats slick. A clean, original-looking finish is the goal, not a dashboard from a 1990s music video.
How to Clean Suede or Alcantara-Style Car Seats
Suede-like automotive materials are stylish but sensitive. First, check the manufacturer’s care instructions. Use a dedicated suede or microfiber upholstery cleaner if available.
Vacuum gently with a soft attachment. For light dirt, use a dry microfiber towel or suede brush. For stains, apply cleaner sparingly to a towel, not directly to the seat. Blot gently, then brush the fibers in one direction after drying to restore the texture.
Do not soak suede-style seats. Do not attack them with a stiff brush. They may look tough, but emotionally, they are delicate.
How to Remove Common Car Seat Stains
Coffee Stains
Blot immediately with a dry towel. For cloth seats, use upholstery cleaner and gentle brushing. For leather or vinyl, wipe with a damp microfiber towel and follow with the proper cleaner. Avoid rubbing aggressively, which can spread the stain.
Grease and Fast Food Stains
Remove excess grease with a dry towel first. Use a fabric-safe upholstery cleaner for cloth or a leather-safe cleaner for leather. Work slowly and repeat if needed. Grease often takes more than one pass.
Pet Hair
Vacuum first, then use a rubber pet-hair tool, rubber glove, or slightly damp microfiber towel to lift stubborn hair from cloth. Brush in one direction to gather hair into clumps before vacuuming again.
Ink Marks
Ink can be difficult. Test any cleaner in a hidden spot first. Avoid flooding the stain. On leather, use a product specifically designed for leather stains, and stop if color transfers to your towel.
Odors
For cloth seats, sprinkle baking soda lightly over the surface, let it sit, then vacuum thoroughly. For deeper odors, clean the upholstery and dry it completely. Odor often comes from trapped moisture or residue, not just the surface.
Pro Tips for Better Results
Work in Sections
Clean one seat panel at a time. This prevents cleaner from drying before you wipe it away and helps you see your progress.
Use Less Product Than You Think
Oversaturating seats is one of the biggest DIY mistakes. More foam does not mean more clean. It often means more residue and longer drying time.
Always Test First
Before using any cleaner, test it on a hidden area. Wait a few minutes and check for discoloration, texture changes, or dye transfer.
Do Not Mix Cleaning Chemicals
Mixing products can create unsafe fumes or damage upholstery. Use one cleaner at a time, follow label instructions, and keep the car ventilated.
Be Careful Around Seat Electronics
Modern seats may include heating, cooling, airbags, occupancy sensors, and power controls. Keep liquids away from switches, wiring, and seatbelt buckles.
How Often Should You Clean Car Seats?
For most drivers, vacuuming once every one to two weeks keeps crumbs and grit under control. A light wipe-down every month helps prevent body oils and dust from building up. Deep clean cloth car seats every three to six months, or sooner if you have kids, pets, road-trip snacks, or a personal relationship with drive-thru coffee.
Leather seats usually benefit from regular wiping and occasional conditioning, depending on climate, sun exposure, and manufacturer recommendations. Hot, dry, sunny environments may require more attention because leather and vinyl can dry, fade, or crack over time.
Mistakes to Avoid When Cleaning Car Seats
One major mistake is soaking cloth seats. Too much water can reach the foam padding and create odors. Another is using harsh household cleaners on leather, which can damage the finish. Scrubbing too aggressively can fray fabric, flatten suede-like materials, or wear down stitching.
Also avoid using dark-colored towels on light seats, especially leather. Dye transfer is real, and it is very rude. Stick with clean white or light-colored microfiber towels when working on pale upholstery.
Finally, do not close the car immediately after a damp cleaning session. Drying is not optional. It is the final step that protects all the work you just did.
How to Keep Car Seats Cleaner Longer
The easiest way to clean car seats like pros is to prevent disasters before they become weekend projects. Keep a small trash bag in the car, use sealed drink containers, vacuum regularly, and treat spills quickly. Seat covers can help if you transport pets, sports gear, or kids with snack-based hobbies.
For leather and vinyl, park in the shade when possible or use a windshield sunshade. UV exposure can fade and dry interior materials. For cloth seats, avoid letting damp towels, swimsuits, or sweaty gym clothes sit on the upholstery.
A five-minute maintenance habit can save you from a two-hour deep clean later. Future you will be grateful, and future you is probably already tired.
Experience Notes: What Cleaning Car Seats Like Pros Teaches You
After cleaning enough car seats, you start noticing patterns. The dirtiest areas are rarely the big flat sections that everyone worries about. The real trouble zones are seams, side bolsters, seatbelt contact points, armrest edges, and the little valley between the seat and center console. That valley is basically a snack cemetery. If you only clean the visible middle of the seat, the car may look better for a day, but old dirt will creep back into view.
One practical experience is that patience beats pressure. Many people try to scrub stains out with force, especially on cloth seats. That can rough up the fabric and still leave the stain behind. A better approach is to apply a small amount of cleaner, let it dwell briefly, agitate gently, blot, and repeat. Stains often fade gradually. Think of it as convincing the stain to leave, not wrestling it in a parking lot.
Another lesson is that drying makes or breaks the job. A seat can look clean while it is damp, then dry with rings because dirty moisture traveled outward through the fabric. Working evenly across the panel helps avoid water marks. Using an extractor or wet/dry vacuum makes a huge difference because it removes dirty liquid instead of letting it settle back down. If you do not have one, clean lightly and blot aggressively with dry microfiber towels.
Leather teaches a different lesson: shiny is not always clean. Many neglected leather seats look glossy because they are coated with body oils, lotion, sunscreen, and grime. After proper cleaning, the surface often becomes more matte and natural. That is a good sign. A greasy shine may look dramatic in photos, but it can attract dust and make seats feel slippery.
Vinyl and faux leather are forgiving, but they still need detail work. Textured vinyl can hold grime in tiny grooves, especially on light-colored seats. A soft brush is often more effective than a towel alone. The trick is to brush gently and wipe immediately so loosened dirt does not dry back into the texture.
For families, the best car seat cleaning strategy is speed. Spills are easier to handle in the first few minutes than after a week of heat, pressure, and denial. Keep a small emergency kit in the trunk with microfiber towels, a travel-size interior cleaner, a plastic bag, and disposable gloves. It is not glamorous, but neither is discovering chocolate milk under a booster seat two days later.
For pet owners, vacuuming alone usually is not enough. Pet hair weaves into fabric like it signed a long-term lease. A rubber glove, pet-hair stone, or rubber squeegee can gather hair before vacuuming. Work slowly and use short strokes. Once the hair is clumped, the vacuum can finally do its job instead of making loud noises and false promises.
The biggest professional habit is consistency. A car that gets a quick vacuum and wipe every couple of weeks rarely needs a dramatic rescue mission. Small cleaning sessions protect the upholstery, reduce odors, and make the entire vehicle feel newer. Clean seats also improve the driving experience. There is something satisfying about getting into a car that smells fresh, feels tidy, and does not crunch when you sit down.
Note: Always follow your vehicle owner’s manual and product label instructions. Test cleaners in a hidden spot first, use good ventilation, and avoid soaking areas near electronics, airbags, seat controls, and seatbelt components.
Conclusion
Cleaning car seats like pros is not about using the strongest cleaner or scrubbing with superhero energy. It is about matching the method to the material, removing loose dirt first, using the right amount of moisture, and drying everything properly. Cloth seats need careful stain treatment and extraction. Leather seats need gentle cleaning and light conditioning. Vinyl and faux leather need texture-focused wiping. Suede-style seats need patience and a delicate touch.
With the right tools and a smart process, your car seats can look fresher, smell better, and last longer. Even better, you can stop pretending the stain on the passenger seat is “just a shadow.” It knows what it did.