Note: This is a body-only HTML article fragment, ready to paste into a web page template.
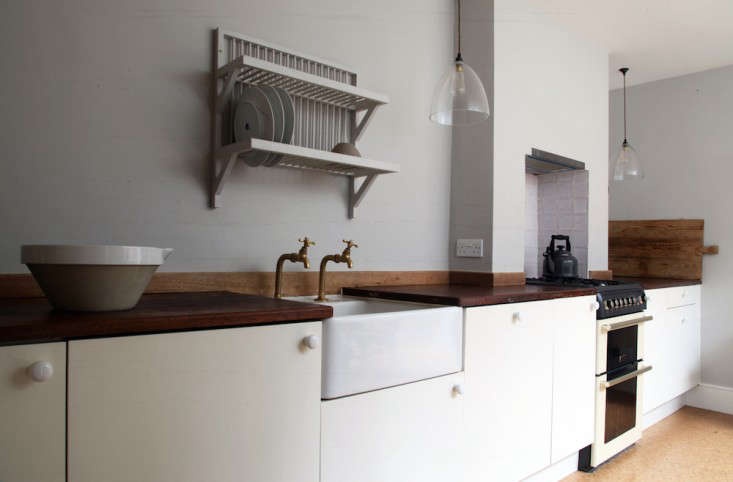
A kitchen countertop has a strangely important job. It must survive coffee rings, rogue tomato sauce, grocery bags dropped with Olympic-level enthusiasm, and at least one person who thinks a hot pan “will probably be fine for a second.” That is why upgraded IKEA wood countertops are such a satisfying DIY project: they can bring warmth, character, and a custom-built look to a kitchen without requiring a luxury-stone budget or a crew of countertop wizards.
Modern IKEA wood countertops come in several looks, including oak, walnut, birch, and patterned veneer designs. Many are made with a durable wood veneer over an engineered core rather than a solid slab of hardwood. That is not a flaw; it simply changes the DIY strategy. Instead of aggressively sanding like you are restoring a 200-year-old farmhouse table, the goal is to improve the finish, protect vulnerable edges, create a polished installation, and make the countertop look intentionally expensive.
This guide walks through how to upgrade an IKEA wood countertop for a kitchen, island, desk, laundry room, coffee bar, or built-in workspace. Think of it as giving your countertop a glow-up without forcing it to attend a reality TV reunion.
Why Upgrade an IKEA Wood Countertop?
Wood countertops add something that stone and laminate often struggle to deliver: visual warmth. A wood surface can soften a white kitchen, make dark cabinets feel less cave-like, and give a basic island the kind of personality usually associated with custom cabinetry.
The biggest advantage of an IKEA countertop DIY is flexibility. You can use a pre-sized countertop as-is, trim it for a small kitchen layout, turn it into a large island top, add decorative trim, or pair it with stock cabinets for a built-in look. A simple countertop can become the focal point of the room once you upgrade its finish and installation details.
Another benefit is repairability. Small scratches, dry patches, and mild stains are often easier to refresh on wood than on glossy manufactured surfaces. A careful cleaning, a light hand-sanding, and the right maintenance product can bring life back to a tired wood countertop. In other words, the countertop does not have to retire because somebody dragged a ceramic mixing bowl across it during a holiday baking spree.
Before You Start: Know What Kind of IKEA Wood Countertop You Have
Before buying stain, oil, polyurethane, wax, or enough sandpaper to open a tiny hardware store, identify the countertop construction. Some IKEA wood countertops use thick veneer over a particleboard core, while others may have different layered constructions. The care instructions for your specific model matter.
Why Veneer Changes the DIY Plan
A thick wood veneer can often be lightly sanded and refinished, but it is not the same as a solid butcher block slab. Sanding too aggressively can wear through the veneer and expose the core beneath it. Once that happens, your countertop makeover can quickly become a countertop apology tour.
Use a fine grit sandpaper, keep pressure light, and sand in the direction of the grain. The goal is to smooth the surface and prepare it for treatment, not to remove half the forest. For major damage, deep burn marks, or swelling near a sink cutout, consider whether replacement or a professional repair makes more sense than repeated sanding.
Inspect the Surface and Edges
Pay close attention to the edges, cut ends, sink cutouts, faucet holes, and seams. These areas are more likely to absorb moisture because they may not have the same factory protection as the finished top surface. A beautiful countertop can fail early if water gets into an exposed edge and causes swelling.
Look for dry areas, scratches, cloudy spots, seams that need attention, or signs that the finish has worn thin. A few cosmetic flaws are normal. Warping, crumbling material, major bubbling, or a soft swollen edge are signs that moisture has already become a much more serious guest than anyone invited.
Tools and Materials for an Upgraded Wood Countertop
You do not need a professional cabinet shop to upgrade an IKEA wood countertop, but you do need a sensible toolkit. Gather the following before you start:
- Measuring tape, pencil, and straightedge
- Painter’s tape and a cardboard or hardboard template material
- Circular saw, track saw, or jigsaw with a fine-tooth blade
- Drill and drill bits for faucet, sink, or mounting holes
- Fine-grit sandpaper, sanding block, or orbital sander used gently
- Clean lint-free cloths
- Wood treatment oil, hardwax oil, or a suitable cured protective finish
- Food-safe mineral oil for a cutting-surface-style finish, when appropriate
- Silicone sealant for sink and wall gaps
- Mounting hardware, screws, brackets, or countertop fasteners
- Safety glasses, hearing protection, and a dust mask
Read the label on every finish before using it. Not all finishes are meant for surfaces that will be used as food-prep areas, and not all finishes are compatible with an existing hardwax-oil treatment. When in doubt, test the product on an offcut or hidden area first.
Step 1: Plan the Look Before You Cut
The smartest IKEA countertop upgrades begin with a layout plan. Decide whether your countertop will have a simple square edge, a deeper island overhang, a waterfall-style end, decorative corbels, open shelving, or a layered “thicker slab” appearance.
For a standard counter run, measure the cabinet width in several places: front, middle, and back. Walls are often less straight than they appear, especially in older homes. A cardboard template is incredibly helpful for corners, uneven walls, and sink locations. It is easier to correct a cardboard mistake than to explain why your expensive wood top now has a mysterious trapezoid-shaped gap.
Consider Overhang and Support
A modest overhang is usually fine for a countertop edge. A large seating overhang needs proper support. Brackets, steel legs, hidden supports, or corbels can prevent sagging and make the installation safer. Always check the countertop’s current installation instructions for support requirements, especially for islands and breakfast bars.
If you are building a desk or island, also think about legroom, stool clearance, and how people will move through the space. A countertop can look gorgeous in photos and still be annoying in real life if every cabinet door crashes into a bar stool.
Step 2: Make Accurate Cuts Without Chipping the Finish
Cutting is the point where confidence becomes useful, but caution becomes essential. Mark your cut line carefully and use painter’s tape along the line to help reduce surface chipping. A fine-tooth blade designed for finished wood or laminate-style surfaces is usually a better choice than a rough framing blade.
Support the countertop fully while cutting. A long piece that flexes during a cut can bind the blade, splinter, or snap off awkwardly. If you need to cut a sink opening, drill starter holes at the corners and use a jigsaw for the straight runs. Test-fit the sink before applying sealant.
After cutting, lightly sand the edge and seal it thoroughly. The same rule applies to faucet holes, appliance cutouts, and underside openings. Every fresh cut is a potential moisture entry point, so treat it like a tiny doorway that needs a very strict security policy.
Step 3: Upgrade the Finish for Better Durability
The finish is what separates a basic wood countertop from a countertop that looks rich, intentional, and capable of surviving weekday life. There are several finish directions, and the best one depends on how you use the surface.
Option 1: Food-Safe Oil Finish
A food-safe mineral oil or butcher-block oil finish is a good choice for a countertop used directly for food prep. It creates a natural matte appearance, enhances the grain, and is easy to refresh. The tradeoff is maintenance. Oil finishes need reapplication when the wood looks dry, dull, or thirsty.
Apply the oil generously with a clean cloth, allow it to soak in according to the product directions, and wipe away excess. Several thin applications are usually better than leaving a heavy greasy layer behind. The countertop should look nourished, not like it has joined a professional wrestling league.
Option 2: Hardwax Oil Finish
Hardwax oil is popular because it combines the warm appearance of oil with more surface protection than a simple mineral-oil treatment. It can be especially useful for wood countertops, desks, and islands that need a low-sheen, furniture-like finish.
Use thin coats and allow proper drying time between them. Thick coats often create a sticky surface that attracts dust, fingerprints, and resentment. Follow the manufacturer’s instructions for curing time before placing appliances, dishes, or heavy objects on the countertop.
Option 3: Durable Film Finish
A cured polyurethane, oil-varnish blend, or other durable topcoat can offer greater resistance to water and stains for a desk, bar, coffee station, or lightly used countertop. This type of finish is often easier to wipe clean, but it is not ideal if you plan to chop food directly on the surface.
For a kitchen sink area, a durable finish can be helpful, but it does not make wood invincible. Wipe up standing water promptly, use trivets for heat, and do not expect any wood finish to enjoy a permanent puddle beside a leaky faucet.
Step 4: Create a Custom, Built-In Appearance
The most impressive IKEA countertop transformations are often about visual tricks rather than expensive materials. A few thoughtful details can make a standard countertop look custom-made.
Add a Thick-Edge Illusion
To create a chunkier, high-end edge, attach a matching wood strip or mitered edge piece to the front of the countertop. This creates the appearance of a thicker solid slab without turning your budget into a dramatic cautionary tale.
Match the grain direction when possible and test-fit everything before gluing or fastening. Use clamps carefully, wipe away glue squeeze-out immediately, and finish the added edge with the same product used on the countertop surface.
Use Decorative Supports
Black steel brackets, simple wood corbels, turned legs, or painted support panels can transform an island overhang. These supports are not only decorative; they can help carry weight and reduce flexing. Choose a style that fits the room: clean steel for industrial kitchens, chunky wood corbels for farmhouse spaces, or hidden brackets for a modern look.
Improve the Wall Connection
A narrow gap at the wall is common in real kitchens. Rather than pretending the gap does not exist and hoping nobody owns a flashlight, use a small backsplash strip, trim piece, or a neat bead of color-matched silicone. This protects the wall area from moisture and gives the installation a finished appearance.
Step 5: Install the Countertop Correctly
Set the countertop in place without fastening it first. Check the fit, overhang, cabinet alignment, wall gaps, appliance clearances, and sink position. Confirm that cabinet boxes are level. If the cabinets are uneven, shimming and leveling should happen before the countertop becomes permanently attached.
When fastening wood or wood-veneer countertops, avoid locking the material so tightly that it cannot respond naturally to seasonal humidity changes. Wood can expand and contract, particularly across the grain. Use the mounting system recommended by the countertop manufacturer, and avoid over-tightening hardware.
Secure the countertop from below whenever possible so the fasteners remain hidden. Pre-drill pilot holes to reduce the risk of splitting. For sink installations, apply a continuous bead of silicone where the sink flange meets the countertop, then tighten hardware evenly. Wipe away excess sealant before it cures.
Daily Care for IKEA Wood Countertops
Wood countertops are not difficult to maintain, but they reward consistency. Clean spills quickly with a soft cloth and mild dish soap. Dry the surface afterward, especially near the sink. Avoid abrasive scrubbers, harsh chemical cleaners, steel wool, and random cleaning experiments inspired by a social media video filmed in a suspiciously perfect kitchen.
Always use a trivet under hot pots and pans. Use a cutting board for slicing, even if the wood countertop is food-safe. A cutting board is easier to sanitize, cheaper to replace, and much less emotionally devastating to scratch.
When to Re-Oil or Refresh the Surface
Reapply a maintenance oil when the countertop begins to look faded, dry, or less water-resistant. A simple test is to place a few drops of water on the surface. If they soak in quickly rather than bead up, it may be time for maintenance.
For small scratches, lightly sand with fine-grit paper in the direction of the grain, remove dust, and reapply the appropriate finish. For stains, begin gently. Clean first, try a mild treatment, and only sand when necessary. Wood is forgiving, but it does not enjoy panic sanding.
Common Mistakes to Avoid
- Assuming all IKEA wood countertops are solid wood: Check the product details before sanding deeply or cutting aggressively.
- Skipping edge sealing: Cut edges, sink openings, and faucet holes need special protection from moisture.
- Installing before the countertop acclimates: Let the material adjust to indoor conditions according to the manufacturer’s instructions.
- Using the wrong finish: Match the finish to the countertop’s intended use, especially around food preparation and sinks.
- Ignoring support needs: Long overhangs require brackets, legs, or other structural support.
- Leaving standing water: Wood can handle life, but it should not be asked to become a tiny indoor dock.
- Rushing cure time: A finish may feel dry before it is fully cured. Give it the time listed on the label.
Final Thoughts: A Small Upgrade With a Big Payoff
Upgraded IKEA wood countertops are proof that a practical DIY project can also be beautiful. With accurate measurements, thoughtful cuts, sealed edges, the right finish, and regular maintenance, a simple countertop can look far more expensive than it actually is.
The secret is not pretending the material is something it is not. Work with the countertop’s construction, protect its weak spots, and use design details that make the installation feel intentional. Whether you are building a warm kitchen island, a compact coffee bar, a home office desk, or a laundry-room folding station, an IKEA wood countertop can deliver custom style with a realistic DIY budget.
DIY Experience: What People Learn When Upgrading IKEA Wood Countertops
The first experience many DIY homeowners have with an IKEA wood countertop is a mixture of excitement and mild terror. The countertop looks beautiful in the store or in the box, but once it is leaning against a wall in your home, it suddenly becomes a very large piece of wood that you are personally responsible for not ruining. That feeling is normal. The good news is that careful planning usually matters more than advanced woodworking skills.
One of the biggest lessons is that measuring takes longer than cutting, and that is exactly how it should be. People often expect the fun part to be using the saw, but the real victory happens when the countertop slides into place with clean overhangs, a tidy wall connection, and no mystery gap large enough to store a phone charger. Making a cardboard template for awkward corners can feel overly cautious at first, but it often saves more time than any fancy cutting tool.
Another common experience is discovering how much the finish changes the personality of the wood. A countertop that looks plain under store lighting can suddenly appear richer, deeper, and more expensive after a properly applied oil or hardwax treatment. The grain becomes more visible, the color becomes warmer, and the entire room can feel less like a collection of cabinets and more like an actual kitchen. This is especially noticeable in white, gray, black, or navy kitchens, where a wood countertop keeps the space from feeling too cold.
People also learn quickly that edges deserve more attention than the large flat surface. The countertop top may look flawless, but water tends to find faucet holes, sink cutouts, seams, and fresh cut ends. A homeowner who carefully seals those areas often enjoys a much more durable result than someone who focuses only on the visible top. It is not glamorous work, but neither is replacing a swollen sink edge six months later.
Many DIYers are surprised by how much better a simple countertop looks once it has proper support. Adding black brackets beneath an island overhang, installing legs at a breakfast bar, or using a painted support panel can make the whole project look professionally designed. Those additions also make the countertop feel solid when someone leans on it, which is important because guests will absolutely lean on it while holding a drink and saying, “Wow, did you make this?”
Maintenance is another reality check. Wood countertops are not install-it-and-forget-it surfaces. They need wiping, occasional oiling or refreshing, and reasonable protection from heat and standing water. Yet most homeowners find the routine easier than expected. A few minutes of care every so often is a small trade for a surface that can be renewed instead of replaced.
Finally, the most rewarding part of an IKEA wood countertop upgrade is the sense of ownership. A kitchen island, desk, or coffee bar feels more personal when you measured it, cut it, sealed it, and finished it yourself. The minor imperfections become part of the story. Maybe there is a tiny mark near the back edge where a clamp slipped, or a subtle variation in the stain that only you notice. That is not failure. That is evidence that your home contains something made with your own hands, not just something delivered in a box with an instruction booklet and an alarming number of screws.