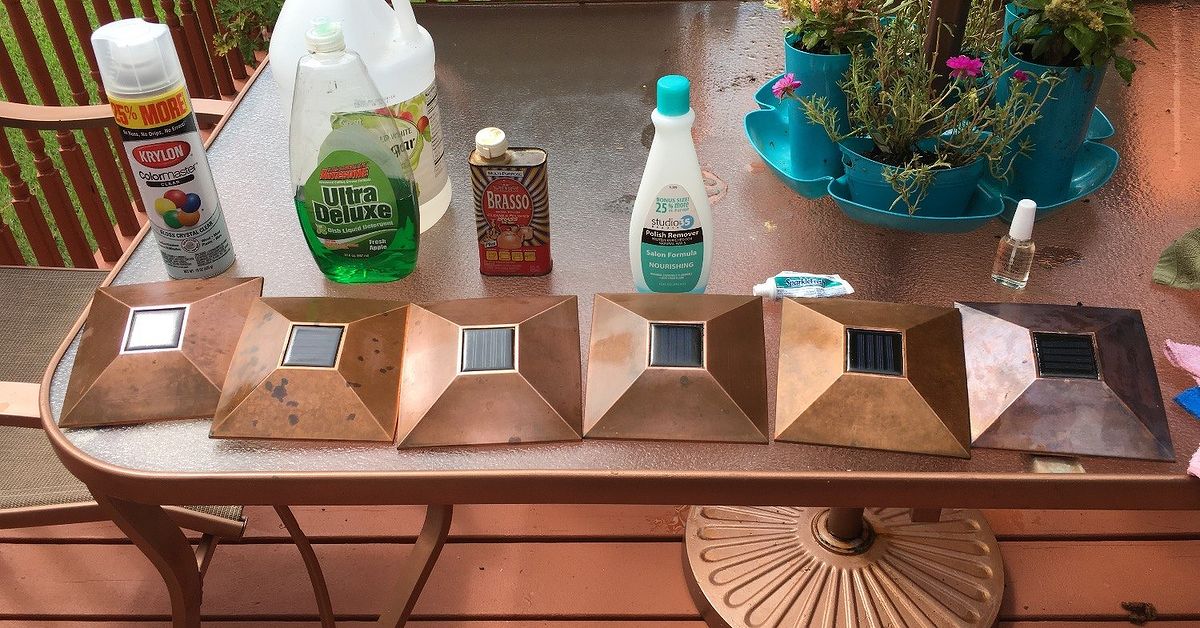
Outdoor solar lights have a talent for making a yard feel magicaluntil they begin glowing like exhausted fireflies. One lamp quits entirely, another stays on for seventeen heroic minutes, and a third flickers as though it is sending a distress signal. Fortunately, dim solar garden lights are not always ready for retirement. A careful cleaning and troubleshooting challenge can often restore their brightness without expensive tools or an electrical engineering degree.
This guide explains how solar lights work, why their performance declines, and how to clean solar panels, inspect batteries, correct placement problems, and diagnose stubborn fixtures. The goal is simple: bring light back to the walkway while keeping the project safe, practical, and surprisingly satisfying.
Why Outdoor Solar Lights Become Dim
A solar light is a small off-grid energy system. During daylight hours, its photovoltaic panel converts sunlight into electricity. That energy is stored in a rechargeable battery. After dark, a photosensor tells the controller to power the LED.
If any link in that chain underperforms, nighttime brightness suffers. The usual suspects include dirt, shade, aging batteries, corroded contacts, moisture, an obstructed sensor, or a switch that was accidentally moved to the wrong position.
Dirty Solar Panels Block Useful Sunlight
Dust, pollen, bird droppings, tree sap, lawn clippings, and wildfire residue can form a film over the panel. Even when the panel does not look dramatically dirty, that layer can reduce the light reaching its photovoltaic cells. The U.S. Department of Energy identifies dirt and shade as factors that affect real-world solar energy yield, while National Renewable Energy Laboratory research confirms that accumulated particles can reduce photovoltaic output.
On a full-size rooftop array, a little dirt may represent lost kilowatt-hours. On a tiny garden-light panel, it may be the difference between six hours of illumination and a brief post-sunset cameo.
Rechargeable Batteries Do Not Last Forever
Solar lights commonly use rechargeable nickel-metal hydride, nickel-cadmium, lithium-ion, or lithium iron phosphate batteries. Repeated charging, heat, freezing temperatures, and deep discharge gradually reduce their capacity. Depending on the product and conditions, replacement may be needed after roughly one to three years, although some higher-quality battery packs last longer.
A failing battery may still accept a small charge, which explains why a light can turn on at dusk but fade quickly. The LED is alive; the battery simply has the stamina of a phone at one percent.
Shade and Artificial Light Confuse the System
A location that receives strong summer sun may become shaded when the sun sits lower in winter. Plants also grow, trees leaf out, and outdoor furniture migrates. Check the panel at several points during the day rather than assuming a bright-looking location receives uninterrupted sunlight.
Nighttime lighting can create a different problem. Porch lights, streetlights, or nearby landscape fixtures may shine on the solar light’s photosensor and convince it that daytime has not ended. If a fixture charges normally but refuses to switch on, temporary darkness can help test the sensor.
Supplies for the Solar Light Cleaning Challenge
Most fixtures need gentle care, not an arsenal of industrial chemicals. Gather the following supplies before beginning:
- Two soft microfiber cloths
- A small bowl of lukewarm water
- A drop of mild dish soap, if permitted by the manufacturer
- A soft toothbrush or detailing brush
- Cotton swabs
- A small Phillips-head screwdriver
- Work gloves
- Replacement rechargeable batteries matching the original specifications
- A tray or container for screws and small parts
- Painter’s tape and a marker for labeling problem fixtures
Avoid abrasive pads, harsh solvents, bleach, metal brushes, pressure washers, and aggressive polishing compounds. These can scratch the panel, damage a protective coating, weaken seals, or force water into the housing.
How to Clean Solar Lights Step by Step
1. Inspect the Lights Before Cleaning
Walk through the yard during daylight and look for cracked housings, broken stakes, cloudy lenses, loose panel connections, rust, standing water, and swollen batteries. Do not continue using a fixture with a badly damaged battery or exposed wiring.
Label each light as working, dim, intermittent, or dead. This turns a random cleaning session into a useful diagnostic test and prevents the classic mistake of forgetting which identical black lantern was the troublemaker.
2. Turn Off and Disassemble Each Fixture
Move the switch to the off position when the design allows it. Remove the fixture from the ground rather than bending over it like a lawn flamingo with back pain. Separate removable lantern tops, lenses, stakes, and battery covers according to the product manual.
Keep screws organized and avoid pulling wires or prying apart sealed components. Some products have integrated batteries or glued solar panels that are not intended for homeowner service.
3. Remove Loose Dirt
Use a dry microfiber cloth or soft brush to lift away leaves, cobwebs, insects, and loose dust. Removing dry debris first reduces the chance of grinding grit across the panel during wet cleaning.
4. Gently Wipe the Solar Panel
Dampen a clean microfiber cloth with lukewarm water and wipe the panel without applying heavy pressure. If grime remains and the manual permits mild soap, add one small drop to the water. Wipe again with a soap-free damp cloth so no residue remains, then dry the surface.
Do not submerge the fixture, even when its packaging describes it as weather-resistant. A rain rating does not automatically mean the light is designed for an afternoon at the bottom of a bucket.
5. Clean the Lens and Housing
Wipe plastic, resin, or painted-metal surfaces with a damp cloth. Use the soft brush around seams and decorative details. Clean glass panes with a method approved by the manufacturer, taking care not to let liquid run into the electronics.
A dirty or hazy lens reduces visible brightness even when the LED is producing normal light. However, permanently yellowed or crazed plastic may not improve through cleaning. Replacing the lens or fixture is usually safer than applying an unapproved coating that may peel, cloud, or interfere with light transmission.
6. Check the Battery Compartment
Open the compartment only if it is designed to be serviced. Confirm that the battery is seated firmly and that its positive and negative ends match the polarity markings. Look for rust, white or green residue, moisture, or damaged contacts.
If the compartment is wet, remove the battery and allow the fixture to dry completely in a protected location. Do not reinstall a leaking, swollen, cracked, or badly corroded battery. Wear gloves when handling damaged cells and follow the manufacturer’s safety guidance.
7. Reassemble and Give the Lights a Full Charge
After every component is dry, reassemble the fixture and return the switch to its normal operating position. Many models must remain switched on while charging. Place the lights where their panels can receive six to eight hours of strong sunlight, or follow the charging time stated in the manual.
Allow one or two good charging days before judging the result. Testing immediately after cleaning may unfairly blame the light for a battery that has not yet had lunch.
When Cleaning Is Not Enough
Perform a Simple Darkness Test
After charging, cover the solar panel or photosensor completely with your hand or an opaque cloth. A working dusk-to-dawn light should illuminate after a brief delay. If it does, the fixture may be receiving too much artificial light at night. Relocation or reorientation may solve the problem.
Replace the Battery Correctly
If the panel is clean and the light still runs for only a short period, the rechargeable battery may have reached the end of its useful life. Use the exact chemistry, voltage, size, connector, and other specifications recommended for that model. A battery that physically fits is not automatically electrically compatible.
Never install an ordinary disposable alkaline battery in a solar light that charges its battery during the day. Disposable cells are not designed for that charging cycle and may leak or fail. Do not mix old and new batteries or combine different chemistries in a fixture that uses multiple cells.
Inspect Placement and Seasonal Conditions
Move the panel away from roof overhangs, thick foliage, fences, and other shade sources. Brush away snow and fallen leaves. Short winter days and long cloudy periods naturally reduce charging and runtime, so seasonal dimming does not always indicate a defect.
Consumer testing has shown that solar lights can charge under overcast skies, but reduced sunlight generally shortens battery life at night. If winter performance is important, consider a model with a separate panel, adjustable brightness, motion activation, or supplemental USB charging.
Know When to Retire the Fixture
Replacement is the sensible choice when the housing is cracked, seals have failed, the circuitry is corroded, wiring is exposed, or compatible parts are unavailable. Integrated LEDs usually last a long time, but the controller and weather seals can fail first.
Rechargeable batteries should be handled responsibly. The U.S. Environmental Protection Agency advises taking removable rechargeable batteries to specialized recyclers, participating retailers, or household hazardous-waste programs. Lithium-ion batteries should not be placed in household trash or curbside recycling. Protect their terminals with nonconductive tape or place each battery in a separate bag before transport, following local requirements.
Turn Maintenance Into a Repeatable Cleaning Challenge
A challenge works best when it has a finish line. Choose ten or twelve fixtures and complete the following tasks in one session:
- Photograph their brightness before cleaning.
- Sort them into working, dim, intermittent, and dead groups.
- Clean every panel and lens.
- Check switches, sensors, batteries, and compartments.
- Move shaded fixtures to better charging locations.
- Charge them for at least one full sunny day.
- Photograph and compare the results after dark.
Record which intervention helped each light. If cleaning restores brightness, schedule more frequent panel care. If new batteries solve most failures, note the installation date inside the battery cover with a small label.
A Practical Maintenance Schedule
- Monthly: Brush away obvious leaves, dust, snow, and bird droppings.
- Every three to six months: Wipe panels and lenses, inspect stakes, and check for changing shade.
- After severe weather: Look for water intrusion, cracked parts, loose mounts, or buried panels.
- Once a year: Compare nighttime brightness and runtime across the set.
- As needed: Replace rechargeable batteries with manufacturer-approved equivalents.
The ideal frequency depends on local conditions. A light beneath a flowering tree will collect more pollen and debris than one in an open, rainy yard. Coastal salt, desert dust, heavy snow, and irrigation overspray may also justify more frequent inspections.
Common Solar Light Cleaning Mistakes
- Scrubbing aggressively: More elbow grease can mean more scratches, not more charging power.
- Using strong chemicals: Solvents and abrasive cleaners may damage plastics, coatings, seals, and panel surfaces.
- Replacing batteries by size alone: Chemistry and voltage must also match the fixture.
- Testing too soon: A depleted battery needs a proper charging period before performance can be evaluated.
- Ignoring nearby lights: Artificial illumination may keep the dusk sensor from activating.
- Assuming “water-resistant” means submersible: Rain protection and bucket protection are very different promises.
- Coating a cloudy panel without checking the manual: DIY clear coats can produce uneven results and may void a warranty.
My Solar Light Cleaning Challenge: A Realistic Weekend Experience
My imaginary starting lineup for this very realistic backyard experiment contained twelve path lights. Four were reasonably bright, five were dim, two were completely dark, and one blinked whenever it felt emotionally prepared. From the patio, the walkway looked less like landscape lighting and more like a runway experiencing budget cuts.
I began on Saturday morning by numbering the lights with painter’s tape. That simple step proved unexpectedly useful because the fixtures were identical. Without labels, every diagnosis would have become, “I think this was the dim one, unless that was the dim one.” I photographed the panel location and nighttime output of each fixture, then sorted the lights on an old towel.
The first surprise was how dirty the panels were. They did not appear filthy from standing height, but the cloth collected a yellow-gray mixture of pollen and dust. Two lights also had dried irrigation spots. Lukewarm water and a microfiber cloth removed most of the film. One stubborn patch required a tiny amount of mild dish soap, followed by a careful water-only wipe.
The lenses told a different story. Seven cleaned up beautifully, while two remained cloudy because the plastic itself had weathered. Cleaning improved their appearance but could not reverse material degradation. That distinction saved me from polishing them indefinitely like a person trying to negotiate with plastic.
Next came the battery compartments. One dead light contained a loose battery. After reseating it correctly, the fixture passed the darkness test. The second dead light had heavy corrosion and signs of moisture, so I removed it from service rather than attempting a heroic but questionable resurrection.
Three dim lights used aging rechargeable batteries. I checked the markings and replaced them with compatible cells of the same chemistry and voltage. The old batteries were bagged individually for delivery to a battery-recycling location. No mystery batteries went into the kitchen junk drawer, where small electronics traditionally disappear to begin new lives as clutter.
Placement caused the final major problem. A shrub had grown over two panels, and a recently installed porch light was shining directly toward another fixture’s sensor. I trimmed only enough foliage to clear the panels, moved one light several feet, and angled the affected fixture away from the porch.
After a full sunny day, ten of the eleven serviceable lights switched on. Their brightness was noticeably more even, and most remained illuminated well past bedtime. The blinking fixture stopped its dramatic performance after the battery contacts were secured. One older light was still weaker than the others, so I marked it for replacement instead of spending another weekend performing solar-light surgery.
The challenge produced a useful lesson: there was no single miracle fix. Cleaning improved charging, battery replacement restored runtime, and better placement corrected sensor and shade problems. The biggest reward was not merely a brighter walkway. It was avoiding the unnecessary replacement of several fixtures that still had plenty of useful life.
Conclusion: A Little Cleaning Can Restore a Lot of Light
Bringing light back into solar lights is usually a process of elimination. Start with the easy fixes: clean the panel, clear the lens, verify the switch, improve sun exposure, and test the photosensor. If performance remains poor, inspect the battery and replace it only with a compatible rechargeable model.
Regular solar light maintenance cannot repair every cracked housing or failed circuit, but it can revive many supposedly dead fixtures. A soft cloth, one sunny afternoon, and a little organized troubleshooting may be all that stands between a gloomy path and a properly glowing garden.