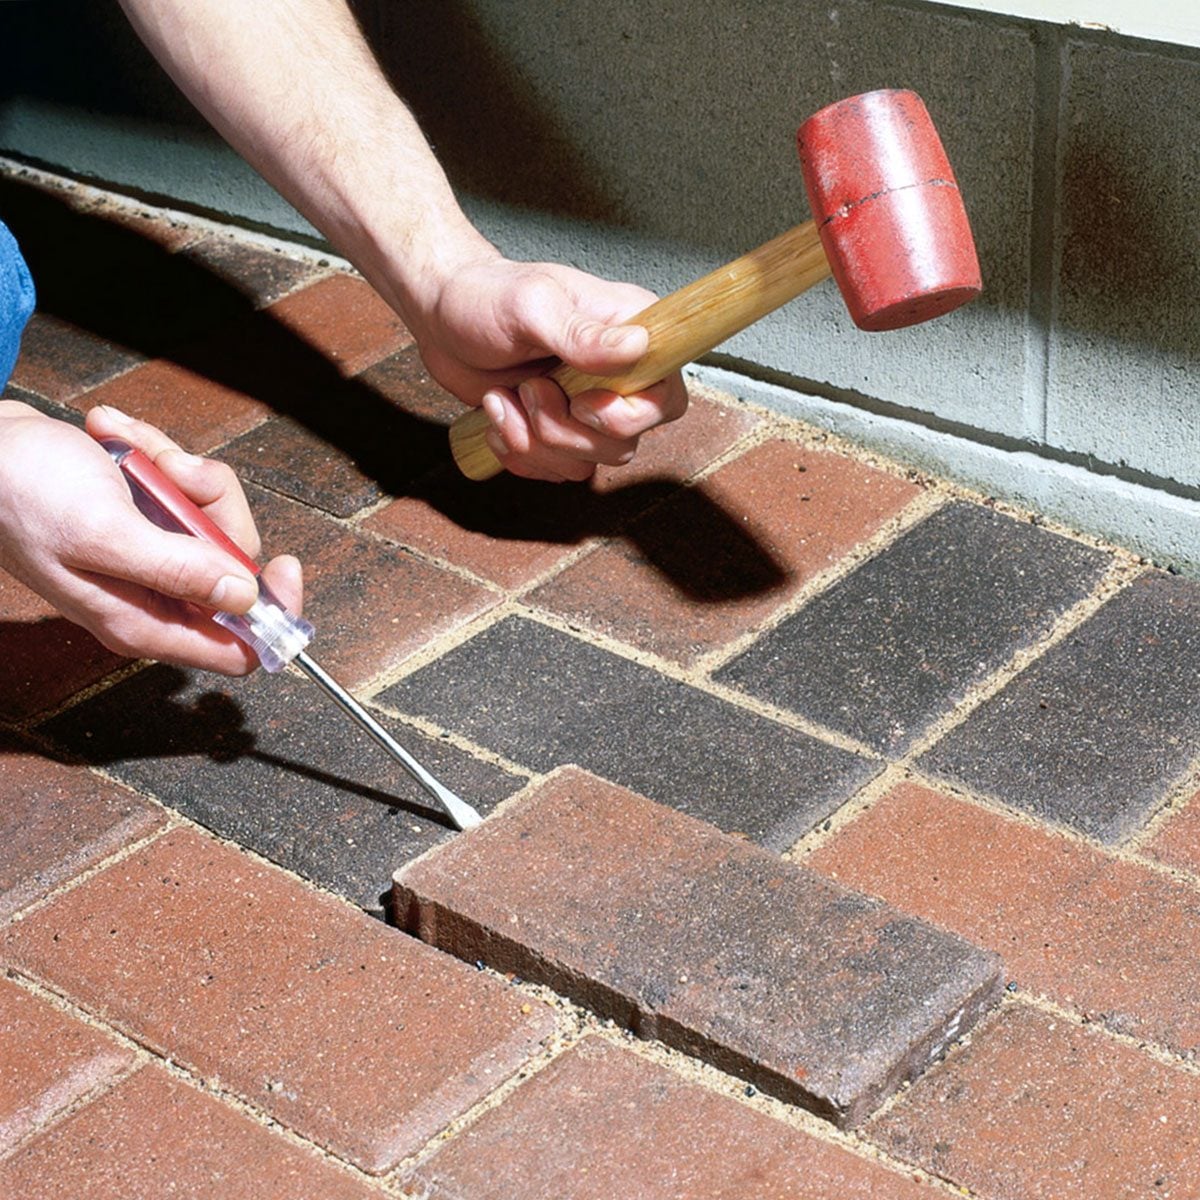
A sunken patio paver rarely arrives with dramatic fanfare. It simply drops a little lower than its neighbors, collects rainwater, catches the toe of your sandal, and quietly waits for someone carrying a tray of barbecue to discover it.
Fortunately, learning how to fix sunken patio pavers does not usually require replacing the entire patio. When the damage is limited to a small or moderately sized area, homeowners can often lift the affected pavers, rebuild the base, restore the proper slope, and reinstall the original stones. The finished repair can look nearly invisibleassuming you remember where every oddly shaped paver belongs.
This guide explains why patio pavers sink, how to diagnose the underlying problem, which materials to use, and how to reset uneven pavers so they remain stable instead of taking another underground vacation next spring.
Why Do Patio Pavers Sink?
Pavers are only the decorative top layer of a patio system. Their long-term stability depends on the soil, compacted aggregate, bedding material, edge restraints, joint sand, and drainage beneath and around them.
When one of those components fails, the surface may develop depressions, rocking stones, wide joints, standing water, or raised edges.
An Improperly Compacted Base
The most common cause of sinking pavers is inadequate compaction during the original installation. Loose soil or aggregate contains pockets of air. As people, patio furniture, grills, rain, and seasonal weather place pressure on the surface, those pockets collapse and the base settles.
Dumping several inches of gravel into an excavation and compacting only the top is not enough. Aggregate generally performs better when installed and compacted in multiple shallow lifts. A thick, loosely compacted layer may look solid for a few months while quietly preparing a future crater.
Water Erosion and Poor Patio Drainage
Water is another frequent troublemaker. Runoff from a roof, downspout, slope, irrigation system, or poorly graded yard can wash fine material out from beneath the pavers. Repeated saturation may also weaken the subgrade, especially in clay-rich or poorly draining soil.
A patio should normally direct surface water away from the house. If water flows toward the foundation or consistently pools in the same depression, simply adding sand beneath the low pavers may provide only a temporary cosmetic repair. The drainage problem must be corrected as well.
Using the Wrong Base Material
Bedding sand is useful for creating a smooth setting layer, but it is not a substitute for a properly compacted aggregate base. A deep layer of loose sand can shift, hold water, and settle unevenly.
Stable patio construction commonly includes compacted crushed stone or another approved paver-base aggregate, followed by a relatively thin and uniform bedding course. Product specifications vary, so match the material to the paver manufacturer’s recommendations and local soil conditions.
Burrowing Animals, Insects, and Tree Roots
Ants can remove joint or bedding material grain by grain. Moles, chipmunks, and other small animals may create voids beneath the patio. Tree roots can produce the opposite problem by lifting one area and making the adjacent pavers appear sunken.
Look for soil piles, tunnels, recurring ant activity, cracked stones, or a visible root path before rebuilding the base. Otherwise, you may repair the patio while leaving the original excavation crew employed beneath it.
Weak Edge Restraints
Edge restraints prevent the outer pavers from spreading. When edging loosens or disappears under years of enthusiastic lawn trimming, the pattern may gradually open. Joint sand escapes, stones move sideways, and unsupported sections begin to settle.
Freeze-Thaw Movement
In cold climates, water in the soil can freeze, expand, and move the pavement. Thawing may then leave voids or softened material behind. Adequate excavation, drainage, base thickness, and compaction become especially important in regions with severe freeze-thaw cycles.
Can You Repair the Pavers Yourself?
A localized depression involving a few dozen pavers is usually a reasonable do-it-yourself project. The work is physical, but the technique is straightforward: remove the stones, repair the supporting layers, and put the puzzle back together.
Professional evaluation is more appropriate when:
- A large percentage of the patio is sinking or shifting.
- The surface slopes toward the foundation.
- Water enters a basement, crawl space, or nearby structure.
- A retaining wall, outdoor kitchen, column, or heavy structure is moving.
- A plumbing leak, broken drain, or buried utility may be involved.
- Tree roots are causing widespread displacement.
- The repaired area repeatedly sinks after previous corrections.
Tools and Materials You May Need
Gathering everything before removing the first paver reduces the chance of leaving a partially dismantled patio outside during a surprise rainstorm.
- Safety glasses and work gloves
- Knee pads
- Flat pry bar, paver extractor, or two sturdy screwdrivers
- Rubber mallet
- Shovel and hand trowel
- Stiff-bristle brush
- Level and straight 2-by-4 board
- String line and stakes for larger areas
- Hand tamper or rented plate compactor
- Crushed aggregate or approved paver-base material
- Coarse bedding sand or manufacturer-approved bedding aggregate
- Jointing sand or compatible polymeric sand
- Broom
- Garden hose with a gentle spray setting
- Replacement pavers for cracked or stained units
How To Fix Sunken Patio Pavers Step by Step
1. Identify the Full Repair Area
Place a long straight board across the depression and check it with a level. Mark every low, tilted, or rocking paver with removable chalk. Extend the repair area beyond the most obvious dip because neighboring stones may also have lost support.
Check the patio during or immediately after rain when possible. Observe where water enters, where it pools, and where it exits. Inspect nearby downspouts, sprinkler heads, roof valleys, slopes, and garden beds for potential sources of erosion.
2. Photograph the Existing Pattern
Take several overhead photographs before removing anything. Include nearby borders and fixed objects so you can identify each stone’s orientation later.
This step may feel excessive when the pattern looks simple. It will feel considerably less excessive when you are holding the final paver and staring at a space that appears to have been designed for a completely different shape.
3. Remove the Joint Sand
Scrape or brush sand from the joints around the repair area. Removing joint material creates enough room to lift the first paver without chipping its edges.
If the joints contain hardened polymeric sand, carefully loosen it with a narrow tool. Avoid aggressive prying against delicate corners. A cracked first paver is not the motivational opening most patio projects need.
4. Lift the First Paver
The first stone is usually the most difficult. Insert a paver extractor into the joints, or work two flat tools down opposite sides and lift evenly. Another option is to remove a damaged paver first and replace it later.
Once the first unit is out, the surrounding pavers should be easier to remove by hand. Stack them in order near the work area, keeping different sizes or rows separated.
5. Remove Enough Pavers to Expose Stable Material
Do not limit the excavation to the lowest stone. Remove pavers until you reach an area where the bedding layer appears firm, uniform, and properly supported.
Brush dirt and old joint sand from the sides of reusable pavers. Inspect each one for cracks, severe chips, or surface deterioration. Small cosmetic flaws may be rotated toward a less visible edge, while structurally damaged units should be replaced.
6. Inspect the Base and Subgrade
Remove loose bedding material and examine what lies underneath. Look for washed-out channels, muddy soil, animal tunnels, rotted roots, decomposed landscape fabric, deep sand, or aggregate that was never compacted.
If you find a soft area, excavate until you reach stable ground. A hand tamper should not disappear into the soil like a spoon entering pudding. When the subgrade remains saturated or unstable, drainage improvements or professional soil correction may be necessary.
7. Correct the Cause of the Settlement
Repairing the depression without addressing the cause is similar to placing a bucket under a leaking roof and declaring victory.
Depending on the diagnosis, corrective work may include:
- Redirecting a downspout away from the patio
- Repairing a leaking irrigation line
- Regrading adjacent soil so runoff moves away from the pavers
- Installing a channel drain, French drain, or other drainage system
- Replacing failed edge restraints
- Removing unstable organic material or abandoned roots
- Addressing ant colonies or burrowing animals
8. Rebuild and Compact the Aggregate Base
Add approved crushed aggregate to the excavated area. For a deeper repair, place the material in shallow layers rather than filling the hole all at once. Compact each layer thoroughly before adding the next.
A hand tamper may be sufficient for a small patch. A plate compactor is generally more effective for broad repairs, provided surrounding pavers and structures are protected.
Continue adding and compacting aggregate until the remaining space accommodates the bedding course and paver thickness. Measure carefully. Too much base creates a hump; too little recreates the depression you just spent the afternoon eliminating.
9. Restore the Correct Patio Slope
Use a level, straightedge, or string line to match the surrounding patio grade. The repaired section should blend smoothly with adjacent pavers while maintaining drainage away from buildings.
A commonly used target for conventional patios is approximately one-quarter inch of fall per horizontal foot, although the correct slope can depend on the paver system, site conditions, accessibility requirements, and local standards.
10. Add a Uniform Bedding Layer
Spread a thin, even layer of coarse bedding sand or the bedding aggregate recommended for your installation. Interlocking concrete pavement guidance commonly uses a nominal one-inch uncompacted bedding course.
Screed the material with a straight board resting on guides or the surrounding grade. Do not use the bedding layer to compensate for a badly uneven base. Its job is fine leveling, not structural rescue.
Avoid walking directly on the finished bedding surface. Footprints create low spots that may reappear after the pavers settle.
11. Reinstall the Pavers
Replace the stones according to your photographs. Begin along a stable edge and maintain the original joint spacing. Set each paver gently instead of sliding it across the bedding layer.
Check the surface frequently with a straightedge. The newly installed stones may initially sit slightly above the neighboring patio because final tamping will settle them into the bedding material.
Tap high corners lightly with a rubber mallet. If a paver is significantly low, remove it and add bedding material beneath the entire unit rather than creating one small pile in the center. A concentrated mound can make the stone rock like a tiny concrete seesaw.
12. Compact the Repaired Surface
For a small patch, seat the pavers with a rubber mallet and a protective board. Larger areas may be compacted with equipment appropriate for the paver type. Some concrete pavers tolerate a plate compactor with a protective pad, while natural stone, porcelain, or fragile units may require a different method.
Follow the paver manufacturer’s instructions. More force is not always more professional.
13. Refill the Joints
Sweep dry jointing sand diagonally across the surface so it enters the spaces from multiple directions. Compact or tap the area again, then add more sand until the joints remain full.
Polymeric sand may help resist washout, weeds, and insects when correctly selected and installed. However, it is not structural grout and cannot stabilize a weak base. The pavers should already be level and secure before the joint sand is applied.
If using polymeric sand, remove dust from the paver faces and follow the product’s watering instructions precisely. Too much water can wash out binders; too little may leave the sand incompletely activated.
14. Test the Repair
Walk across the repaired area and check for movement. Place the straightedge over the former depression and compare it with the surrounding surface.
After the next rainfall, verify that water drains normally. A visually perfect patch that creates a new puddle three feet away is merely a relocated problem.
Common Paver Repair Mistakes
Adding Only Loose Sand
Pouring sand into a deep void may raise the paver temporarily, but loose material can settle or wash away. Deep depressions usually need compacted aggregate beneath a uniform bedding course.
Repairing Too Small an Area
The visible low point may be only the center of a larger base failure. Extending the repair into stable surrounding material produces a smoother transition and reduces isolated movement.
Ignoring Drainage
Persistent water can undo careful leveling. Redirect runoff and correct grading before considering the project complete.
Making the Bedding Layer Too Thick
A thick sand bed is more likely to shift and settle unevenly. Build height with compacted base material and use bedding material only for final positioning.
Forgetting the Edging
Even a strong base cannot fully stabilize a pattern whose outer stones are spreading. Repair or replace loose edge restraints before refilling the joints.
Using a Steel Hammer Directly on Pavers
A metal hammer can chip concrete, split brick, or damage finished surfaces. Use a rubber mallet or place a wood block between the tool and the paver.
How to Keep Patio Pavers From Sinking Again
Inspect the patio every spring and after major storms. Early warning signs include disappearing joint sand, widening joints, rocking stones, soil erosion along the perimeter, and puddles that remain long after the rest of the surface dries.
Keep gutters and downspouts functioning, direct runoff away from the patio, and avoid allowing mulch or soil to build up against the paver edges. Refill joint sand when necessary and repair failed edging promptly.
Be cautious with pressure washing. A concentrated stream can remove joint material and disturb bedding near open joints. Use appropriate pressure, maintain distance from the surface, and replace displaced sand afterward.
Heavy objects also deserve attention. Large planters, masonry fireplaces, hot tubs, and outdoor kitchens impose concentrated loads. These features may require a specially designed foundation rather than an ordinary pedestrian patio base.
Lessons From Real-World Sunken Paver Repairs
One of the most useful lessons from repairing uneven patios is that the lowest paver is not always located directly above the original failure. Water may enter several feet away, travel through loose base material, and wash fines toward the edge. The depression is where the damage becomes visible, not necessarily where it begins.
For example, imagine a four-foot-wide low area beside a patio door. It would be tempting to lift the affected stones, add bedding sand, and finish before lunch. A closer inspection might reveal that a roof downspout discharges at the corner of the patio. During every storm, water runs along the edge restraint and slowly removes supporting material. Unless the downspout is extended or redirected, the repaired section will probably sink again.
Another recurring lesson is that photographs save enormous amounts of frustration. Repeating patterns can be deceptive, especially when a patio contains multiple paver sizes. A three-piece modular pattern may look random, but each unit occupies a deliberate position. Numbering rows with removable chalk and stacking stones in sequence can turn reinstallation into a manageable process instead of an outdoor geometry exam.
DIY repairs also demonstrate why compacting in layers matters. On a deeper patch, adding six inches of aggregate and pounding the surface with a hand tamper may leave the bottom half loose. The repair can feel firm on the day it is completed, yet settle after several storms. Installing smaller lifts requires more effort, but each layer receives direct compaction and becomes part of a stronger foundation.
Matching the surrounding elevation requires patience. Beginners often focus on making each paver perfectly level, even when the patio intentionally slopes for drainage. The better goal is to match the established plane. A paver can be level by itself and still create a bump or trap water if it does not align with its neighbors.
A long straight board is often more informative than a small bubble level. Place it across several rows and look for daylight beneath the board. Check the repair from multiple directions. Small height differences that are difficult to see while kneeling become obvious when viewed across a longer span.
Older pavers present another practical challenge: replacement colors may not match. Sunlight, weather, dirt, and previous sealing can change the appearance of the original stones. When a damaged unit must be replaced, moving an existing paver from a hidden edge or beneath a grill may create a better visual match. The new stone can then be installed in the less noticeable location.
Joint sand should be treated as part of the paving system rather than decorative filler. Properly filled joints help neighboring units work together and reduce movement. However, repeatedly pouring polymeric sand into widening joints will not correct failed edging or a collapsing base. When joints reopen soon after being filled, investigate what is moving underneath.
Finally, successful patio repairs tend to follow a simple principle: fix the cause before perfecting the appearance. Drainage, subgrade stability, aggregate compaction, and edge restraint determine whether the surface remains flat. The pavers are merely the handsome part everyone sees. Give the hidden layers the same attention, and the patio is far less likely to request another repair next season.
Conclusion
Fixing sunken patio pavers is usually less intimidating than it first appears. The basic process involves lifting the affected stones, identifying the reason for the settlement, removing unstable material, rebuilding the compacted base, restoring the drainage slope, and reinstalling the pavers with fresh joint sand.
The quality of the repair depends more on what happens beneath the patio than on how neatly the surface is swept afterward. Take time to diagnose runoff, compact aggregate in layers, maintain a uniform bedding course, and secure the perimeter. Those steps transform a temporary leveling job into a durable repair.
Once finished, your patio should drain properly, feel stable underfoot, and stop attempting to trip everyone carrying snacks. That is a respectable achievement for a weekend involving several hundred pounds of stone.
Note: Base depth, drainage design, compaction equipment, and bedding materials should be selected for the specific paver product, soil conditions, climate, expected loads, and applicable local construction requirements.
Research for this guide was synthesized from U.S. home-improvement publications, construction-material manufacturers, hardscape specialists, industry technical guidance, and university extension resources. Technical principles referenced include compacted aggregate support, nominal bedding-course thickness, layered compaction, edge restraint, joint filling, and drainage correction. Drainage and erosion recommendations were additionally informed by hardscape and university stormwater guidance. Material-selection and joint-sand guidance was informed by U.S. manufacturers and retailers.