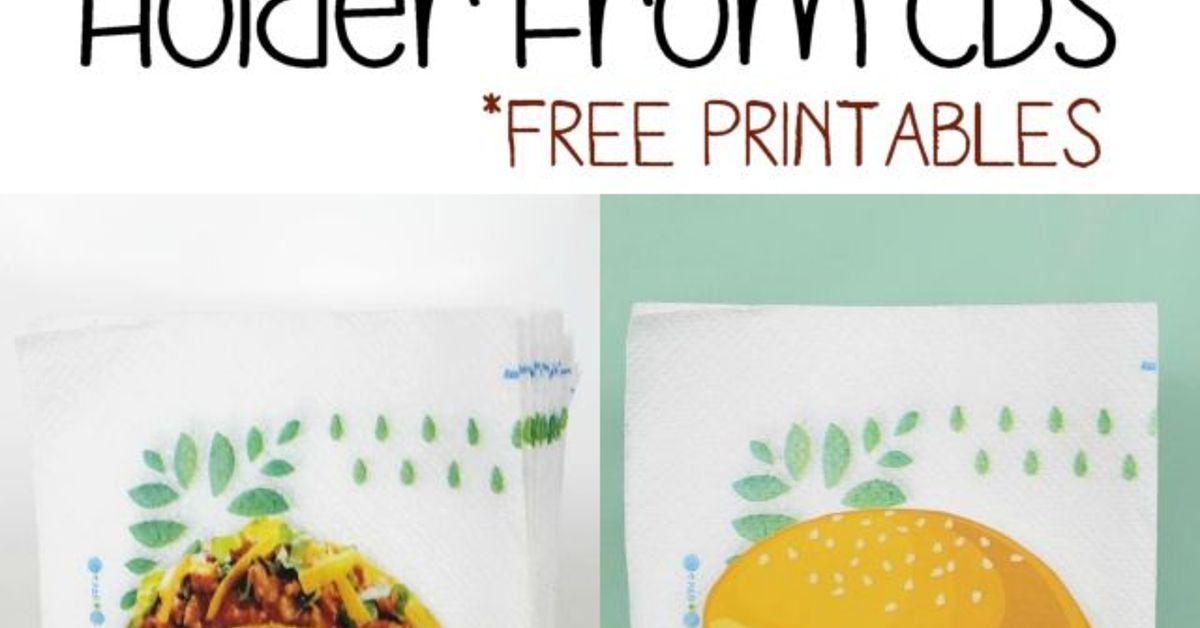
Somewhere in a drawer, probably under a mystery charging cable and beside a pen that gave up in 2017, there is an old CD or DVD waiting for a second career. Maybe it once held family photos, a software installer, a burned road-trip playlist, or a movie you absolutely promised yourself you would watch again. Today, that disc can become something far more useful for modern life: a burger and taco napkin holder.
Yes, a napkin holder. Not glamorous in the red-carpet sense, but incredibly heroic when your taco decides to leak salsa like it is auditioning for a disaster movie. A sturdy, homemade napkin holder keeps paper napkins upright, easy to grab, and close to the action. Better still, making one from CDs or DVDs gives you an affordable DIY table accessory with personality, shine, and a little eco-friendly attitude.
This project is ideal for burger nights, taco bars, backyard cookouts, game-day spreads, kids’ craft afternoons, and casual parties where napkins are not optional. Burgers are juicy. Tacos are structurally optimistic. A napkin holder made from recycled discs brings order to the table before the guacamole gets dramatic.
Why Turn Old CDs or DVDs Into a Napkin Holder?
CDs and DVDs are made mostly from durable plastic, which is part of the reason they last so long in closets, drawers, and “I’ll organize this later” boxes. That durability makes them useful for crafts. They are lightweight, round, easy to decorate, and surprisingly sturdy when used as side panels. Instead of sending them straight to the trash, you can reuse them in a small but practical way.
Reusing household materials also fits the classic reduce-and-reuse mindset: use what you already have before buying something new. A CD or DVD napkin holder will not save the planet by itself, but it does rescue a few discs from waste and turns them into something your table can actually use. That is the sweet spot of upcycled home decor: practical enough to matter, cute enough to show off, and cheap enough that your wallet does not need a support group.
For this specific project, the rounded shape of the disc is an advantage. Two discs can become the upright sides of a napkin holder, while a small base made from cardboard, craft sticks, foam board, scrap wood, or another disc keeps everything standing. Decorate it like a burger, a taco, a diner sign, a fiesta table piece, or a shiny modern kitchen accessory.
What Is a Burger/Taco Napkin Holder?
A burger/taco napkin holder is a tabletop organizer designed for the kind of meals that require confidence, courage, and at least three napkins per person. It keeps napkins upright or slightly angled so guests can grab one quickly. The holder can sit beside a burger platter, taco toppings station, condiment tray, or outdoor picnic setup.
Because this version uses CDs or DVDs, it works best as a casual handmade holder for folded paper napkins. It is not meant for direct food contact, and it should not be used as a plate, cutting board, or serving tray. Think of it as a table helper: the napkins touch the holder, the tacos touch your soul, and the salsa touches everything else if you are not careful.
Materials You Will Need
The beauty of this DIY napkin holder is that the materials are simple. Most people already have at least half of them at home. If you do not, they are easy to find at a craft store, dollar store, or hardware aisle.
Basic Supplies
- 2 old CDs or DVDs for the side panels
- 1 sturdy base, such as thick cardboard, foam board, scrap wood, or a third disc
- Hot glue gun and glue sticks, or strong craft adhesive
- Acrylic paint, spray paint, decorative paper, or fabric
- Scissors or a craft knife
- Ruler and pencil
- Sandpaper or a nail file for smoothing edges
- Optional: felt pads, ribbon, stickers, sealant, twine, faux lettuce paper, or mini taco decorations
Best Napkins to Use
Standard folded lunch napkins usually work well. If the napkins are extra tall, choose a wider base. If they are cocktail napkins, you can make the holder smaller and more compact. Always measure your napkins before cutting the base. Napkins are like guests at a party: they behave better when they have enough room.
Safety First: A Few Smart Crafting Rules
CDs and DVDs can crack or splinter if cut aggressively, so avoid forcing them with dull tools. For this napkin holder, you do not need to cut the discs at all unless you want a half-circle shape. Keeping the discs whole is easier, safer, and stronger.
If you do decide to cut discs for a custom shape, soften them first with warm water or gentle heat, wear protective gloves, and trim slowly. Smooth any sharp edges with sandpaper. Children should not cut discs or use hot glue without adult supervision. Hot glue is wonderful, but it has the personality of lava in a tiny craft tube.
Since this holder will sit near food, keep the design cleanable. Avoid glitter that sheds, loose beads, or decorations that can fall into food. Do not let food rest directly on painted or glued surfaces. Use the holder only for napkins, paper packets, or wrapped utensils.
Step-by-Step: How to Make a CD or DVD Napkin Holder
Step 1: Clean the Discs
Wipe the CDs or DVDs with a soft cloth and mild soap if needed. Dry them completely before painting or gluing. Dust, oil, and old fingerprints can prevent paint and glue from sticking properly. If the disc has a glossy surface, lightly scuff the area where glue will attach. You do not need to sand the whole disc unless you plan to paint it fully.
Step 2: Choose the Holder Style
You have two easy design options. The first is a vertical holder, where two discs stand upright on a rectangular base with space between them for napkins. The second is a slightly angled holder, where the discs lean outward a little. The angled version looks more relaxed and makes napkins easier to grab, especially when the holder is full.
For burger and taco nights, the angled style is usually better. Guests can pull a napkin with one hand while holding a taco in the other, which is basically the highest level of dining engineering.
Step 3: Cut the Base
Measure the width of your folded napkins. Cut a base that is about one inch wider than the napkins and deep enough to support the discs. A good starting size is about 6 inches long by 3 inches wide for standard lunch napkins. If you use larger napkins, increase the base size.
Foam board is easy to cut and decorate. Thick cardboard works well for a lightweight holder. Scrap wood gives the most durable result. A third CD or DVD can also be used as a base, but it may need extra support underneath to prevent wobbling.
Step 4: Attach the Discs
Place the two discs on the base like side walls. Leave enough space between them for a small stack of napkins. Apply a thick line of hot glue where each disc meets the base. Hold the discs in place until the glue sets. For extra strength, add a second bead of glue along the inside seam.
If you want a cleaner look, glue small craft sticks or cardboard strips along the inside bottom edges. These act like braces and help the discs stay upright. If your table has ever seen a toddler, a dog tail, or a very enthusiastic uncle reaching for ketchup, extra bracing is not overthinking. It is survival.
Step 5: Add a Back Stop or Front Rail
A small rail across the front or back helps keep napkins from sliding out. You can use a popsicle stick, a strip of cardboard, a piece of dowel, or a narrow scrap of wood. Glue it between the discs at the bottom. Paint it to match the rest of the holder.
This step is especially helpful for outdoor dining, where wind likes to turn napkins into tiny white birds. If you plan to use the holder on a patio, add a slightly heavier base or glue a few flat stones underneath the base for weight.
Burger-Themed Decoration Ideas
A burger-themed napkin holder should feel fun, warm, and a little retro. Paint the outside of each disc tan for a sesame seed bun look. Add small white dots for sesame seeds. Paint the lower part with layers of green, yellow, red, and brown to suggest lettuce, cheese, ketchup, and a burger patty.
You can also create a diner-style design. Paint the discs red and white, add a checkerboard strip, and write “Napkins” or “Burger Night” across the side. For a backyard barbecue look, use kraft paper, black paint, and small chalkboard labels. The goal is not museum perfection. The goal is for someone to say, “Wait, is that made from old DVDs?” and for you to casually reply, “Obviously. I’m an artist now.”
Simple Burger Color Palette
- Tan or golden brown for the bun
- Green for lettuce
- Yellow for cheese
- Red for ketchup or tomatoes
- Dark brown for the patty
- White for sesame seeds and lettering
Taco-Themed Decoration Ideas
A taco-themed napkin holder can be bright, cheerful, and party-ready. Paint the discs yellow or golden orange to resemble taco shells. Add layers of green tissue paper for lettuce, red felt for tomatoes, white dots for sour cream, and brown paper for seasoned beef or beans. If you want a fiesta look, decorate the base with colorful stripes, mini paper flags, or patterned scrapbook paper.
For a modern taco bar, keep the design cleaner. Use matte black paint on the base, golden discs for the sides, and a small label that says “Taco Napkins” or “For Salsa Emergencies.” That last label is not only decorative; it is public service.
Simple Taco Color Palette
- Golden yellow for taco shells
- Fresh green for lettuce or cilantro
- Red for salsa and tomatoes
- White for sour cream
- Brown for beans or seasoned meat
- Bright accents such as turquoise, orange, or pink
How to Make It Stronger and More Durable
The biggest weakness in many homemade napkin holders is the joint where the side panels meet the base. To strengthen your CD or DVD holder, use both glue and braces. Small triangular pieces of cardboard or wood can be glued inside the holder at the bottom corners. These supports are almost invisible once painted, but they make a noticeable difference.
You can also glue felt or cork to the bottom of the base. This prevents scratching and reduces sliding. If the holder will be used outdoors, add a clear acrylic sealant over painted areas. Choose a finish that works with your paint and let it cure completely before placing the holder near napkins.
If you want a more polished version, cover the discs with fabric or adhesive vinyl before assembly. Fabric gives a soft farmhouse look. Vinyl gives a clean finish and is easy to wipe. Scrapbook paper is inexpensive and comes in thousands of patterns, from picnic gingham to taco Tuesday chaos.
Cleaning and Care Tips
This DIY holder is easy to care for if you treat it like a decorative table accessory. Wipe it with a slightly damp cloth after use. Do not soak it in water, especially if it is made with cardboard, paper, or hot glue. Store it in a dry place between meals.
If it gets greasy during burger night, remove the napkins and wipe the surface with mild dish soap on a damp cloth. Dry it right away. Avoid harsh scrubbing if you used paper decorations or paint. For outdoor use, bring it inside after the meal. Rain and handmade cardboard bases are not friends. They are not even polite acquaintances.
Where to Use Your Burger/Taco Napkin Holder
This project is useful in more places than you might expect. Put it on a kitchen island during casual dinners. Set it beside a slow cooker full of taco meat. Place it next to burger buns, condiments, or a basket of chips. Use it for cookouts, birthday parties, camping meals, potlucks, and school events.
It can also hold wrapped plastic utensils, paper menus, recipe cards, or small signs for a buffet table. If you make several, create a themed set: one for napkins, one for forks, and one for sauce packets. Suddenly your table looks organized, and nobody needs to dig through a drawer while holding a dripping cheeseburger.
Creative Variations
Mini Taco Bar Label Holder
Make a smaller version using one disc as a base and two half-discs as side supports. Add a small clip to hold labels such as “Mild Salsa,” “Hot Salsa,” and “Why Is This So Spicy?” This variation works well for parties and buffet setups.
Retro Diner Napkin Holder
Paint the discs silver, red, and white. Add a checkerboard pattern and a small paper straw decoration. This style is perfect for burger nights, milkshake parties, or a kitchen with vintage charm.
Kids’ Craft Version
Let kids decorate the discs with washable paint, stickers, foam shapes, and markers. Adults should handle cutting and hot glue. The result may not be perfectly symmetrical, but it will have character. Also, children have a gift for adding 47 stickers where three would have worked, and honestly, that is part of the charm.
Game-Day Snack Station Holder
Paint the holder in team colors and use it for napkins near wings, sliders, tacos, or nachos. Add a small front sign that says “Grab One Before the Sauce Wins.” It is practical and emotionally honest.
Common Mistakes to Avoid
The first mistake is making the base too narrow. A narrow base may look sleek, but it can tip over when stuffed with napkins. Always test the holder with a full stack before decorating. The second mistake is using too little glue. CDs and DVDs are smooth, so adhesives need enough surface area to grip.
The third mistake is decorating with loose materials that shed. Glitter looks festive until it appears on a taco. Use sealed glitter paint instead of loose glitter if you want sparkle. The fourth mistake is using the holder before the paint or sealant has fully dried. Patience is cheaper than repainting napkins by accident.
Why This DIY Project Works So Well for Burger and Taco Nights
Burgers and tacos are casual foods, but they demand organization. You need napkins, sauces, toppings, utensils, plates, and maybe a backup plan when the taco shell cracks down the middle. A handmade napkin holder gives guests a clear place to reach for cleanup without interrupting the meal.
It also adds personality. A store-bought napkin holder is fine, but a recycled CD or DVD holder becomes a conversation piece. It says your table is fun, resourceful, and not afraid of a little hot glue. That kind of handmade detail makes casual meals feel more memorable.
of Real-Life Experience: What I Learned Making and Using One
The first time I made a burger/taco napkin holder from old discs, I underestimated two things: how slippery CDs are and how many napkins taco night actually requires. I started with two DVDs, a cardboard base, and the confidence of someone who had watched enough craft videos to become mildly dangerous. The first version looked great for about nine seconds. Then I added a stack of napkins, and the whole thing leaned like it had just heard bad news.
The fix was simple: a wider base and better bracing. I cut a new base from thick foam board, made it longer than the napkin stack, and glued small cardboard triangles inside each corner. That one change turned the holder from “cute but nervous” into “ready for guacamole combat.” If you are making this project, do not skip the supports. They are not glamorous, but neither are seatbelts, and we still appreciate them.
I also learned that decoration matters less than clean design. My first idea was to add fake lettuce, tiny tomatoes, paper cheese, and a dramatic burger face with googly eyes. It was funny, but it was also a lot. When placed next to actual food, the simpler version looked better. A tan bun color, sesame seed dots, a red base, and a small “Burger Night” label did the job without making the table look like a craft store exploded near the ketchup.
For taco night, the best version used golden yellow discs, a black base, and a small sign that said “For Salsa Emergencies.” Guests noticed it immediately. More importantly, they used it. That is the real test of any DIY kitchen accessory. If people only admire it, it is decor. If they keep reaching for it with messy hands and it survives, it is useful decor.
One practical tip: place the holder slightly away from sauces. If it sits directly beside salsa bowls, sour cream, or burger toppings, it will get splattered. A little distance keeps the napkins cleaner and the holder easier to wipe down. I found that the best spot is near the plates or at the end of the buffet line. People grab a plate, take food, then grab napkins before sitting down. It creates a natural flow and prevents the classic “Can someone pass me a napkin?” chorus.
The project also became a surprisingly good group activity. Adults liked the recycling angle. Kids liked painting the shiny discs. One person suggested making a holder for pizza nights, another wanted one for hot dog toppings, and someone else asked if we could turn old CDs into coasters. That is the hidden benefit of a simple upcycled project: it gets people thinking creatively about objects they usually ignore.
After several uses, the holder held up well, but the cardboard version was definitely indoor-only. For outdoor cookouts, I would recommend a scrap wood base or at least a foam board base reinforced with extra layers. Add felt pads underneath to prevent sliding, and use a clear sealant if the holder might face humidity. Also, keep the design wipeable. Burger night is not the time for delicate paper flowers unless you enjoy cleaning mustard from petals.
The best part of the project is that it does not pretend to be fancy. It is playful, useful, and made from something that might otherwise sit forgotten in a drawer. Every time someone grabs a napkin from it, the little recycled discs earn their place on the table. And honestly, that is a pretty good second act for a DVD that once contained a movie nobody finished.
Conclusion
A burger/taco napkin holder from CDs or DVDs is a clever, budget-friendly DIY project that blends recycling, creativity, and real table usefulness. It is simple enough for beginners, flexible enough for different party themes, and practical enough for messy foods that do not respect personal boundaries. With two old discs, a sturdy base, strong glue, and a little imagination, you can create a handmade napkin holder that works for burger nights, taco Tuesdays, backyard cookouts, and casual family meals.
The key is to build for stability first and decorate second. Use a wide base, reinforce the side panels, choose cleanable materials, and keep food safety in mind by using the holder only for napkins. Whether you paint it like a sesame bun, style it like a taco shell, or give it a retro diner look, the finished piece will be more than a craft. It will be a small, useful reminder that old things can still have a job to doespecially when salsa is involved.