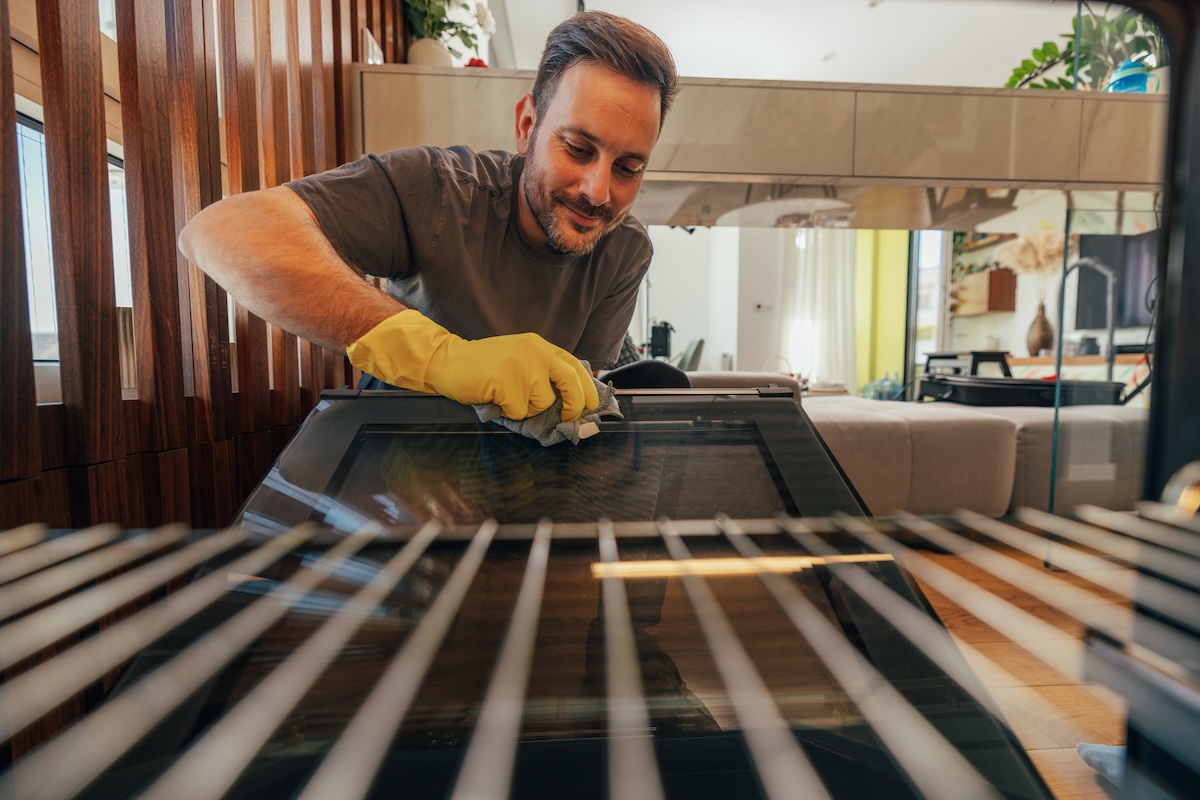
A clear oven window should let you check whether the lasagna is bubbling, not force you to rtunately, cleaning oven door glass is usually less dramatic than the buildup suggests. The safest approach is simple: let the oven cool completely, begin with warm soapy water, give stubborn residue time to soften, and use a nonabrasive tool rather than trying to win a wrestling match with burned cheese.
This guide explains how to clean the outside, inside, and hard-to-reach space between the glass panes. It also covers baked-on grease, streak prevention, common cleaning mistakes, and practical lessons that make the job faster the next time.
Why Oven Door Glass Gets So Dirty
Oven glass collects a special blend of kitchen mischief. Roasting fat becomes airborne, sugary fillings bubble over, tomato sauce spits, and steam carries microscopic grease droplets toward the relatively cool door. Repeated heating then turns that film into a brown, varnish-like layer.
The inside glass usually develops the toughest baked-on residue. The exterior picks up fingerprints, cooking oil, dust, and cleaner overspray. Streaks or drips between the panes can occur when liquid enters through vents or when grease-laden vapor finds its way into the insulated door assembly. Because designs vary, the correct way to access that space depends on the exact model.
What You Need
Basic Supplies
- Warm water
- A few drops of grease-cutting dish soap
- Baking soda
- Distilled white vinegar in a spray bottle
- Two or three microfiber cloths
- A soft, nonabrasive sponge
- A plastic scraper or old plastic card
- Rubber cleaning gloves
- Old towels to protect the floor
Start with the gentlest supplies and escalate only when necessary. Appliance manufacturers commonly recommend mild soapy water, soft cloths, nonabrasive cleaners, and model-specific instructions. They also warn against allowing liquid to run into door vents or onto the gasket. Checks Before Cleaning
Turn the oven off and wait until the door is completely cool. Remove pans and, if they interfere with access, the racks. Never pour cold liquid onto hot glass. Sudden temperature changes create an unnecessary risk of damage.
Read the use-and-care manual before applying a commercial oven cleaner, using a razor-style scraper, removing the door, or running a self-clean cycle. A method that is acceptable for one oven may damage another oven’s coating, trim, gasket, or decorative glass. Never mix cleaning products, especially chlorine bleach with vinegar, ammonia, or other acids.
How to Clean the Outside of Oven Door Glass
- Remove loose grime. Wipe the glass with a dry microfiber cloth to collect crumbs and dust.
- Wash the surface. Dip a clean cloth in warm water mixed with a few drops of dish soap. Wring it out well, then wipe the glass, handle area, and surrounding trim.
- Cut through fingerprints. For lingering greasy smears, lightly spray a 1-to-1 mixture of distilled white vinegar and water onto the cloth rather than flooding the door.
- Rinse. Wipe the surface with a second cloth dampened with clean water.
- Dry immediately. Buff with a dry microfiber cloth using long vertical or horizontal strokes.
Using one damp cloth to clean and a separate dry cloth to buff is a reliable way to reduce streaks. Keep the solution away from control panels, door vents, logos, and stainless-steel finishes unless the oven manual says it is suitable for those surfaces.
How to Deep-Clean the Inside Oven Door Glass
For a hazy film or scattered grease spots, begin with dish soap. For the stubborn brown layer that laughs at ordinary wiping, use a baking soda paste and patience.
Step 1: Open and Protect the Door
Open the cool oven door fully. Place an old towel beneath it to catch drips. Avoid leaning or sitting on the open door; it is a door, not an emergency kitchen bench.
Step 2: Soften the Grease
Lay a warm, soapy cloth over the dirty glass for about 10 minutes. This dwell time is more important than furious scrubbing because it allows water and detergent to begin loosening the greasy film. GE Appliances similarly recommends letting a soapy towel or cloth rest on oven glass to soften grime. : Make a Baking Soda Paste
Mix approximately 1/2 cup of baking soda with 3 tablespoons of water. Add the water gradually; the goal is a spreadable paste, not pancake batter. For especially greasy residue, mix in one or two drops of dish soap.
Step 4: Apply the Paste
Spread a thin layer over the stained glass, keeping it away from the gasket, vents, hinges, screw holes, and openings along the edge of the door. Let it sit for 15 to 30 minutes. Heavy buildup may need up to an hour.
Baking soda works mainly as a mild alkaline cleaner and gentle abrasive, while the waiting period helps soften the residue. Manufacturer and home-care guidance commonly recommends a baking soda paste for stubborn oven-glass buildup. : Scrub Gently
Use a damp nonabrasive sponge or microfiber cloth to work the paste in small circles. Apply moderate, even pressure. For raised flecks of burned food, hold a plastic scraper at a shallow angle and gently push the deposit away. Rewet the area as necessary instead of grinding dry powder against the glass.
Step 6: Remove the Residue
Wipe away the paste with a damp cloth, rinsing the cloth frequently. A light mist of vinegar can help loosen chalky baking soda residue, but it is not a magical cleaning power-up. Vinegar and baking soda neutralize each other. The fizz can lift remaining particles, while the real cleaning work comes from the alkaline paste, detergent, dwell time, and gentle abrasion.
Step 7: Rinse and Buff
Wipe the glass again with clean water until no white film remains. Dry it with a fresh microfiber cloth. Look across the surface from a low angle; streaks that were invisible head-on will suddenly announce themselves as though they have been waiting for an audience.
How to Remove Burned-On Grease and Brown Stains
If one cleaning pass does not remove the stain, repeat the soaking and paste treatment before reaching for a harsher product. Two gentle rounds are often safer than one aggressive attack.
Extend the Dwell Time
Reapply the baking soda paste and leave it for 30 to 60 minutes. Covering the paste loosely with a damp cloth can slow drying, but do not use so much liquid that it runs toward vents or between the glass panes.
Use a Manufacturer-Approved Cleaner
An oven-glass cleaner or appliance cleaner may work faster on carbonized grease. Confirm on both the label and in the oven manual that the product is suitable for door glass. Wear gloves, ventilate the kitchen, follow the stated contact time, and rinse thoroughly.
Never assume that a general-purpose oven cleaner belongs on every glass door. Some manufacturers prohibit harsh chemicals or abrasive products on certain surfaces because they can damage coatings, trim, enamel, or seals. eam for Lighter Residue
Steam can soften fresh or moderate grime, whether it comes from a model’s approved steam-clean cycle or a handheld steamer used according to its instructions. It is less impressive against a thick, blackened layer, but it can reduce scrubbing on routine messes. Keep concentrated steam away from control panels, vents, seals, and electrical openings.
How to Clean Between Oven Door Glass Panes
Before dismantling anything, confirm that the stain is truly between the panes. Clean and dry both accessible surfaces, then shine a flashlight across the glass. If the mark remains fixed beneath the surface, it is probably inside the door assembly.
Use the Model Manual, Not a Generic Video
Some ovens provide access through slots along the bottom edge. Others require the entire door to be removed and partially disassembled. Hinge locks, fasteners, pane order, insulation, spacers, and wiring differ significantly.
Samsung and GE both direct owners to model-specific door-removal instructions, and GE warns against lifting a removed door by its handle. rofessional Service Is the Better Choice
Call an appliance technician if the door is unusually heavy, the hinge locks are unclear, the glass is chipped, the seal is damaged, fasteners are hidden, or the manual does not authorize homeowner disassembly. A cosmetic streak is annoying; an incorrectly reassembled insulated door can become a safety and performance problem.
Avoid the Wet-Cloth-on-a-Stick Shortcut Unless Approved
Sliding a wrapped ruler or utensil through a vent appears convenient, but a cloth can snag, leave lint, dislodge insulation, or drip cleaner into the door assembly. If the manual provides an access-slot method, use a barely damp lint-free pad attached to an appropriate flexible tool and follow the manufacturer’s directions exactly.
Cleaning Mistakes That Can Damage Oven Glass
- Cleaning hot glass: Wait for complete cooling before applying water or cleaner.
- Using steel wool: Harsh scouring tools can scratch glass, coatings, paint, and trim.
- Flooding the door: Excess liquid can enter vents and become trapped between panes.
- Soaking the gasket: Keep the door seal dry unless the manual specifically instructs otherwise.
- Scraping with a knife: Metal blades can scratch the surface or chip a glass edge.
- Combining chemicals: Never mix bleach with acids, ammonia, or other cleaners.
- Assuming self-cleaning cleans everything: A self-clean cycle may reduce interior soil, but the door glass often still requires manual wiping afterward. High-heat cycles also require ventilation and model-specific precautions. section>
How to Keep Oven Glass Clean Longer
Prevention is less glamorous than a dramatic before-and-after photograph, but it is much easier on your Saturday.
- Wipe fresh splatters after the oven has cooled.
- Place a rimmed baking sheet beneath pies, casseroles, and bubbling dishes.
- Choose a roasting pan with sides high enough to contain fat.
- Avoid overfilling baking dishes.
- Clean the exterior during regular kitchen wipe-downs.
- Inspect the interior glass monthly and spot-clean before residue carbonizes.
- Remove excess grease before long roasting, broiling, or self-cleaning sessions to reduce streak formation. section>
Frequently Asked Questions
Can I Use Vinegar on Oven Door Glass?
Diluted distilled white vinegar is usually suitable for accessible glass, especially as a final rinse for grease or baking soda residue. Spray it onto a cloth rather than saturating the door, keep it away from vents and gaskets, and consult the manual before using it on coated or decorative glass.
Will Baking Soda Scratch Oven Glass?
Baking soda is mildly abrasive. Used as a wet paste with a soft sponge and light pressure, it is widely recommended for oven glass. Do not scrub it dry, use excessive force, or assume it is appropriate for every special coating.
Can I Use a Magic Eraser?
Melamine foam is a micro-abrasive. Some manufacturers permit eraser-style pads without added cleaner on certain oven surfaces, but approval varies. Test an inconspicuous area and consult the manual before using one on coated glass, printed markings, stainless steel, or trim.
Why Does My Clean Oven Glass Look Cloudy?
Cloudiness may be caused by leftover cleaner, mineral deposits, fine scratches, chemical etching, a heat-reflective coating, or residue between panes. Rinse repeatedly with distilled water and buff dry. If the haze does not change, stop scrubbing and ask the manufacturer or a technician to identify the surface.
How Often Should I Clean the Oven Door Glass?
Wipe the outside during normal kitchen cleaning. Spot-clean the inside whenever splatters appear and deep-clean it when visibility becomes poor or when you clean the oven cavity. Frequent light cleaning is faster and gentler than waiting for grease to become a permanent-looking resident.
Experience-Based Lessons That Make Oven Glass Cleaning Easier
In real kitchens, the biggest difference between an easy oven-door cleanup and a miserable one is rarely the brand of cleaner. It is timing. A fresh grease film can often be removed with warm dishwater in a few minutes. The same film, baked through six pizza nights and a holiday roast, starts behaving like automotive paint. The practical lesson is to inspect the glass after messy cooking and wipe it once the oven is cool. That 60-second habit prevents the majority of deep-cleaning drama.
Another reliable lesson is that dwell time beats brute force. People often apply a paste and begin scrubbing immediately, then conclude that the method does not work. Letting a warm soapy cloth rest on the glass first, followed by 20 to 30 minutes with a damp baking soda paste, changes the job. The residue softens, the plastic scraper catches raised edges, and much less pressure is needed. When a stain remains, a second patient treatment usually performs better than switching to steel wool, a knife, or an unapproved chemical.
Moisture control matters more than it seems. The most frustrating result is not a stain that remains on the accessible glass; it is cleaner that seeps between the panes and dries as a white river. The cure is simple but easy to ignore: wring cloths thoroughly, spray cleaner onto the cloth instead of directly into the door, and keep paste several inches away from vents and openings. A thin, controlled layer cleans better than a foamy avalanche.
It also helps to divide the task into zones. Clean the outside first so you can see which marks are actually inside. Then clean the interior surface. Only after both sides are dry should you diagnose a between-pane stain. This sequence prevents unnecessary door removal. Many apparent internal streaks disappear after the exterior is properly buffed, especially under bright overhead lighting.
When the door truly must come off, preparation prevents panic. Photograph hinge positions, screw locations, trim orientation, and the order of every glass panel before moving anything. Lay parts on towels in the exact sequence of removal and use a small container for fasteners. Most importantly, follow the model manual rather than assuming that a similar-looking oven uses the same hinges. Oven doors are heavier than they look, and spring-loaded hinges are not known for their forgiving personalities.
A final lesson concerns expectations. Deeply etched haze, scratches, damaged coatings, and stains trapped behind a sealed pane may not be removable with cleaning. Continuing to scrub can turn a cosmetic problem into permanent damage. Once ordinary residue is gone and the appearance does not improve, pause and identify the glass type or seek professional service. Successful cleaning is not measured by how exhausted your arm feels; it is measured by clearer glass with the appliance still intact.
For ongoing maintenance, keep a small oven-door kit together: a microfiber cloth, nonabrasive sponge, plastic scraper, and labeled bottle of diluted vinegar. When the tools are nearby, small splatters get handled before they graduate into brown armor. The oven window stays useful, cleanup takes minutes instead of an afternoon, and you can finally watch cookies bake without opening the door every three minutes like an anxious game-show contestant.
Conclusion
The best way to clean oven door glass is to work from mild to strong: cool the appliance, loosen grease with warm soapy water, treat baked-on residue with a damp baking soda paste, rinse thoroughly, and buff dry. Protect vents and gaskets from excess moisture, avoid abrasive tools, and use the model manual before cleaning between panes or removing the door.
Regular spot-cleaning is the real secret. It keeps the view clear, reduces odors and smoke from old spills, and saves you from having to chisel last Thanksgiving off the window next spring.
Note: Cleaning instructions vary by appliance. Always prioritize the use-and-care manual for your exact oven model, particularly for chemical cleaners, self-clean cycles, coated glass, door removal, and between-pane access.